How to Replace an Air Conditioner Condensate Float Switch
Replace an air conditioner condensate float switch after the drain line or pan is clear and the old switch still fails. Shut off indoor-unit power. Match the mounting method, wire count, threaded body or pan clip, and low voltage rating. Reconnect the control wires the same way. Then test normal cooling and the high-water shutoff.
A float switch stops cooling before condensate reaches the cabinet, ceiling, or floor. A wet pan usually means the switch is doing its job. Clear the drain first. A dry pan, stuck float, cracked housing, loose lead, or open control circuit points more toward replacement.
Before you start: Before ordering, match the old switch: drain line tee, inline body, pan clip, wire count, connector style, thread fit, and control circuit rating. Stop for a wet cabinet, a filling pan, burned insulation, or wiring that will not de energize.
Last reviewed: 2026-06-12
Make sure this switch is the right repair
A backed-up drain can shut down a good air conditioner. Check the water path first. Buy a switch only after the old one fails a movement check, fit check, or circuit check.
Replace the switch
This page fits when: The pan is dry. The float sticks, the housing is cracked, the leads are damaged, or the switch stays open during a cooling call.
Check something else when: Compare mounting style, lead count, connector type, float direction, and thread or clip shape.
Clear the drain first
This page fits when: The pan is wet. The drain tee is slimy, water stands in the line, or the float is high because water is high.
Check something else when: Clean the drain line and pan first. Test again before replacing the switch.
Stop for unsafe wiring
This page fits when: Power is off. The control wiring is dry. The low-voltage leads match the connection points in your photo.
Check something else when: Bring in an HVAC pro if the cabinet stays live, the board is wet, insulation is burned, or the wiring no longer matches.
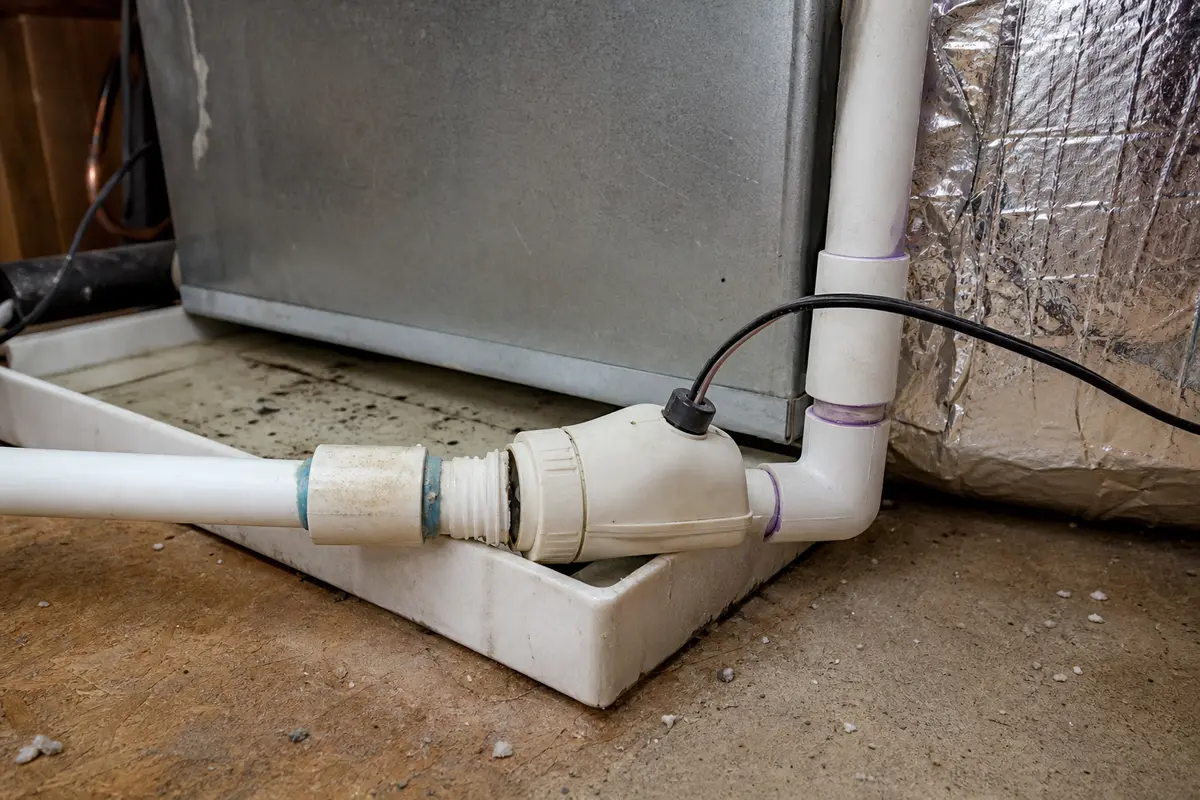
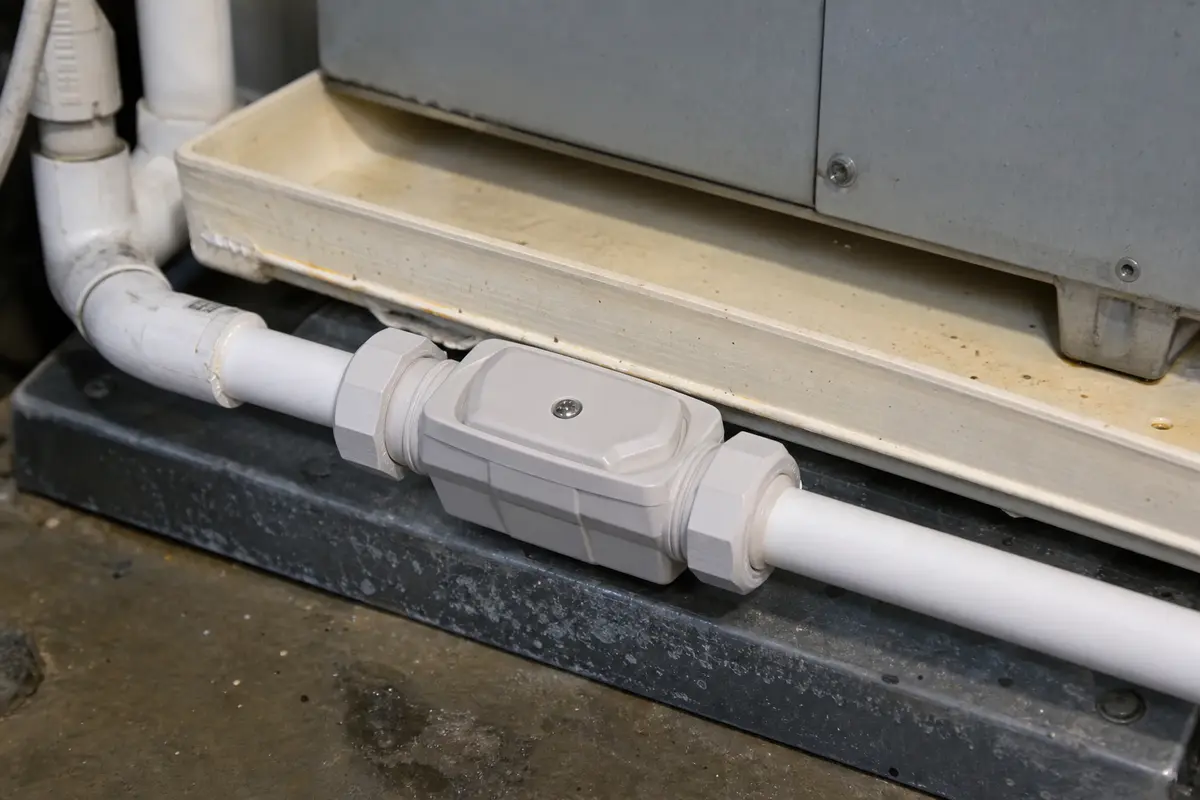
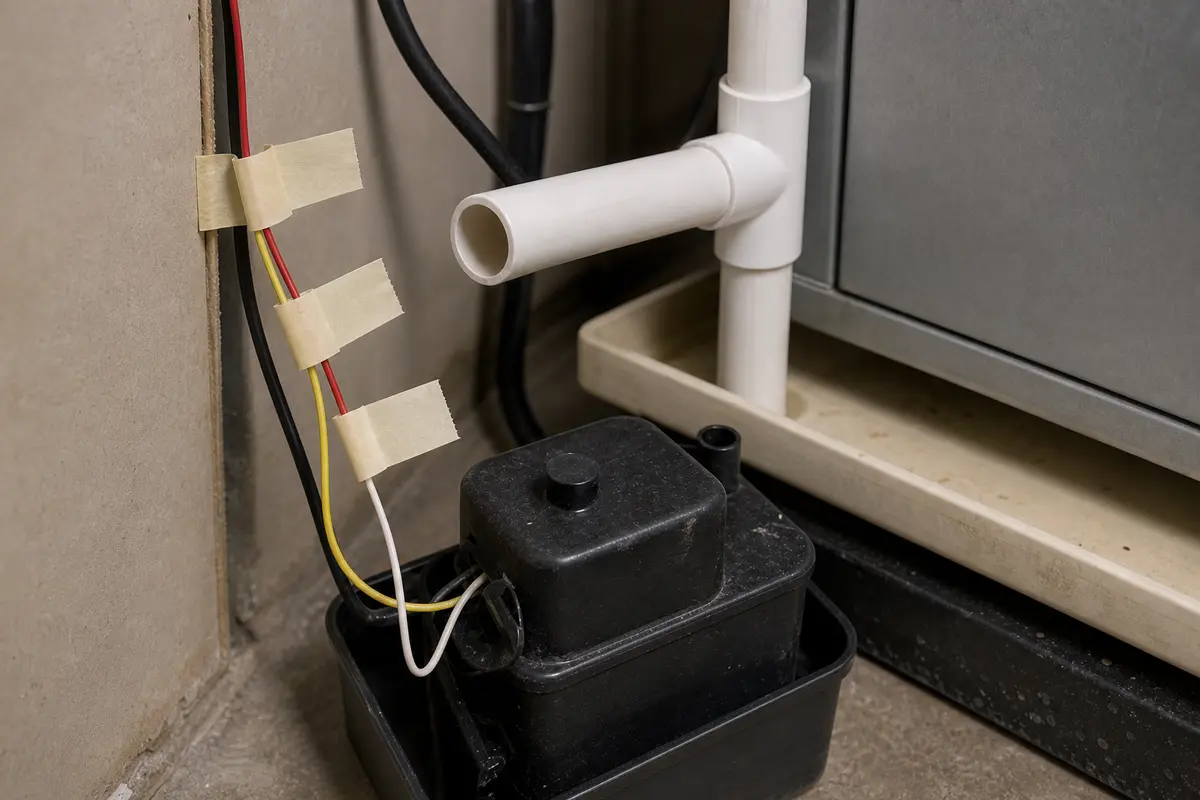
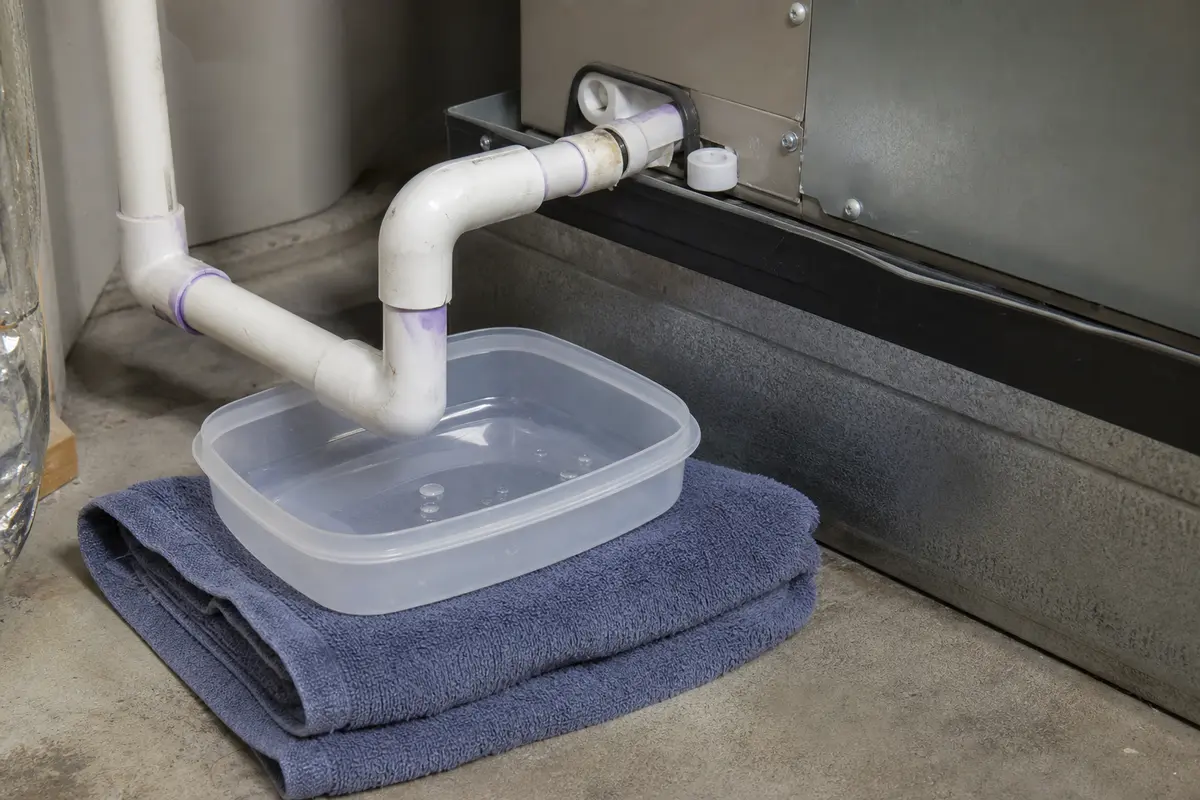
Use the photos to check failure and fit
The useful visual checks are the switch body, the float path, and the way the replacement sits before the wires are tied back in. A dry pan with a stuck or cracked switch points one way; a wet pan or clogged tee points toward drainage first.
Look for the actual failure: cracked plastic, a stuck float, loose leads, corrosion, or a switch sitting in sludge. If water is still backed up, clear the drain before judging the switch.Dry-fit before tightening. The float needs free travel, the body should sit square in the same position, and the wire leads should reach without tension.
Safety first
Shut off power to the indoor unit before opening the access panel or touching any wiring.
Use a voltage tester to confirm power is off instead of assuming the thermostat shut the unit down.
Treat standing water near wiring, a control board, or an access panel as a stop point until the area is dry and the source of the water is understood.
Do not bypass the float switch except for controlled diagnosis by someone who knows the circuit. Leaving it bypassed removes overflow protection.
Tools you may need
Screwdriver set
Use it for: To open the air handler panel, loosen terminal screws, or remove the old switch mount.
As an Amazon Associate I earn from qualifying purchases. Repair Riot may earn a commission at no extra cost to you.
Step-by-step fix
Step 1: Confirm the float switch is the likely problem
Set the thermostat to call for cooling and note whether the indoor blower, outdoor unit, or both stay off.
Look for water in the primary drain line, auxiliary pan, or air-handler drain area before blaming the switch.
Find the float switch at the drain-line tee, pan bracket, or cabinet drain opening and check that the float can rise and fall without rubbing.
Look for a cracked plastic body, a missing cap, loose wire leads, green corrosion on connectors, or a float that stays lifted when the area is dry.
If the drain line or pan is holding water, clear the drainage problem first so you do not replace a switch that is correctly shutting the system down.
If it works: You have a clear reason to replace the float switch and the drain area is not simply backed up with water.
If it doesn’t: If the switch looks normal and the problem points more toward a thermostat, fuse, contactor, or another control issue, stop here and diagnose the no-cooling problem before replacing parts.
Stop if:
The drain pan, cabinet floor, or nearby framing has heavy rust, soft material, or signs of repeated overflow that need repair first.
You cannot confidently identify the float switch or its low-voltage wiring.
Step 2: Shut off power and get safe access
Turn the thermostat off so the system is not calling while the cabinet is open.
Shut off indoor-unit power at the service switch or the correct breaker.
Test the access panel, cabinet seam, and switch wiring area with a non-contact voltage tester.
Check for water, leak stains, burned insulation, and loose fasteners before reaching inside.
Remove only the panel needed to reach the drain fitting, pan edge, or cabinet opening.
Set a towel below the work area and confirm the panel edge is stable.
Take a close photo of the switch body, wire path, terminal points, and which side faces up.
Stop if:
The service switch or breaker must de-energize the air-handler access area. Stop if it does not.
Call a licensed HVAC pro for burned insulation, spliced line-voltage wiring, a wet control board, or an unidentified connection.
Step 3: Remove the old float switch
Label each low-voltage lead before you disconnect it.
Check whether the switch interrupts a thermostat wire, control-board terminal, or wire-nut splice.
Disconnect the wire nuts, spade terminals, screw terminals, or plug without pulling on insulation.
Loosen the locknut, clip, bracket screw, or drain-line tee fitting.
Lift the old switch out and compare float direction, lead length, mounting depth, connector style, and thread or clip shape.
Clean sludge from the tee, pan lip, or bracket seat, then check the gap around the float.
Stop if:
Do not continue if the wire colors, terminal locations, or switch leads no longer match your photo.
A switch opening packed with slime, water, or corrosion points to drain maintenance first.
Step 4: Install the new float switch
Compare pipe or pan mounting style, wire count, lead length, connector type, and float travel.
Match the threaded body, locknut, pan clip, or bracket profile before tightening anything.
Dry-fit the switch and check that the float moves without touching the pipe wall, pan edge, or cabinet.
Mount the switch in the original position so it senses rising water before overflow reaches the cabinet.
Reconnect one low-voltage wire at a time, then tug each terminal or wire-nut connection lightly.
Route wires away from sharp sheet metal, blower movement, and drip spots.
Stop if:
The replacement must match the old mounting method, float travel, lead count, and low-voltage wiring style.
Do not force a switch into a tee, pan, or bracket that will not let it sit flush.
Step 5: Reassemble and restore power
Reinstall the access panel and make sure it seats fully.
Turn the breaker or service switch back on for the indoor unit.
Set the thermostat to cooling and lower the temperature setting so the system calls for operation.
Listen for the indoor blower and outdoor unit to start after the normal delay; a short delay can be normal after power is restored.
Watch the drain fitting, pan edge, and switch wires for a few minutes to make sure nothing was bumped loose during the repair.
If it doesn’t: If the system still will not run, recheck the float switch wiring against your photo and confirm the drain line is not still backed up.
Stop if:
Shut power back off if the blower panel will not seat, the cabinet rattles, or the drain area vibrates differently after reassembly.
Stop testing if water leaks around the switch fitting, drain line, or pan while the system starts.
Step 6: Verify the repair holds in real use
Run the air conditioner long enough to make condensate.
Check the drain under load and watch the pan corner, tee opening, and switch body for water.
Look for drips, a rising water line, or a float that rubs the housing.
If your switch allows a safe lift test, raise only the float and confirm the system shuts off.
Release the float and test for normal operation.
Watch one full cooling cycle for nuisance trips.
If it works: The air conditioner cools normally, the drain handles condensate correctly, and the new float switch still protects the system if water rises.
If it doesn’t: If the switch keeps shutting the system down, look for standing water in the pan, a backed-up tee, or a float that stays lifted. Clear the drain path and recheck the wiring before treating the new switch as the problem.
Stop if:
Water continues to back up into the pan or cabinet after the switch replacement.
The system only runs when the switch is bypassed. Check for water in the pan, a float stuck high, or loose switch wiring before you run the unit again.
Match the old switch style, mounting method, wire count, low voltage control-circuit rating, and whether it mounts in the drain line, auxiliary pan, or air-handler cabinet.
As an Amazon Associate I earn from qualifying purchases. Repair Riot may earn a commission at no extra cost to you.
Verify the repair
The thermostat calls for cooling and the system starts normally.
The new float switch is mounted securely and the float moves freely.
Condensate drains away instead of collecting in the pan or line connection area.
If safely tested, the float switch stops the system when lifted and allows normal operation when released.
The unit completes a normal cooling cycle without nuisance shutdowns.
FAQ
What does a condensate float switch do?
It shuts the air conditioner off when condensate water rises too high in the drain line or pan. That prevents overflow and water damage when the drain system is clogged or draining poorly.
Can I just bypass the float switch?
You should not leave it bypassed. The switch is a safety device, and bypassing it can let the system keep running while water overflows into the cabinet, ceiling, or floor.
How do I know if the switch is bad or the drain is clogged?
If the drain line or pan is full of water, the clog is the first problem to fix. If the drain is clear and dry but the switch stays open, sticks, or has obvious damage, replacement makes more sense.
Are float switches universal?
Not completely. Many look similar, but mounting style, wiring setup, and intended application can differ. Match the replacement to the old switch before ordering or installing it.
Do I need to turn off power if the switch uses low-voltage wires?
Yes. The switch is usually in the low-voltage control circuit, but the air-handler cabinet can also have line-voltage parts nearby. Shut off indoor-unit power, test at the access area, and look for wet panels or burned wiring before you reach inside.
Sources and reference notes
These related Repair Riot pages cover the drain and cooling symptoms that should be ruled out before a float switch goes in the cart.