How to Replace a Ceiling Fan Receiver Without Rewiring the Whole Fan
If the wall switch feeds the fan but the remote gives no click, random speeds, or a dead light after fresh batteries, check pairing first. Then test for voltage off at the canopy, photograph every lead, compare the labels, and replace the receiver only when the new module fits with no canopy gap.
The receiver sits above the fan between house power and the motor and light leads. Treat those leads as line-voltage wiring. Stop if the old module has heat damage, the fan box shifts, the labels do not identify line, neutral, fan, and light, or the canopy will not close flush without pressing on insulation.
Before you start: Before opening the canopy, try fresh remote batteries, check pairing or dip switches, and confirm the wall switch feeds the fan. Buy a receiver only after you match the brand or kit style, wire count, fan and light outputs, pairing method, and the physical space under the canopy.
Last reviewed: 2026-05-31
Confirm the receiver is worth replacing
A dead remote fan can be a battery, pairing, wall-switch, receiver, motor, light-kit, or wiring problem. Use this check before opening the canopy.
Receiver likely
This page fits when: The wall switch supplies power, batteries and pairing are checked, and the fan or light responds inconsistently or not at all through the remote circuit.
Check something else when: Match the receiver by fan brand or wiring layout, fan/light output, frequency or dip switch setup, and canopy space.
Remote or setup likely
This page fits when: The fan works from another control, or the problem started after battery replacement, dip-switch changes, or a reset.
Check something else when: Fix pairing, batteries, wall-switch position, or transmitter setup before disturbing line-voltage wiring overhead.
Stop and call help
This page fits when: The fan box moves, wire colors do not match the old receiver, the canopy is overcrowded, or there is heat damage.
Check something else when: Do not stuff an oversized receiver into the canopy or guess at fan and light load wires.
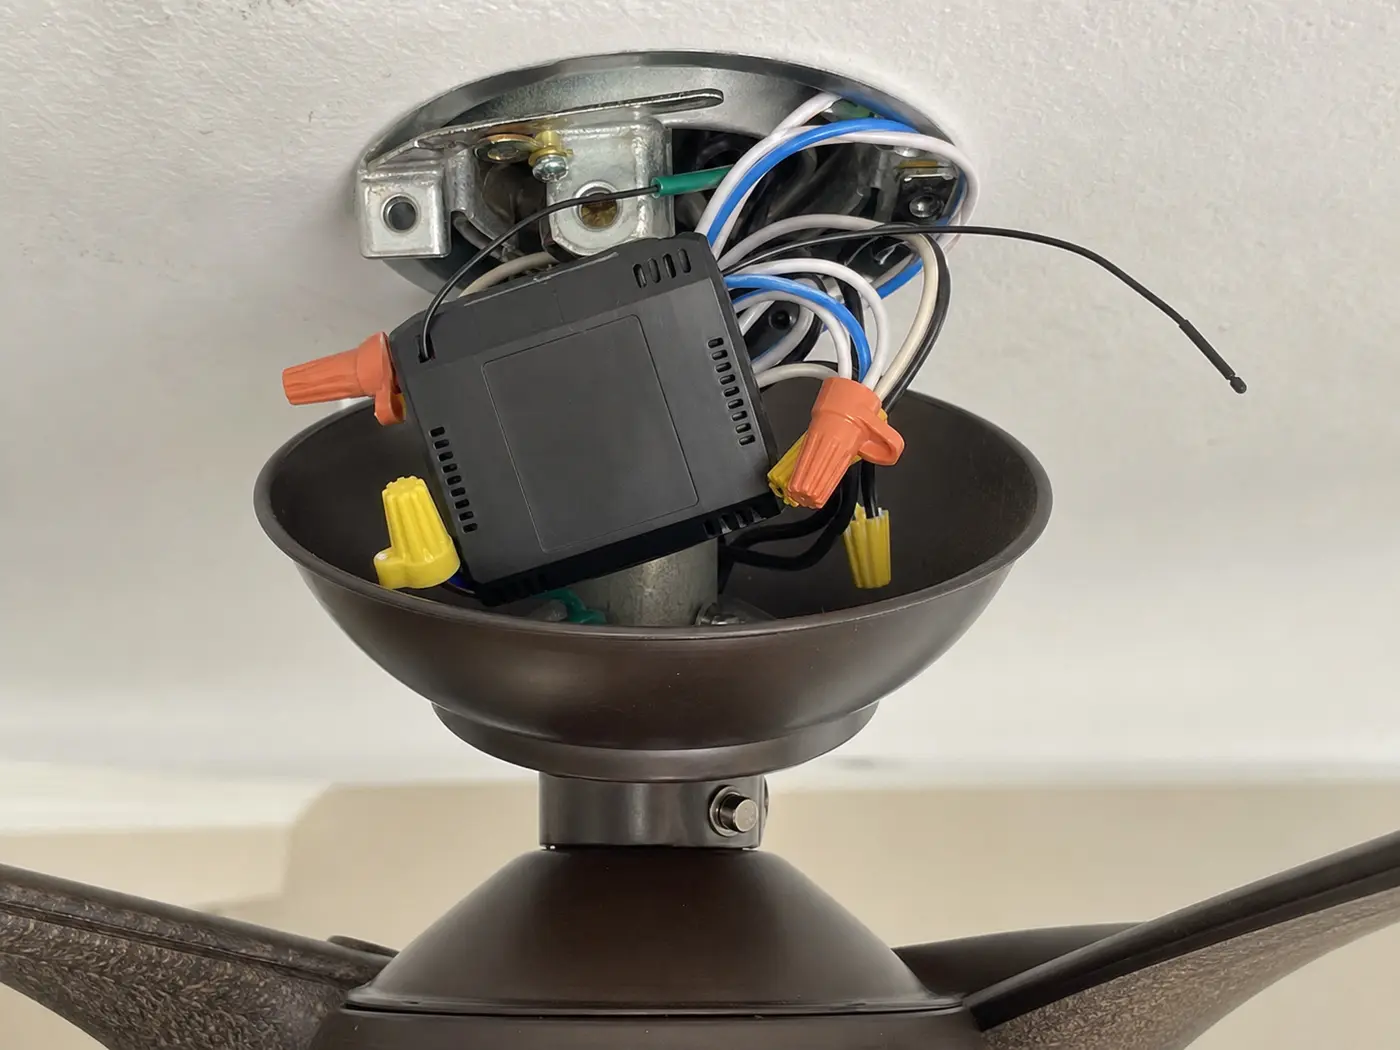
Where the receiver is inside the fan canopy
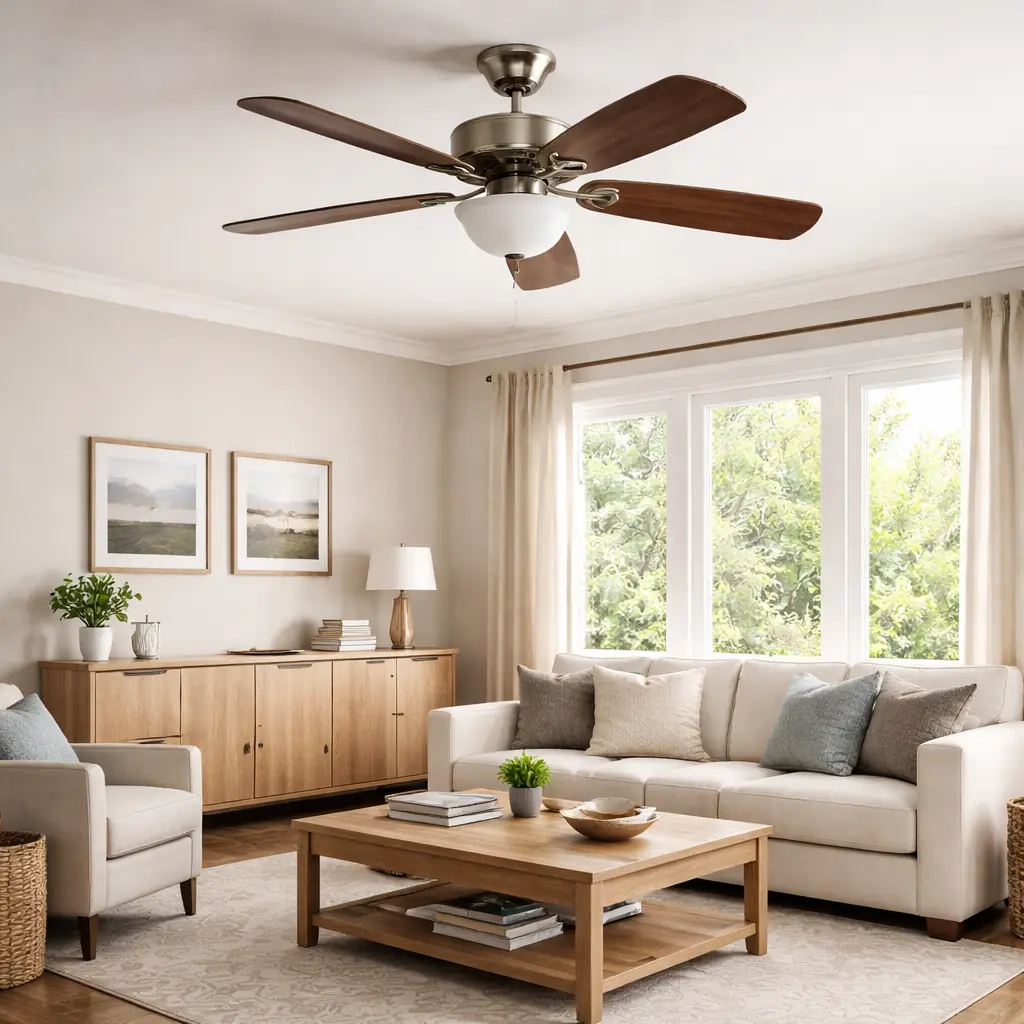
Most remote receivers sit above the fan under the canopy. Use the open-canopy view for wiring and fit checks, then use the whole-fan view to remind yourself what should still work before and after the swap.
The receiver sits between the ceiling wiring and the fan leads. Photograph the wire nuts, antenna, and labels before a connector comes loose.Before buying a receiver, check whether the wall switch, pull chain, light, and remote fail the same way. That split keeps a remote problem from becoming a wiring guess.
Safety first
This repair involves household electrical wiring overhead, so confirm power is off before touching any conductors.
Support the canopy while opening it so the wiring is not pulled loose.
Do not guess at wire functions. If line, neutral, fan, or light connections are unclear, stop and get qualified help.
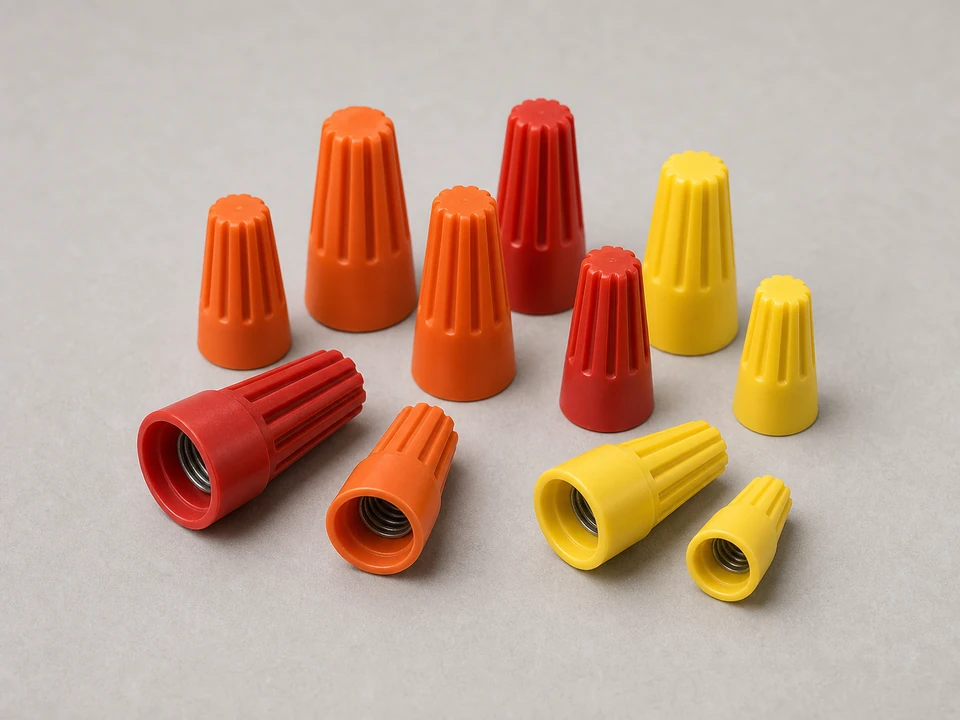
Replace damaged wire connectors instead of reusing cracked or loose ones.
Tools you may need
Non contact voltage tester
Use it for: To confirm power is off before touching any wiring.
As an Amazon Associate I earn from qualifying purchases. Repair Riot may earn a commission at no extra cost to you.
Fit checks before ordering
A receiver that is electrically compatible can still be wrong if it is too large for the canopy or missing one output. Compare these points before you put the kit in the cart.
Check
What to compare
Stop point
Wire labels
Line in, neutral in, fan motor out, and light out should match the old receiver or the fan manual.
Do not connect unlabeled leads by color alone.
Control features
Match fan speeds, light on/off or dimming, reverse control, and dip-switch or electronic pairing style.
Skip receivers that remove a function your fan currently uses.
Canopy space
Compare the receiver body, antenna lead, harness plugs, and wire bundle against the old layout before closing the canopy.
Do not force a module that keeps the canopy from sitting flat.
Step-by-step fix
Step 1: Confirm the receiver is worth opening the canopy for
Try fresh remote batteries and any pairing or learn-mode step your fan uses before removing parts.
Check whether the wall switch supplies power. A fan that is dead from every control path may have a switch, breaker, or wiring problem instead of a failed receiver.
Press the remote near the fan and listen for a faint relay click in the canopy. No click, random response, or one missing function after fresh batteries moves the receiver higher on the list.
If a pull chain or wall control can run the motor or light while the remote path fails, focus on the receiver and remote system before blaming the fan motor.
Turn the fan off with the wall switch and remote, then switch off the correct breaker for the ceiling fan.
Use a non-contact voltage tester at the fan wiring area after opening the canopy enough to confirm power is off.
Set up a stable ladder under the fan and keep screws and wire connectors in a small container or pocket.
If it works: You have safe access to the fan canopy and the tester shows no power at the wiring.
If it doesn’t: If the tester still shows voltage or you are not sure the correct breaker is off, stop and identify the circuit before continuing.
Stop if:
The voltage tester indicates live power.
The ladder does not feel stable.
The ceiling fan mounting feels loose or shifts at the ceiling.
Step 2: Open the canopy and document the old receiver
Remove the canopy screws or loosen the canopy fasteners enough to lower the canopy.
Support the canopy with one hand while the last screw comes loose so the metal cup does not hang from the wire bundle.
Look for the rectangular receiver module tucked beside the mounting bracket. Note whether the antenna wire is loose, routed outside the canopy, or pinched under a bracket edge.
Take clear photos of both sides of the receiver, wire colors, printed labels, plug harnesses, wire nuts, and any dip switch settings.
Mark the old fan-motor lead and light lead with tape before disconnecting anything. Those two outputs often look similar once the receiver is loose.
Compare the old receiver body to the new one while the canopy is open, including thickness, plug locations, and how the wire bundle folds.
If it works: You can clearly see the receiver and have reference photos of the original wiring and settings.
If it doesn’t: If the receiver is not visible, inspect behind the mounting bracket and check only the wiring already in view. Keep the canopy supported, move the wires just enough to see the module, and stop if a hidden harness has no slack.
Stop if:
The wiring insulation looks burned or brittle.
You find signs of overheating, melting, or a scorched canopy.
There is not enough slack to lower the canopy safely.
Step 3: Disconnect the old receiver without guessing
Read the printed labels on the old receiver before loosening a connector. Common labels separate house line, house neutral, fan motor output, and light output.
Disconnect one wire connector at a time and keep each house wire or fan wire identified against your photo. Replace any cracked wire nut instead of reusing it.
If the receiver uses plug harnesses, press the latch and pull on the plug body, not the wires. Bent pins or a cracked shell are a stop sign, not a reason to force it.
Check the stripped copper ends as each connector comes off. Trim and re-strip only if a conductor is nicked, blackened, or too short for a secure connector.
Slide or lift the old receiver out of the bracket or canopy and keep it nearby until the new module has passed the fit check.
If it works: The old receiver is out and the house and fan wires are separated and identifiable.
If it doesn’t: Use your photos to confirm each connection before moving on. If the wiring is unclear, pause rather than guessing.
Stop if:
Wire colors do not match the labels and you cannot identify each connection.
A connector is damaged and the copper conductor is nicked or too short.
The fan uses a wiring layout you cannot confidently trace.
Step 4: Install the matching receiver and dry-fit the canopy
Compare the new receiver to the old one and confirm the wire labels, harness style, fan/light outputs, and remote pairing method match your fan setup.
Set dip switches on the new receiver to match the old receiver and remote when your kit uses switch codes. For learn-button kits, leave switch-style matching out and follow the pairing sequence printed with the receiver.
Connect the new receiver wires to the matching house and fan wires using secure wire connectors, or plug in the harness connectors fully if your fan uses plugs.
Hold each wire connector and gently tug each individual lead. A loose lead means the connector is the wrong size, the copper is not lined up, or the splice needs to be remade.
Place the new receiver back into the bracket or canopy area in the same orientation as the old one, keeping wires neat and away from pinch points.
Before tightening the canopy, dry-fit it by hand. If the canopy will not sit flat, the receiver or wiring is pinched or the receiver is the wrong physical size.
If it works: The new receiver is wired securely and positioned inside the canopy without strained or pinched wires.
If it doesn’t: Recheck each wire against the labels and your photos. If the new receiver does not match the original connections, do not force the installation.
Stop if:
The replacement receiver does not physically fit in the canopy.
The wire labels do not correspond to your fan wiring.
You cannot tuck the receiver and wires in without pinching insulation.
Step 5: Reassemble the canopy and restore power
Check each wire connector before the canopy goes up. No bare copper should show below a wire nut, and no connector should sit against a screw slot or sharp bracket edge.
Fold the wires back into the canopy in shallow bends so wire nuts sit beside the receiver instead of under the receiver body.
Keep the antenna lead clear of screw holes, bracket edges, and the canopy rim. A pinched antenna can make the new receiver act intermittent.
Dry-fit the canopy against the ceiling before you tighten screws. Look for a gap, a tilted rim, or springy pressure that tells you the receiver or wire bundle is trapped.
Raise the canopy and tighten the screws evenly only after it sits flush by hand.
Turn the breaker back on and use the wall switch to supply power to the fan, then pair or reset the remote if your receiver instructions require it.
If it works: The canopy is secure, power is restored, and the fan is ready for testing.
If it doesn’t: If the breaker trips or the fan does not power up, turn the breaker back off and inspect the wiring and canopy for pinched wires or loose connections.
Stop if:
The breaker trips immediately after power is restored.
You hear buzzing, crackling, or smell overheating.
The canopy will not close without forcing it.
Step 6: Test fan and light operation
Test the light on and off if your fan has a light kit.
Run the fan through low, medium, and high, waiting a few seconds between commands so the receiver has time to switch loads.
Check dimming, timer, reverse, or fan-direction features only if your fan and receiver are built for those functions.
Stand near the fan for a few minutes and watch for flicker, delayed response, repeated clicking, hum, or a command that works only from one spot in the room.
If a single function still fails, turn the breaker off before reopening the canopy and compare that output lead against your photo.
If it works: The fan and light respond normally and the remote controls work as expected.
If it doesn’t: If some functions still fail, check the remote battery, pairing steps, and receiver compatibility again. If the fan hums, one speed is missing, or the light works while the motor will not, turn the breaker off before reopening the canopy. The remaining fault may be in the remote, wall control, capacitor, or fan wiring, and capacitor or wiring work is a stop point for qualified electrical help.
Stop if:
The fan hums but does not spin.
The light flickers after wiring has been checked.
The receiver or canopy becomes warm unusually fast.
Match the fan brand and model, receiver kit, wire count, light and fan outputs, remote pairing or dip-switch style, and canopy space before ordering.
As an Amazon Associate I earn from qualifying purchases. Repair Riot may earn a commission at no extra cost to you.
Verify the repair
The breaker stays on after the repair.
The canopy is fully secured and no wires are pinched.
The remote controls the fan speeds correctly.
The light works normally when the fan has a light kit.
There is no buzzing, burning smell, or intermittent operation.
FAQ
Should I replace the receiver before trying to re-pair the remote?
No. Try fresh batteries and the pairing or dip-switch procedure first, then stand near the fan and listen for a relay click or watch for any light response. If the wall switch has power and the remote still will not control the fan or light, the receiver becomes a stronger suspect.
How do I know the receiver is the problem?
A bad receiver often shows up as no remote response, intermittent operation, or one missing function while power is still available at the fan. Check the remote battery and wall switch first. If those pass, listen for a canopy click or compare which commands still work before replacing the receiver.
What if the fan only works from the wall switch or only from the remote?
When one control runs the fan or light and the other does nothing, start with the control path that failed. Watch which command still responds, then check the battery, pairing, wall switch, and receiver connections in that order before replacing the fan or motor.
Do I need to replace the remote too?
Not always. Some replacement receivers work with the existing remote, while others are sold as matched kits. Check compatibility before ordering and match any switch settings if your system uses them.
Can I replace the receiver without taking the whole fan down?
Yes on many fans. The receiver is often inside the ceiling canopy, so you can lower the canopy without removing the entire fan. Turn the breaker off first, support the canopy, and look for visible receiver and wire labels before disconnecting anything. If space is too tight or the wiring is inaccessible, the job may be better left to a pro.
What if I cannot fit the new receiver under the canopy?
Do not squeeze or force it. A receiver that is too large or shaped differently can pinch wires or prevent safe reassembly. Return it and get a compatible replacement for your fan.
Sources and reference notes
Repair Riot uses related electrical troubleshooting pages to keep receiver replacement tied to the symptom, the fit check, and the point where DIY should stop.