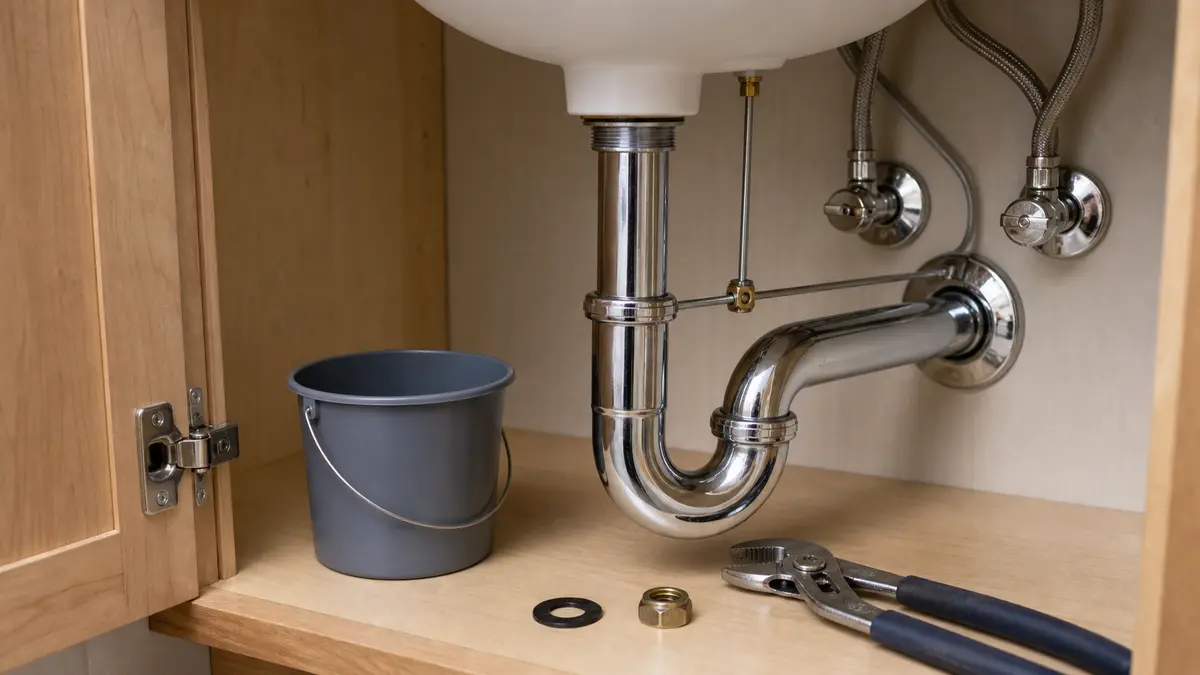
This is the right repair when water drips from the small nut where the horizontal rod enters the drain, or when that rod no longer moves the stopper.
Dry the area first, then run water and watch where the first drop appears. If it starts at the sink flange, tailpiece, or P-trap, the pivot ball is not the problem. Keep the old rod, ball, washers, and nut so you can match the new set.
Before you start: Put a bowl and towel under the drain. Compare the new rod, ball, washers, and nut with the old pieces; these kits are not all the same. If the drain body is cracked, stripped, or badly corroded, replace the drain assembly instead.
Wipe every joint dry and run the faucet. The first wet spot tells you which connection needs attention.
Replace these parts when
Look for: Water appears at the back of the pop-up drain body. The pivot rod slips loose, or the stopper will not move because the ball, rod, washer, or retaining nut is worn.
Next step: If water starts at the sink flange, tailpiece, or P-trap instead, fix that joint rather than replacing the pivot hardware.
Match the old parts
Look for: You can compare the old ball diameter, rod length, washer shape, nut thread, and stopper connection before ordering the replacement kit.
Next step: If the old rod is missing or the nut will not thread cleanly by hand, identify the drain body first. Guessing usually leaves a drip.
Stop for drain-body damage
Look for: The drain body is solid, the pivot opening is round, and the threads can still hold a nut without wobbling.
Next step: Replace the full pop-up drain assembly if the drain body is cracked, stripped, crushed, or badly corroded around the pivot opening.
Where the pivot ball and nut sit under the sink
Find the pivot nut on the back of the drain body first. Then compare it with the stopper and flange so you do not chase the wrong leak.
The pivot nut seals the hole where the rod enters the drain body. Keep this area dry while you test.Keep the old rod, ball seals, nut, and clip until the repair is finished. Compare the ball size, rod length, threads, and washer shape before installation.
Safety first
Wear gloves if the area under the sink has sharp metal edges or rough hardware.
Before you loosen the pivot nut, set a towel and small bucket under the drain body. Look for a wet nut; leftover water can spill as soon as the rod comes out.
Use pliers gently on plastic or thin metal drain parts so you do not crack or deform them.
Do not add thread tape, pipe compound, or caulk at the pivot nut; its matched ball and seals make the joint watertight.
Tools you may need
Adjustable pliers — To loosen and snug the retaining nut if it is stuck or hard to turn by hand.
Small bucket or bowl — To catch any water left in the drain when the pivot rod comes out.
Old towel or rag — To protect the cabinet floor and wipe away water or grime around the drain body.
Flashlight — To see the back of the drain body and the linkage clearly under the sink.
Work gloves — Protecting your hands if sharp cabinet edges, rough hardware, or dirty drain parts sit in your path while you loosen the pivot nut and pull the rod.
Step-by-step fix
Step 1: Confirm the pivot ball and nut are the problem
Look under the sink at the back of the drain body where the horizontal pivot rod enters the drain.
Check for dripping or mineral buildup around the retaining nut, a loose rod, or a rod that has pulled free from the stopper linkage.
Lift and lower the sink's lift rod while watching the pivot rod. If the rod does not move the stopper correctly, the pivot ball, nut, or both may be worn or cracked.
Place a towel and small bucket under the drain before you start taking anything apart.
If it works: You have confirmed the leak or loose linkage is centered at the pivot ball and nut connection.
If it doesn’t: If water is leaking from the sink basket flange above, the tailpiece joints below, or the P-trap, fix that connection instead of replacing the pivot ball and nut.
Stop if:
The drain body itself is cracked or badly corroded around the pivot opening.
The sink cabinet has swollen wood or hidden water damage. Stop and call a pro if you see mold or soft cabinet framing.
Step 2: Disconnect the stopper linkage and remove the old parts
Unsnap or unclip the horizontal pivot rod from the clevis strap connected to the lift rod, then note which hole in the strap was being used.
Hold the drain body steady with one hand and turn the retaining nut at the back of the drain body counterclockwise by hand first.
Use pliers only if the nut is stuck, and pad the jaws with a rag if the nut is plastic or thin chrome.
Pull the pivot rod straight out while supporting the stopper from above if it feels loose.
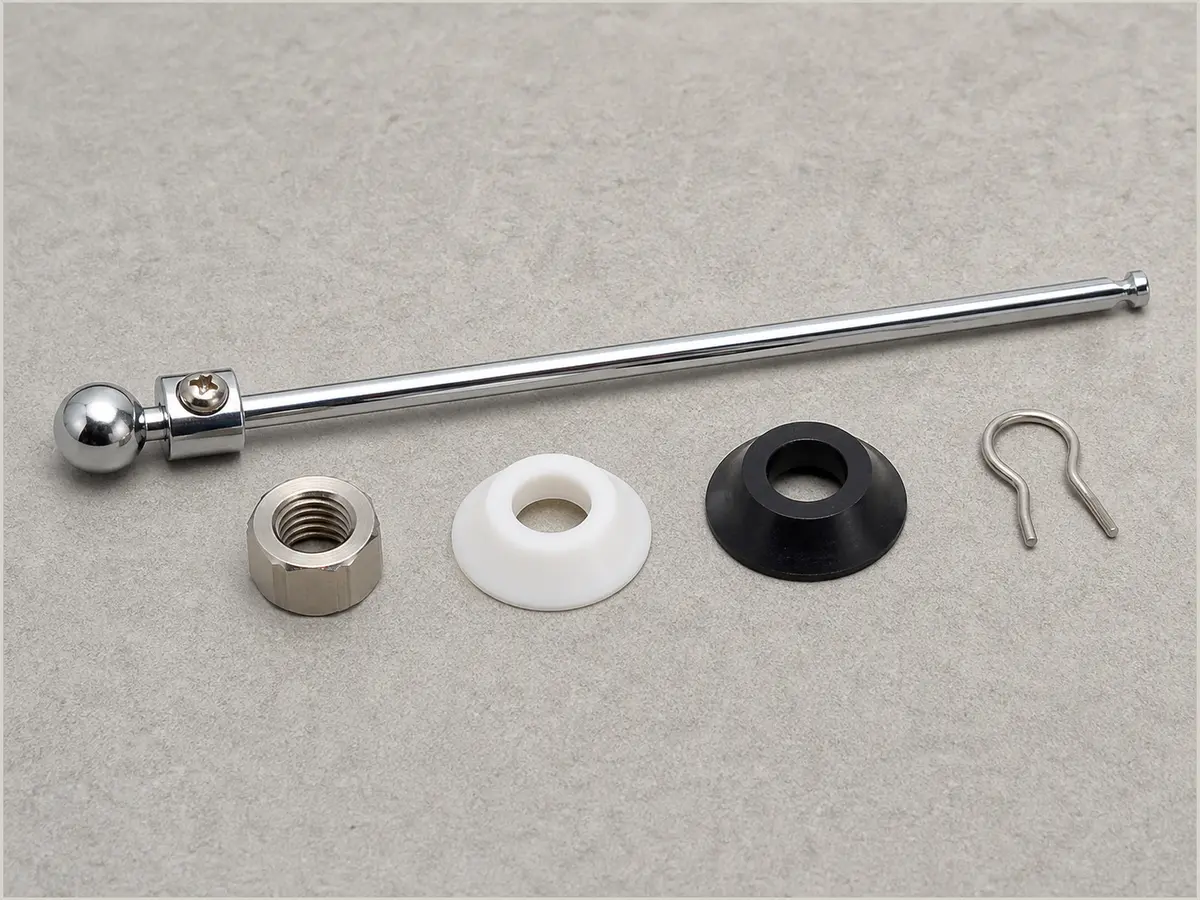
Lay the old rod, ball, washer, and nut on a towel in order so you can compare rod length, ball diameter, washer shape, and thread style with the replacement kit.
If it works: The old pivot rod and retaining nut are out, and the stopper is free inside the drain.
If it doesn’t: If the nut will not loosen, wipe away buildup and try steady pressure with padded pliers. Do not crush the drain body just to save a small pivot nut.
Stop if:
The drain body twists in the sink while you loosen the nut, which can break the seal at the sink.
The threads on the drain body are stripped so the new nut will not tighten securely.
Step 3: Clean the opening and check the stopper
Wipe the pivot opening, washer seat, and drain-body threads clean so the new nut can seat flat.
Pull the stopper out from above the sink if needed and clean off hair, soap film, and sludge.
Check that the hole or slot in the bottom of the stopper is intact and able to catch the pivot rod without cracking.
Compare the stopper slot with the old rod tip. The rod should pass through the slot without forcing the stopper sideways.
Drop the stopper back in with its opening facing the back of the drain, then look through the pivot hole with a flashlight.
If you cannot see the stopper opening, rotate the stopper a little and check again before installing the new rod.
Test the stopper by lifting it slightly while you watch through the pivot hole. The slot should stay lined up with the rod path.
If it works: The drain opening is clean, the stopper is usable, and it is positioned to reconnect with the new pivot rod.
If it doesn’t: If the stopper is bent, broken, or missing the connection hole, replace the stopper assembly too. A new pivot rod cannot hold a stopper that has nothing solid to catch.
Stop if:
The stopper cannot sit properly because the drain body is deformed or damaged.
Step 4: Install the new pivot ball and nut
Compare every new washer or seal with the old assembly before sliding parts onto the rod. The number, shape, order, and orientation are not universal, so use the exact drain instructions if the old stack is missing or unclear.
Slide the new retaining nut onto the new pivot rod in the same orientation as the old one.
Insert the pivot rod through the drain opening until it catches the hole or slot in the stopper.
Thread the new nut onto the drain body by hand first to avoid cross-threading.
Tighten the nut until it is snug and the rod can still pivot smoothly. Do not overtighten it.
If two small plastic rings came with the kit, do not assume they both sit on the same side of the ball. Match their tapered or flat faces to the old parts or the drain maker's diagram.
Move the rod in and out slightly to make sure it stays engaged with the stopper.
If it works: The new pivot ball and nut are installed, the rod stays in place, and the stopper moves when the rod pivots.
If it doesn’t: If the rod binds or pops out, remove it and realign the stopper opening before tightening the nut again.
Stop if:
The new nut will not thread on cleanly because the replacement parts do not match the drain body.
The rod cannot engage the stopper even after repositioning, which points to the wrong replacement or a damaged stopper.
Step 5: Reconnect and adjust the lift linkage
Reconnect the pivot rod to the clevis strap using the spring clip or connector that holds it in place.
Test the lift rod from above the sink and watch the stopper rise and fall.
Adjust the rod position in the clevis strap if the stopper does not open high enough or does not seal when closed.
Make small adjustments until the stopper closes fully and opens enough to drain quickly.
If it works: The lift rod operates the stopper smoothly, and the stopper opens and closes without slipping loose.
If it doesn’t: If the lift rod still feels sloppy, recheck that the pivot rod is fully clipped to the clevis strap and that the stopper is engaged correctly.
Stop if:
The clevis strap, lift rod, or clip is broken and cannot hold the adjustment.
Step 6: Run water and make sure the repair holds
Close the stopper and fill the sink with a few inches of water.
Watch under the sink around the new pivot nut while the sink is full.
Open the stopper and let the sink drain completely while checking again for drips and smooth stopper movement.
Wipe the area dry and check one more time after a few minutes to make sure no slow leak returns.
If it works: The stopper opens and closes from the lift rod, the sink drains normally, and the pivot nut stays dry.
If it doesn’t: If a small drip remains at the nut, try a slight snugging adjustment. If it still leaks, remove the parts and confirm the replacement matches the drain and the stopper is aligned correctly.
Stop if:
Water is now leaking from another drain joint that was disturbed during the repair.
The connection still leaks after you dry the area, try a slight snugging adjustment, and confirm the correct parts are installed and aligned. That usually points to a drain body that needs replacement.
Verify the repair
The lift rod opens and closes the stopper without sticking.
No water drips from the back of the drain body during a full sink test.
The stopper stays connected and does not drop out of position after several uses.
FAQ
What does the pivot ball and nut do on a bathroom sink drain?
They hold the horizontal pivot rod in the back of the drain body and let it move the stopper up and down while keeping water from leaking out of that opening.
How do I know if these parts are bad?
Common signs are dripping from the back of the drain body, a loose or disconnected pivot rod, or a stopper that no longer opens and closes correctly from the lift rod.
Where do the two small white rings go on a sink pivot rod?
There is no universal order. They may be seals or washers shaped for a specific pivot ball and drain body. Lay the old parts out in order, compare tapered and flat faces, and use the exact drain manufacturer's diagram. Do not guess or stack both rings on one side unless the instructions show that arrangement.
How tight should the pop-up drain pivot nut be?
Start it by hand and tighten it only until the connection stays dry while the rod still pivots smoothly. Moen's pop-up instructions describe the nut as snug and warn against overtightening. A nut that binds the rod or needs force to start is not fitted correctly.
Are bathroom sink pivot rods and retaining nuts a standard size?
No. Ball diameter, rod length, nut thread, seal shape, and stopper engagement vary. Match the old parts or identify the drain body before ordering a replacement kit.
Can I replace the pivot rod without removing the whole drain?
Usually yes when the drain body is solid, its threads are intact, and a correctly matched rod and ball can engage the stopper. Replace the full drain only when the body is cracked, stripped, badly corroded, or incompatible with available repair parts.
Sources and reference notes
Dry the drain, run the faucet, and watch where the first drop forms. This repair fits a leak at the pivot nut, not at the sink flange, tailpiece, or P-trap.
Moen pop-up waste instructions - Official manufacturer diagram and instructions for the stopper, pivot rod, pivot nut, lift strap, and spring clip, including the warning not to overtighten the pivot nut.
Kohler lavatory pop-up drain instructions - Official manufacturer installation and service-parts reference showing how the rod, seal, washer, nut, stopper, and lift linkage work as a matched drain assembly.