Does water return when nobody uses the sink?
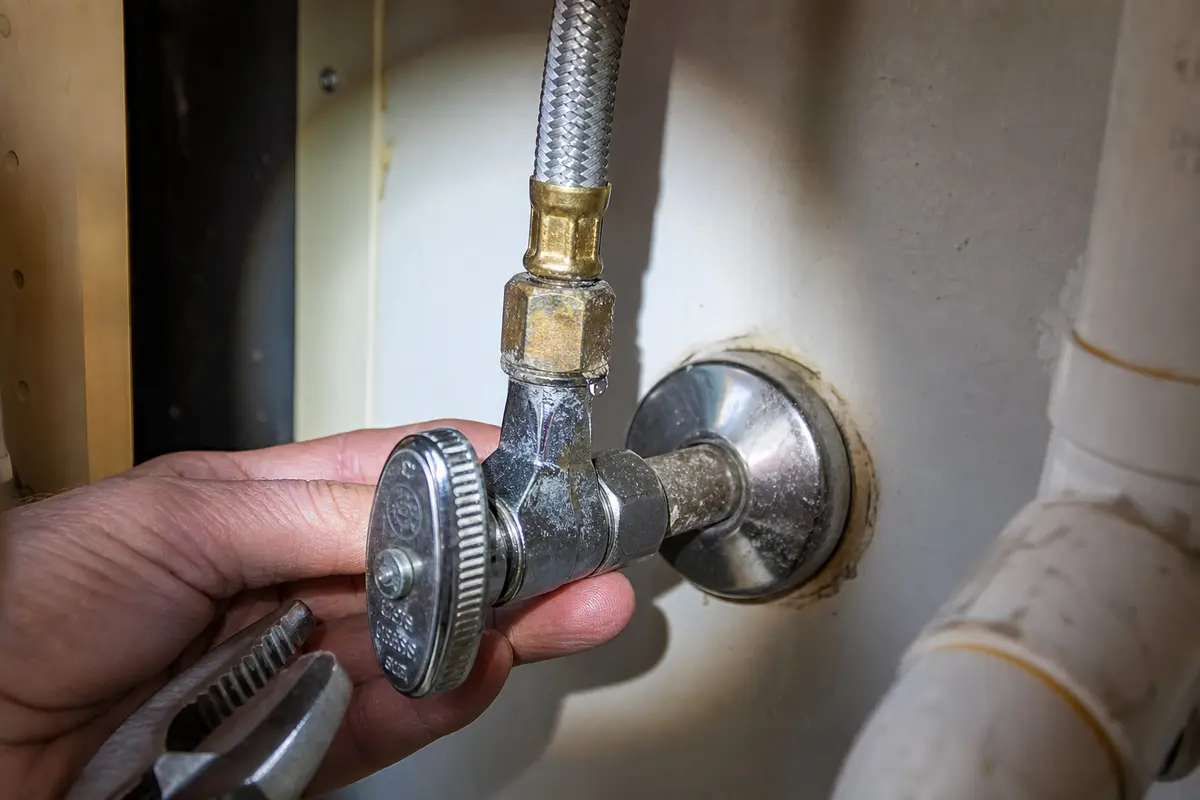
Start with the shutoff valves and supply lines. Those parts are under pressure even when the faucet is off.
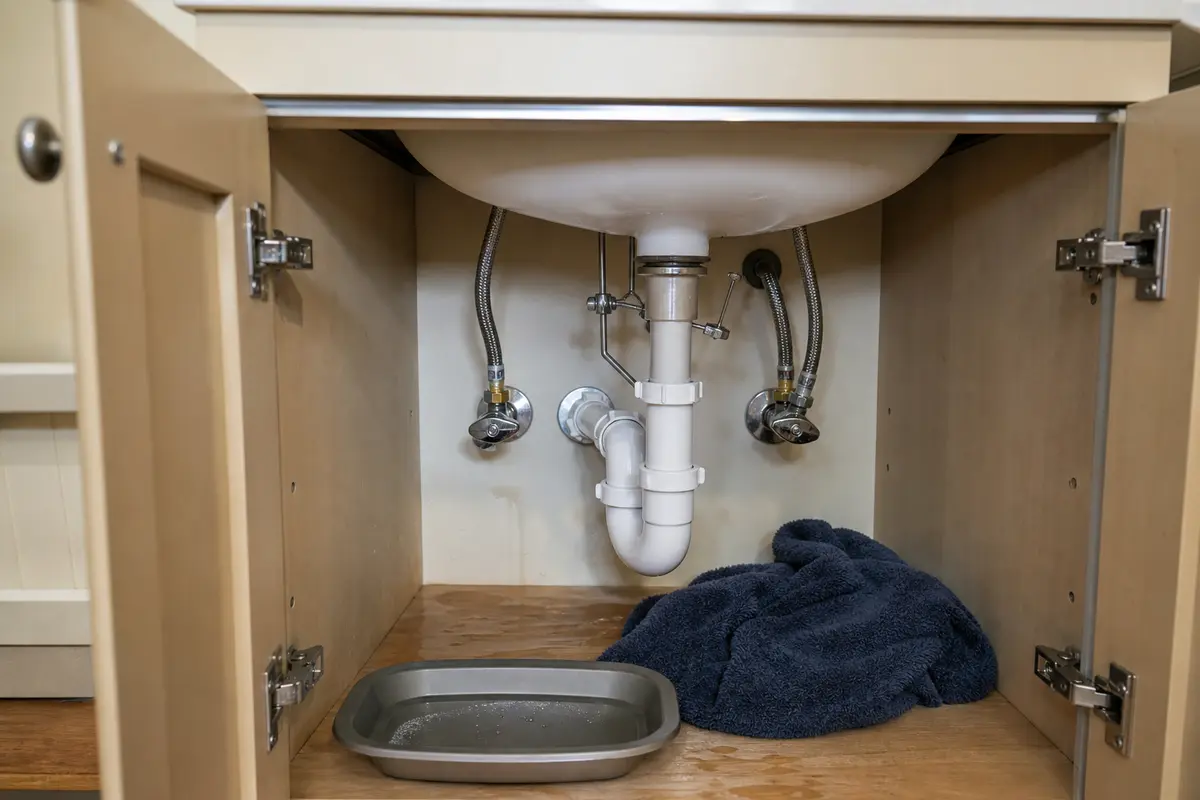
A bathroom sink leak usually starts on either the supply side or the drain side. First dry the vanity, run a controlled test, and repair the highest wet point.
Most leaks start at a loose supply connection, a shutoff valve stem, the pop-up drain body, or a trap slip joint. The first wet point matters more than the puddle location.
Watch for water tracking down a supply line or tailpiece before replacing the wrong part.
Don’t start with: Do not replace the faucet or smear sealant around every joint. That can hide the leak path and make the real repair messier.
Start with the shutoff valves and supply lines. Those parts are under pressure even when the faucet is off.
Watch the supply connections, faucet tailpieces, and shutoff valve outlets. Keep the bowl from filling during this pass.
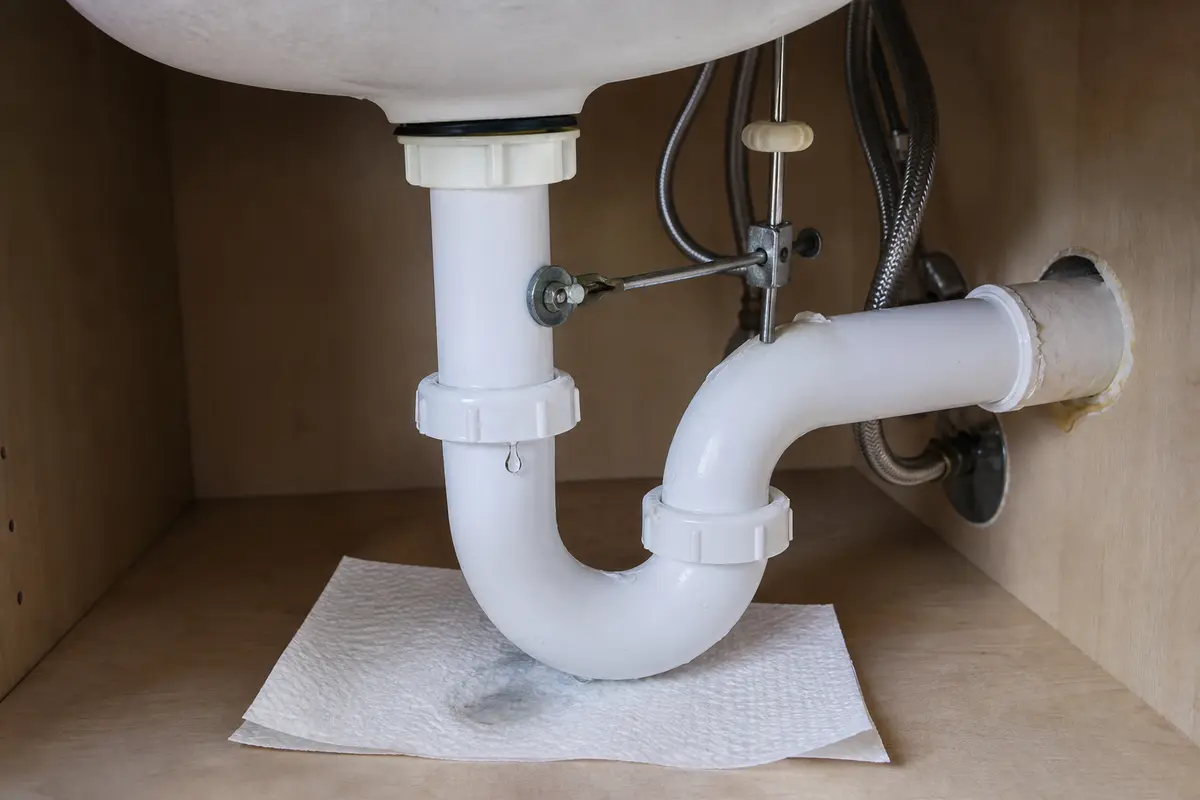
Use a partly filled bowl: dry the drain parts, release the stopper, and watch the drain body, pop-up pivot, tailpiece, and P-trap.
Stop chasing exposed sink parts. The leak may be in the wall supply or drain connection, which is a plumber diagnosis.
Handle the drain problem before replacing leak parts. Backed-up water can make a good trap joint seep.
Do not force it. Control the water and call a plumber before a small drip becomes a broken stub-out.
Clear the cabinet, dry every fitting, and use a flashlight or paper towel to find the first wet spot. Check the pressurized side first. Then fill and drain the bowl; the timing tells you whether the valve, supply line, or drain path deserves the closer look.
Do not buy a faucet, supply line, shutoff valve, pop-up kit, or P-trap until one dry-to-wet run points to that part. Match plumbing replacements by pipe size, thread or compression style, trap layout, and the exact connection that leaked first.
The puddle under the vanity is usually not where the leak started. Dry the hoses, trap bends, sink bowl, and cabinet wall, then look for the first new bead of water before it runs to the floor.
The fastest way to make this repair worse is to hide the evidence. Keep the first pass clean, dry, and limited to the fitting that proves itself wet.
Dry the cabinet and visible plumbing, then run one condition at a time. Use a dry paper towel at each joint so the first damp mark is obvious.
| What gets wet first | What it usually means | Next move |
|---|---|---|
| Valve handle, packing nut, or supply hose with no sink use | Pressure-side leak at the shutoff valve or supply line. | Shut water off before replacing anything; call a plumber if the valve will not isolate. |
| Supply nut or faucet tailpiece only while faucet runs | Loose connection, failed washer, or damaged braided line. | Support the fitting, snug gently only if the joint is sound, then retest. |
| Drain nut under the bowl while water is held | Drain flange, gasket, or drain body seal problem. | Plan on reseating or replacing the drain assembly, not the faucet. |
| Pop-up pivot or tailpiece as the bowl empties | Pivot ball seal, retaining nut, or tailpiece joint is leaking. | Inspect the pop-up hardware and replace only the failed seal or kit. |
| P-trap slip nut or trap bend during draining | Washer alignment, loose slip joint, cracked nut, or damaged trap. | Realign and hand-tighten first; replace cracked or warped trap parts. |
| Cabinet back, wall pipe, floor, or ceiling below | Leak may be hidden in the supply or drain line. | Stop sink-level repairs and call a licensed plumber. |
Supply leaks stay under house pressure, so they deserve a slower hand. The goal is to find the first wet fitting, not to prove how tight the nut can go.
Drain leaks show up when standing water or moving water reaches the joint. Watch high first, then move down to the trap.
A good repair stays dry through all three conditions. Do the final run before the cabinet is full again, while every joint is visible.
These support inspection and light fitting work. Skip tool work when the valve is seized, the wall pipe moves, or water cannot be shut off.
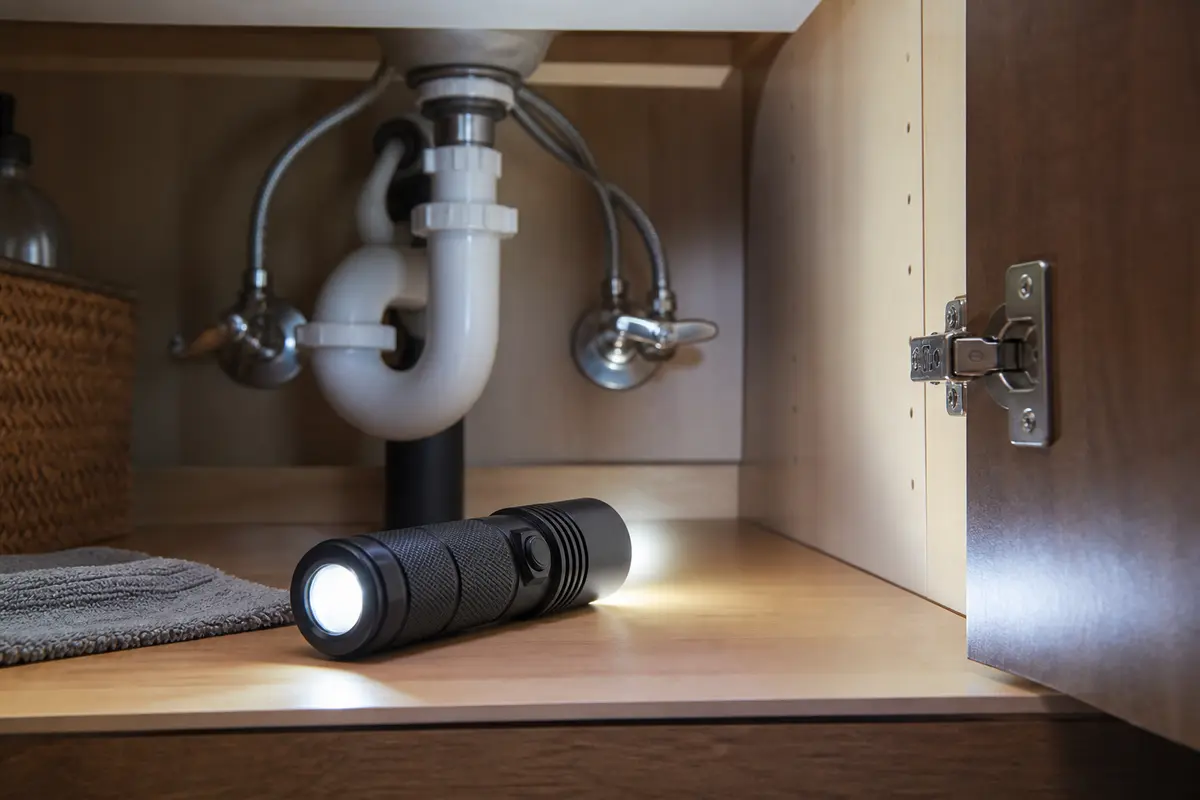
Helps when: Use an inspection flashlight to find the first wet point, valve position, trap condition, or wall-drain clue.
Skip it when: Skip working under the sink until stored items are removed and the cabinet is dry enough to inspect safely.
Compare inspection flashlights on Amazon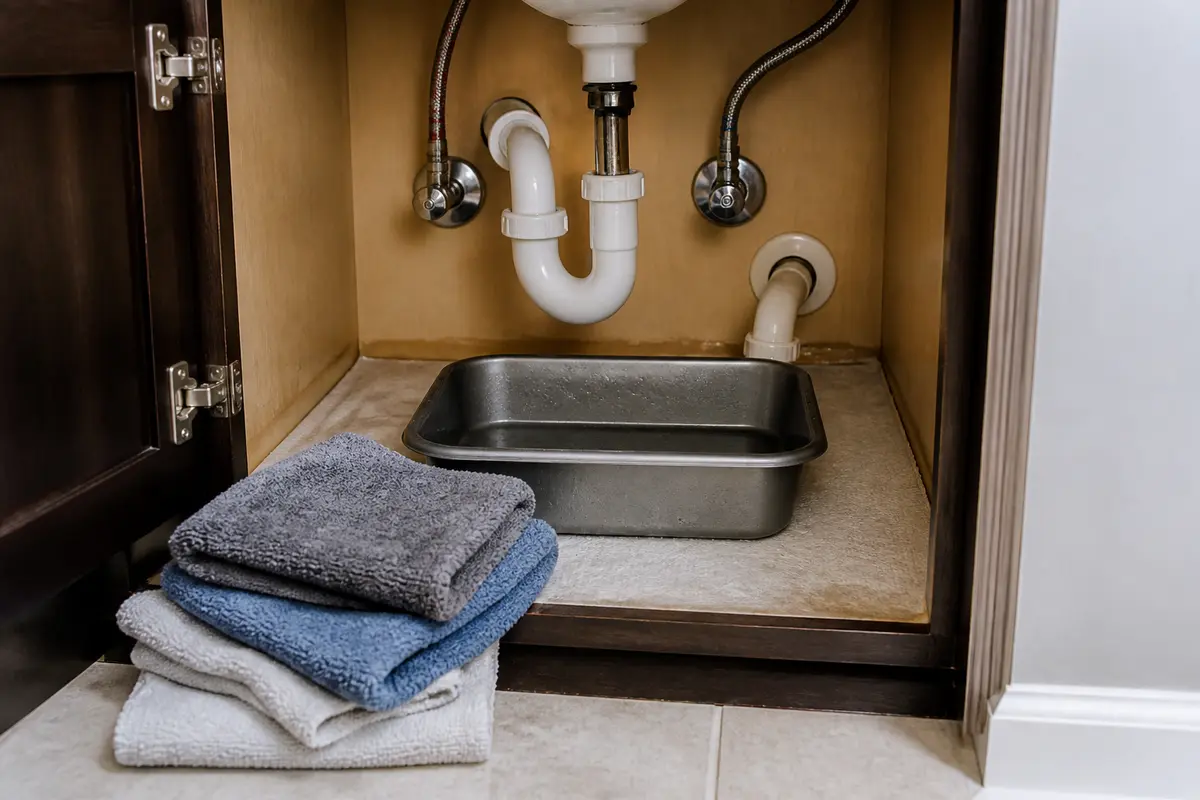
Helps when: Use a shallow pan and towels to catch water while checking supply, shutoff, trap, or drain joints.
Skip it when: Skip disassembly if water is active and you cannot shut it off or keep the cabinet safe.
Compare shallow pans and towels on Amazon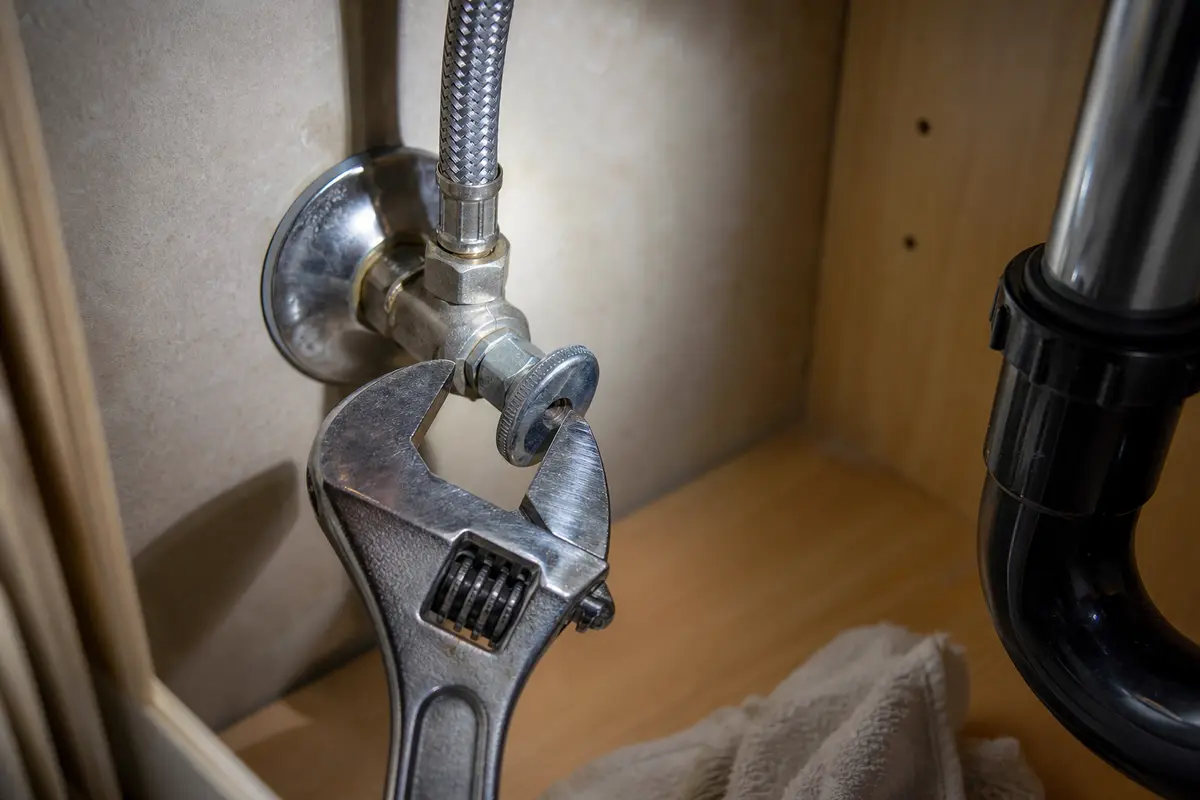
Helps when: Use a small adjustable wrench on metal supply nuts, faucet hardware, or shutoff connections that fit squarely.
Skip it when: Skip using it on plastic slip nuts where hand tightening or pliers are safer.
Compare small adjustable wrenches on Amazon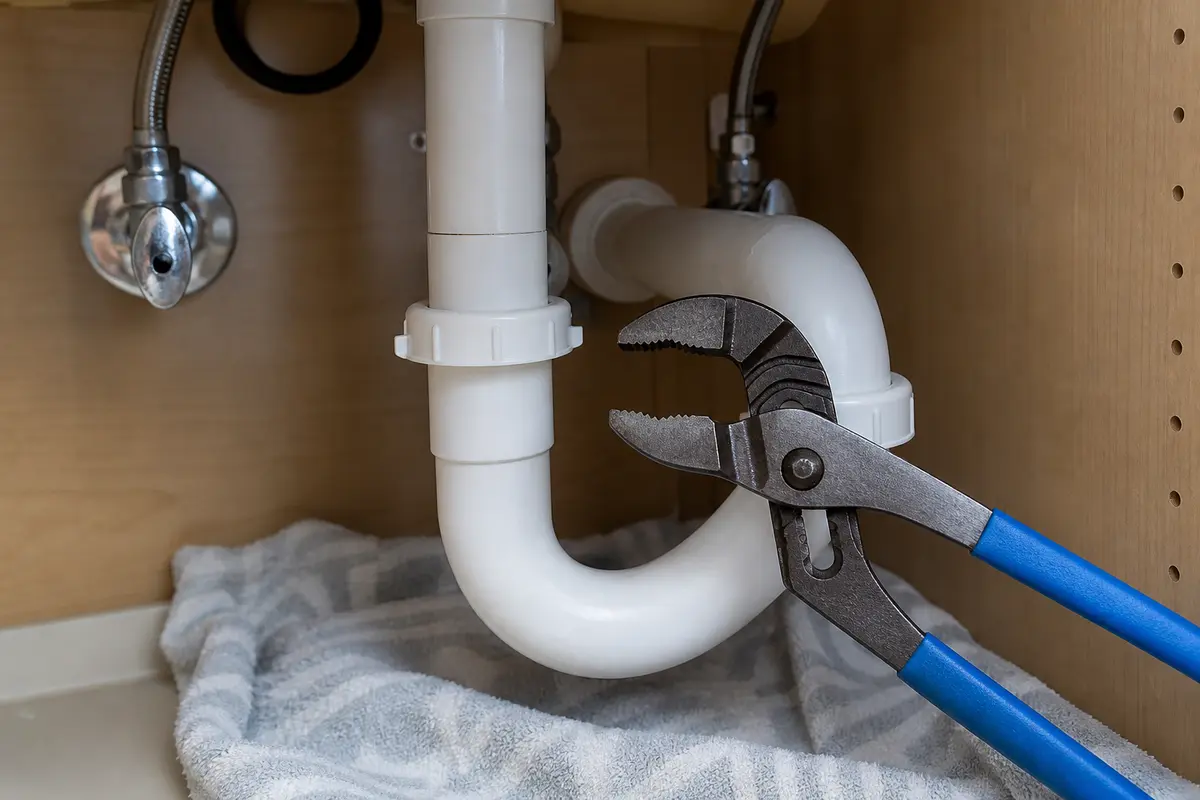
Helps when: Use tongue-and-groove pliers to loosen accessible slip nuts while supporting plastic fittings by hand.
Skip it when: Skip overtightening plastic drain parts because it can deform washers and cause leaks.
Compare tongue-and-groove pliers on AmazonAs an Amazon Associate I earn from qualifying purchases. Repair Riot may earn a commission at no extra cost to you.
Put parts in the cart only after the dry-to-wet test names the joint. Compare the old part to the replacement before buying: same size, thread, washer, and reach. A close-looking supply line, valve, trap, or drain piece can still leak if one fit detail is off.
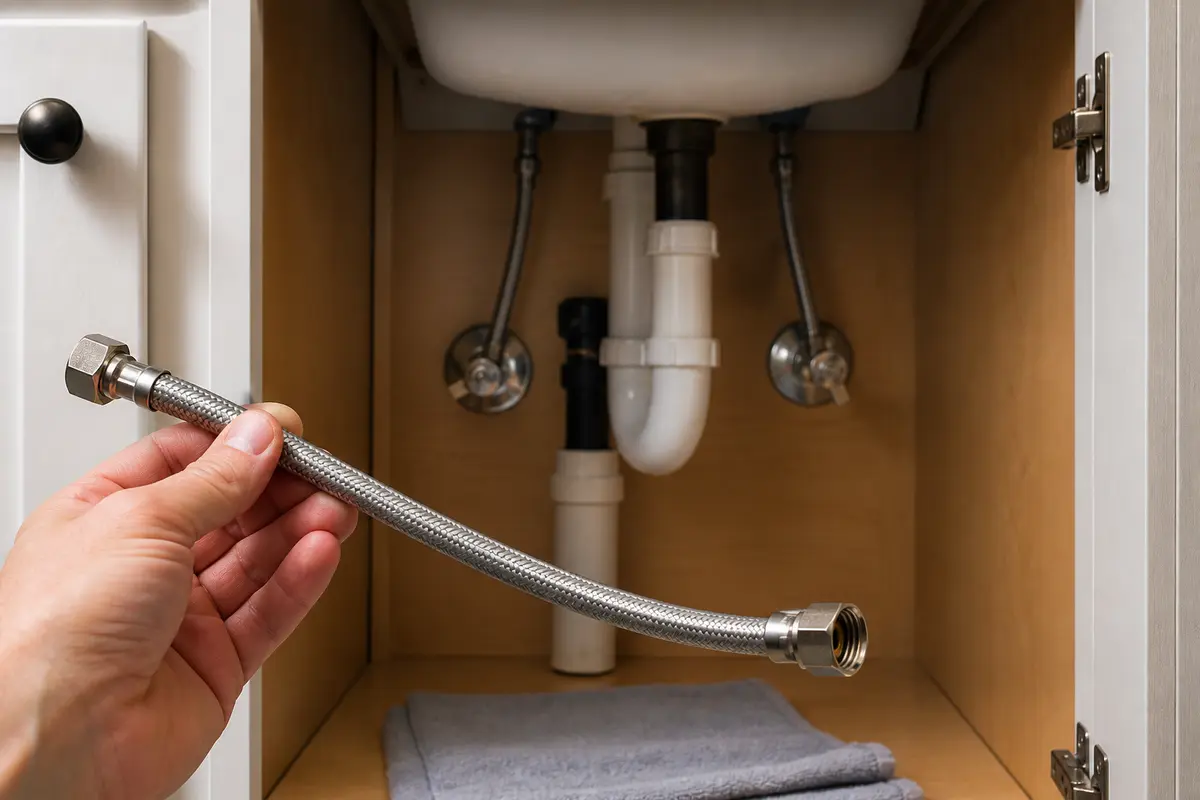
Helps when: Use a bathroom sink supply line when the line is kinked, clogged, corroded, or leaking at the connector.
Skip it when: Skip replacing the line until the stop is off and the connector size is verified.
Compare bathroom sink supply lines on Amazon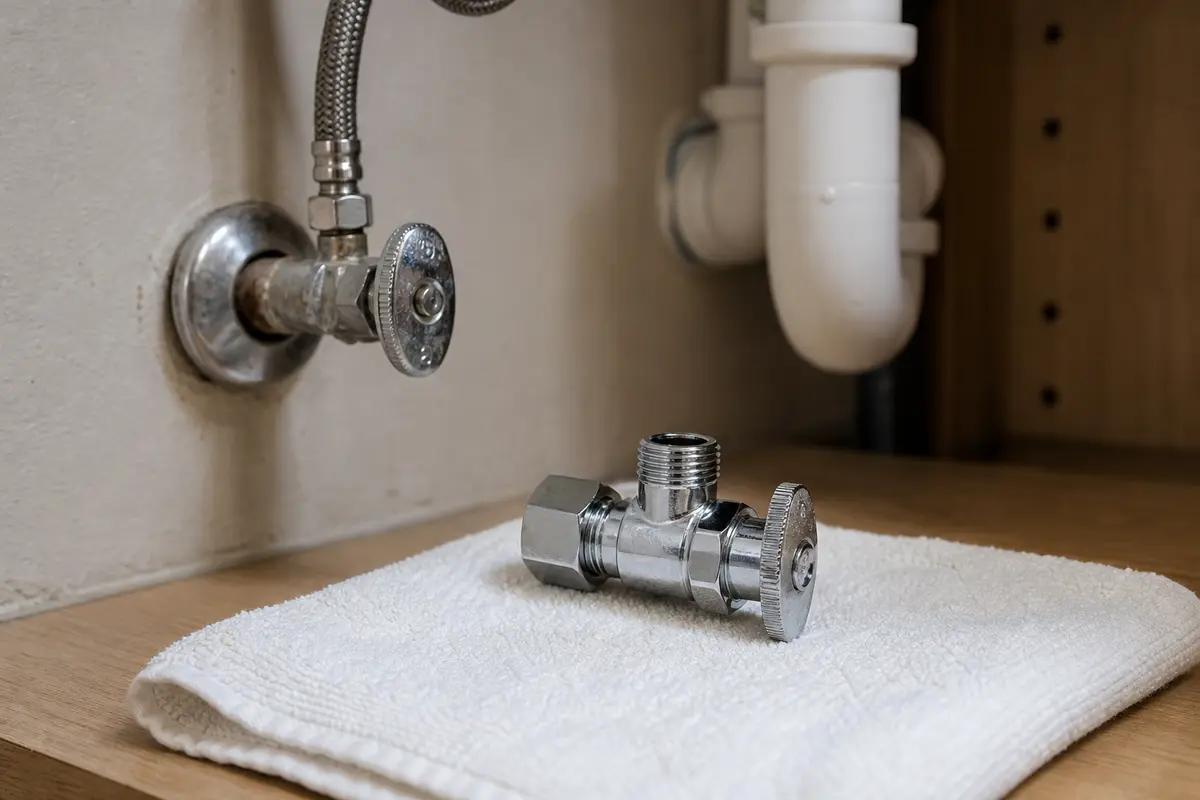
Helps when: Use a bathroom sink shutoff valve when the stop is seized, leaking, or not passing water after safe shutoff.
Skip it when: Skip valve replacement without a working upstream shutoff and the right fitting type.
Compare bathroom sink shutoff valves on Amazon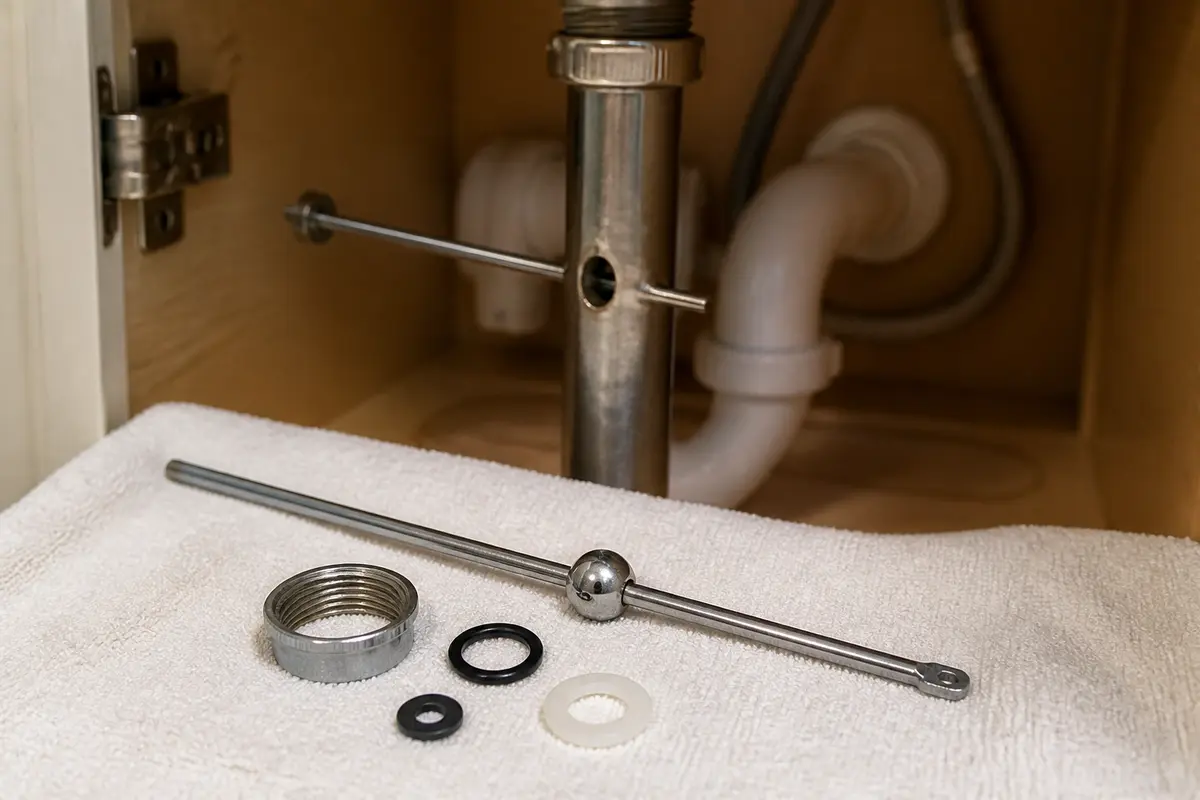
Helps when: Use a pop-up pivot rod and ball kit when the pivot leaks, corrodes, or no longer moves the stopper correctly.
Skip it when: Skip replacing it if the leak starts at the flange, tailpiece, trap, or wall drain instead.
Compare pop-up pivot rod kits on Amazon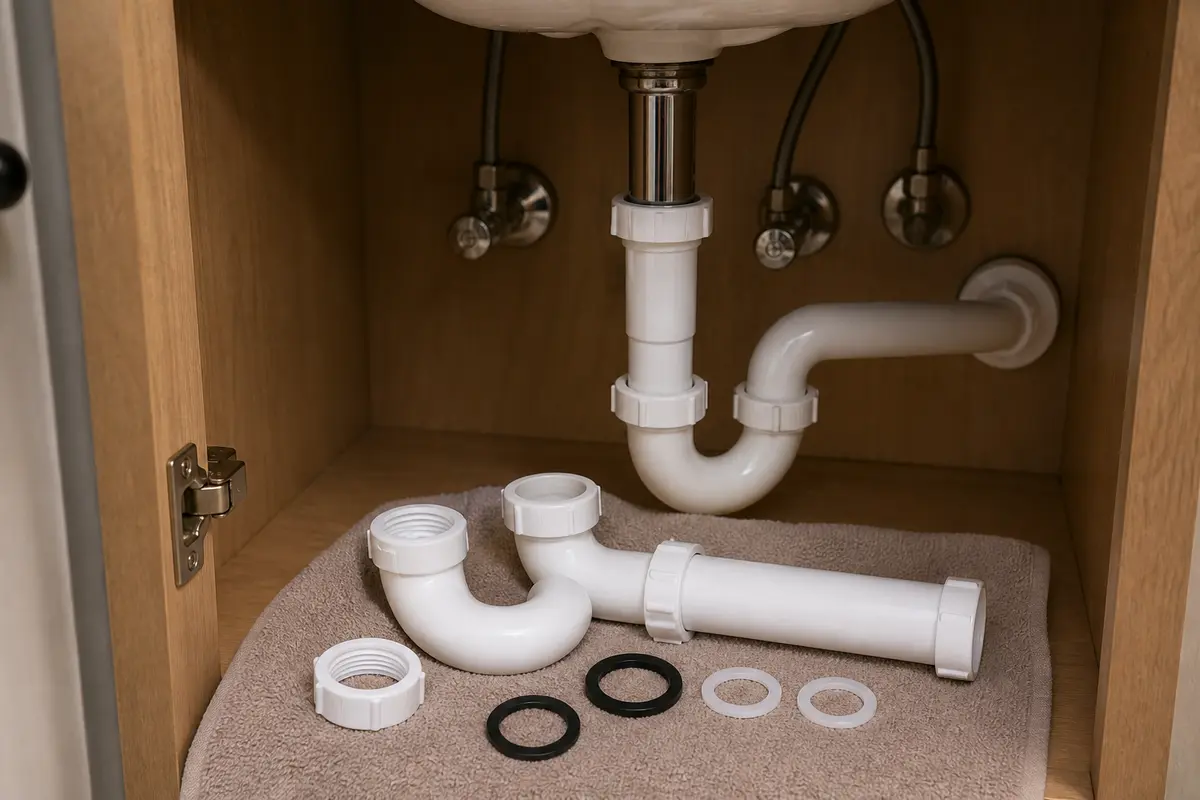
Helps when: Use a bathroom sink P-trap kit when the trap is cracked, corroded, misaligned, or leaking after washer replacement.
Skip it when: Skip trap replacement if the leak or clog starts higher at the drain flange or pop-up pivot.
Compare bathroom sink P-trap kits on AmazonAs an Amazon Associate I earn from qualifying purchases. Repair Riot may earn a commission at no extra cost to you.
That points to the pressurized side or faucet connections. Dry the supply lines, shutoff valves, and faucet tailpieces, then run the faucet without filling the bowl and watch for the highest wet point.
That usually means the leak is in the drain body, pop-up pivot, tailpiece, or P-trap. Partly fill the bowl, dry the drain parts, release the stopper, and watch where the first drop forms.
No. Tighten only the joint that proves itself wet. Overtightening can crack plastic slip nuts, crush washers, distort compression fittings, or twist a shutoff valve at the wall.
Sometimes, but only if you can shut water off upstream and the wall pipe is solid. If the valve is badly corroded, spins, or will not isolate water, call a licensed plumber.
Not unless the first wet point is the faucet body or faucet tailpiece connection. Many under-sink leaks come from the supply line, shutoff valve, drain assembly, or P-trap.
Dry everything completely and run one condition at a time: no use, faucet running, bowl holding water, and bowl draining. A paper towel under each joint makes the first damp spot easier to see.
No. Drain cleaner does not repair a leaking joint, washer, supply line, or valve. It can also make trap work more dangerous if the pipe has to be opened later.
Call a plumber if water is coming from the wall, floor, ceiling below, or cabinet back. Also stop if a valve will not shut off, corrosion is severe, or the wall pipe moves when you touch the fitting.
Repair Riot built this page around visible leak timing: dry cabinet, no-use seepage, faucet-on seepage, standing bowl water, full drain flow, and the stop points where exposed sink work should end.