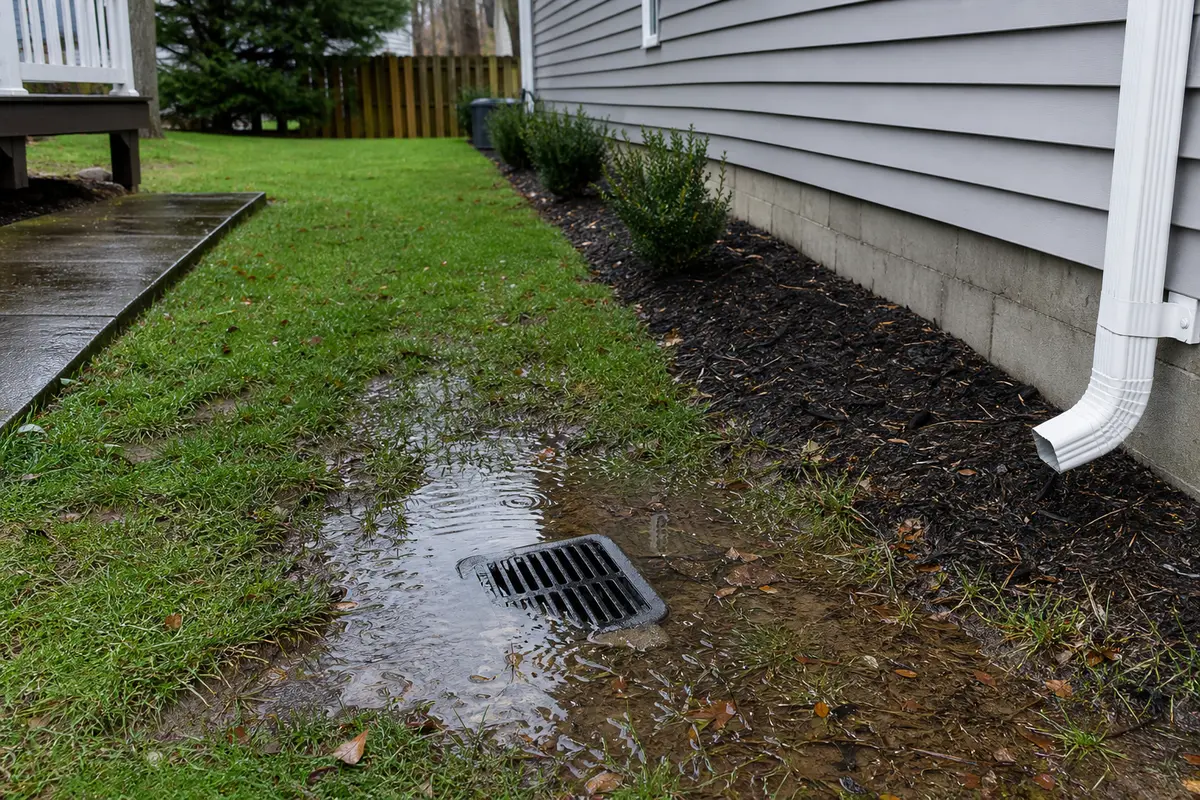
Is water blocked before it reaches the grate?
Clear leaves, mulch, landscape fabric, edging, and soil that keep surface water from entering the drain.
When yard drainage is not draining, start at the visible opening and outlet. The usual causes are a blocked grate, a catch basin packed with silt, a buried discharge end, a damaged pipe section, or more runoff than the drain can carry.
Good clue: if the basin is full but the grate is clear, the problem is usually downstream. Weak outlet flow points to a blocked outlet, pipe belly, crushed section, or root restriction.
Work from the grate to the outlet. Clean the basin, run a gentle hose test, and watch where water stops or surfaces.
Don’t start with: Do not start by digging up the whole line or buying pipe. First prove whether water can enter the basin, leave the outlet, and move through the buried run.
Clear leaves, mulch, landscape fabric, edging, and soil that keep surface water from entering the drain.
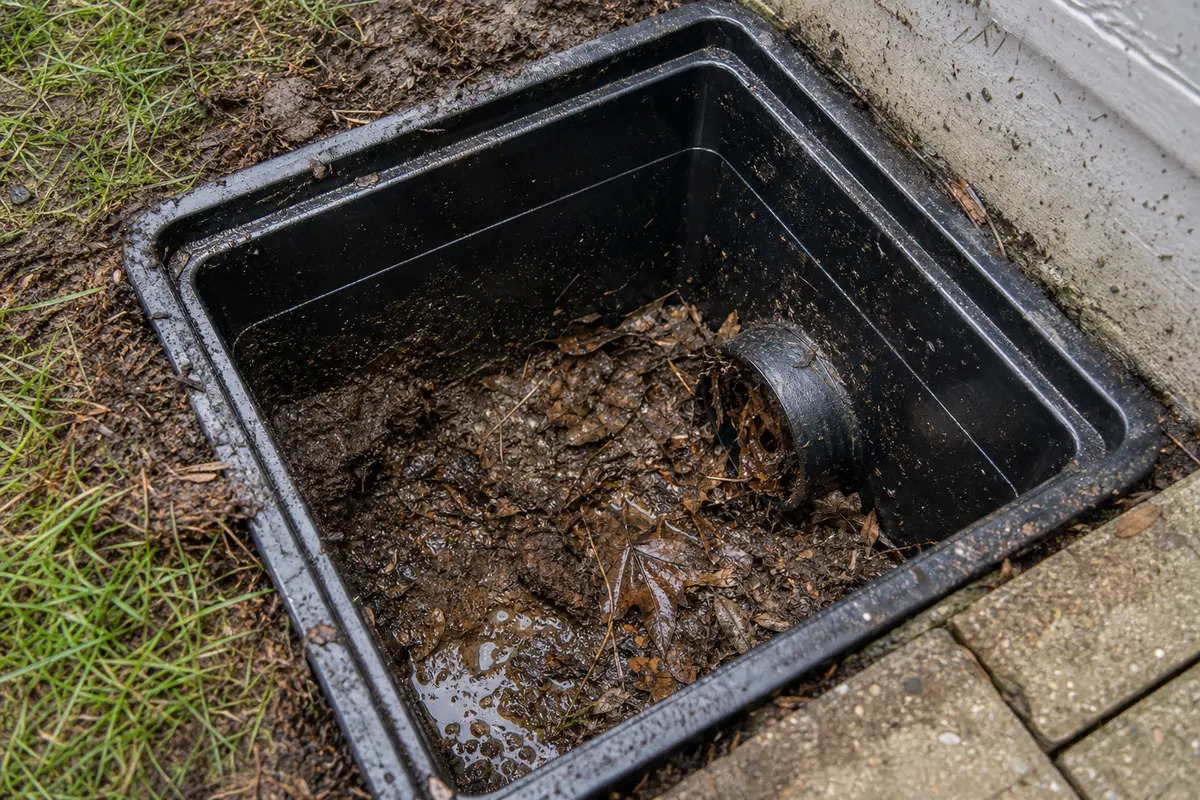
Clean the basin sump first. Wet leaves, roof grit, and silt are the lowest-risk fix.
Move downstream. A full basin with a clear top usually means the outlet or buried run is restricted.
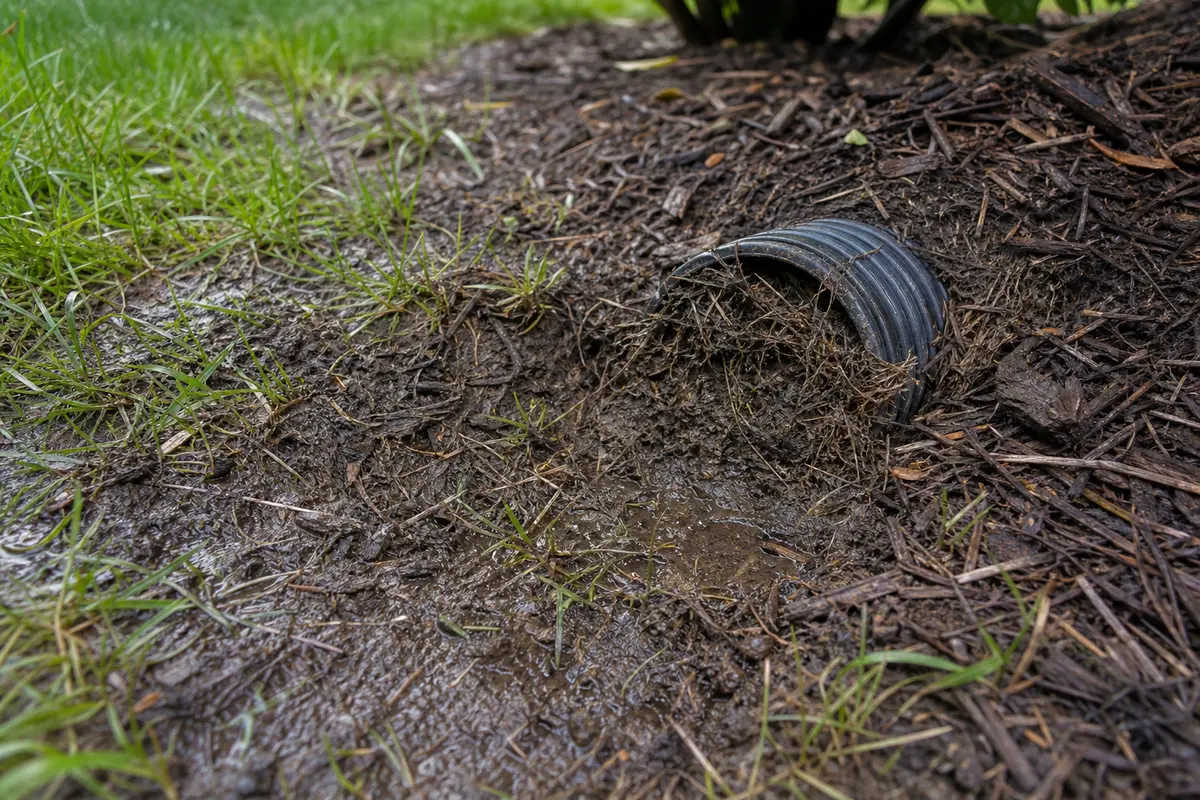
Clear grass, mud, mulch, and pop-up emitter debris at the discharge end before buying parts.
Stop broad flushing. A crushed, separated, or root-damaged section may be leaking underground.
The line may be open but overloaded. Check grading and roof runoff before treating it as a clog.
Use three views: ponding at the drain, debris inside the catch basin, and the outlet that must discharge.
Match the part to the exact drainage diagnosis. A grate helps only when the grate is broken or letting debris in. A pop-up emitter helps only when the outlet device is broken or jammed. More pipe does not fix a packed basin, buried outlet, pipe belly, or too much runoff sent to one low spot.
A yard drain can fail at the inlet, outlet, buried pipe, or yard layout. Name that first.
Let the water pattern set the next step. If the basin fills, look downstream; if the outlet runs hard and the low spot still ponds, check grading or runoff before buying parts.
| What you see | Likely meaning | Next move |
|---|---|---|
| Leaves, mulch, or grass mat the grate | Water cannot enter the catch basin fast enough | Clear the surface opening and basin before any hose test. |
| Basin fills with the grate clean | Restriction is downstream from the basin | Find the outlet and check whether water can leave. |
| Outlet is buried, stuck, or packed with mud | The discharge end is backing up the line | Clear the outlet or replace a broken emitter only after flow is confirmed. |
| Hose water surfaces along the pipe route | Broken, crushed, separated, or root-damaged buried section | Stop broad flushing and isolate the short problem area. |
| Outlet flows strongly but yard still ponds | Runoff volume or grading problem | Redirect roof or surface water and reassess drain capacity. |
| Backups return quickly after cleaning | Hidden restriction, pipe belly, roots, or design issue | Plan professional clearing, camera inspection, or drainage redesign. |
The basin is the common choke point and the safest place to start. Clean enough to learn from the next test, not to prove the whole system is fixed.
A buried outlet or stuck emitter can make the upstream drain look failed. Find the end of the line before you decide the pipe underground is bad.
Use a hose as a sorting tool, not a pressure washer. The test should tell you whether the next step is cleaning, outlet work, a short pipe repair, or grading help.
| Hose test result | What it points toward | What to do next |
|---|---|---|
| Basin drops and outlet runs | Temporary inlet or outlet debris | Clean both ends and recheck after normal rain. |
| Basin rises quickly with little outlet flow | Restriction between inlet and outlet | Look for a clog, root-packed section, crushed pipe, or belly. |
| Outlet flow starts only after basin fills high | Low spot holding water in the buried run | Mark the route and look for a settled wet strip before digging. |
| Water surfaces along the route | Broken, separated, or crushed pipe section | Stop flushing and isolate that short section. |
| Outlet runs hard but the yard still ponds | Capacity or grading problem | Reduce runoff to that basin or change the surface water path. |
Yard-drain repairs get expensive when the first move is a guess instead of a water-path check.
These tools support safe cleaning and flow testing. They do not make deep excavation, unknown buried systems, or foundation-side water safe to handle.
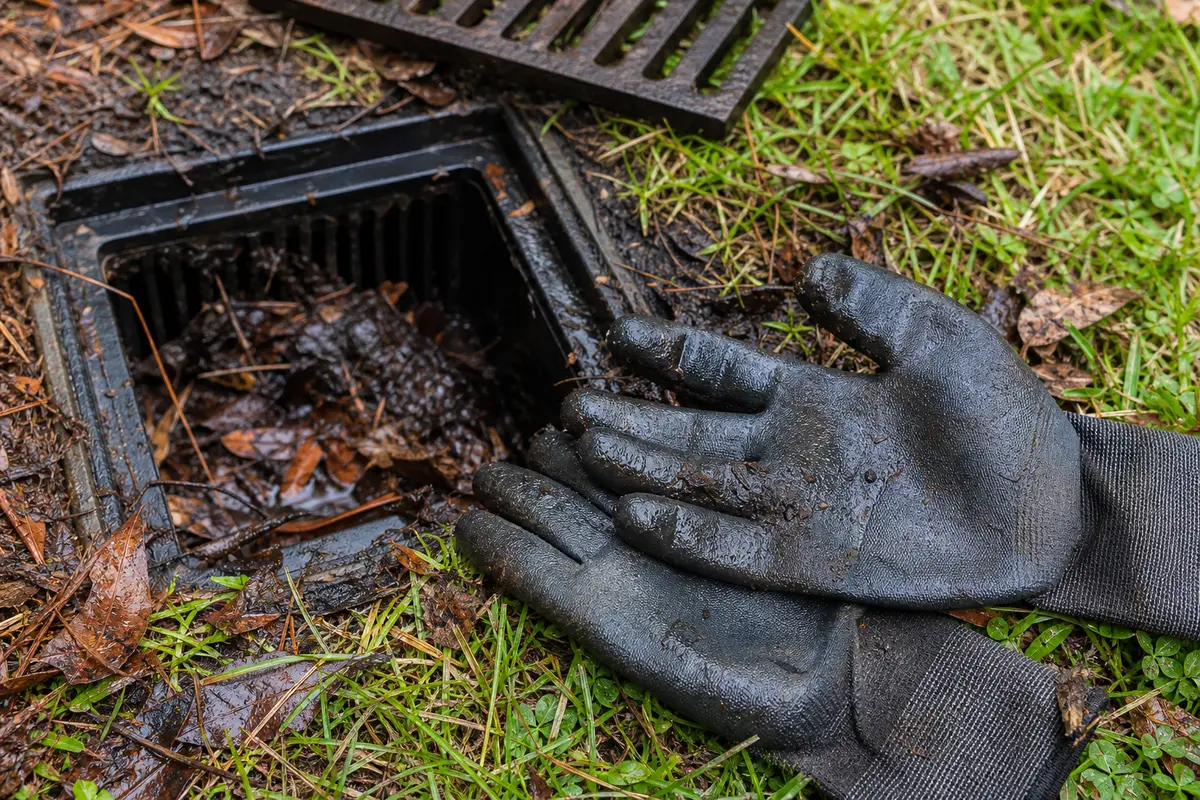
Helps when: Use them for pulling wet leaves, grit, and sharp debris from a grate, basin, or outlet opening.
Skip it when: Skip hands-on cleanup when the basin is deep, you cannot see the bottom, or water is moving fast.
Compare waterproof work gloves on Amazon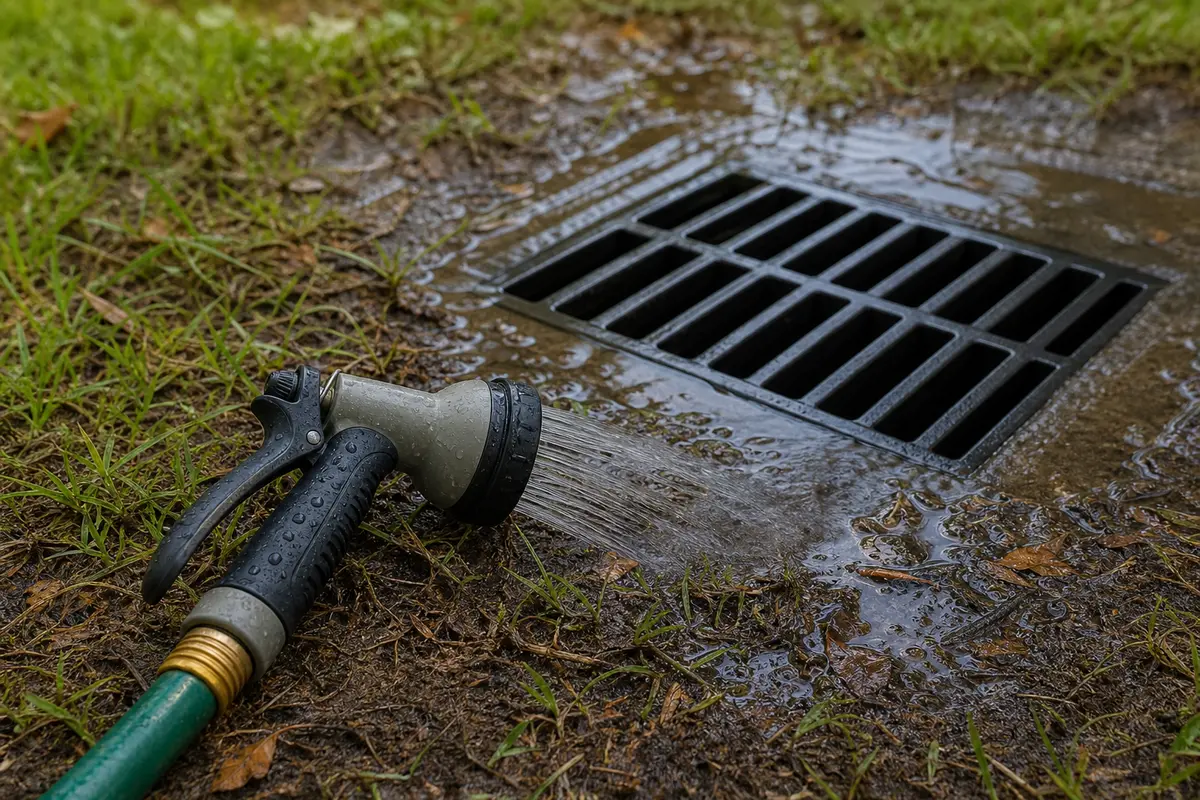
Helps when: Use gentle flow to see whether water travels from the catch basin to the outlet.
Skip it when: Skip forceful flushing when water backs up toward the house, surfaces along the route, or threatens the foundation.
Compare hose spray nozzles on AmazonAs an Amazon Associate I earn from qualifying purchases. Repair Riot may earn a commission at no extra cost to you.
Drainage parts belong in the cart only after the water pattern names the failure. Match size, shape, pipe connection, discharge height, and traffic load before ordering.
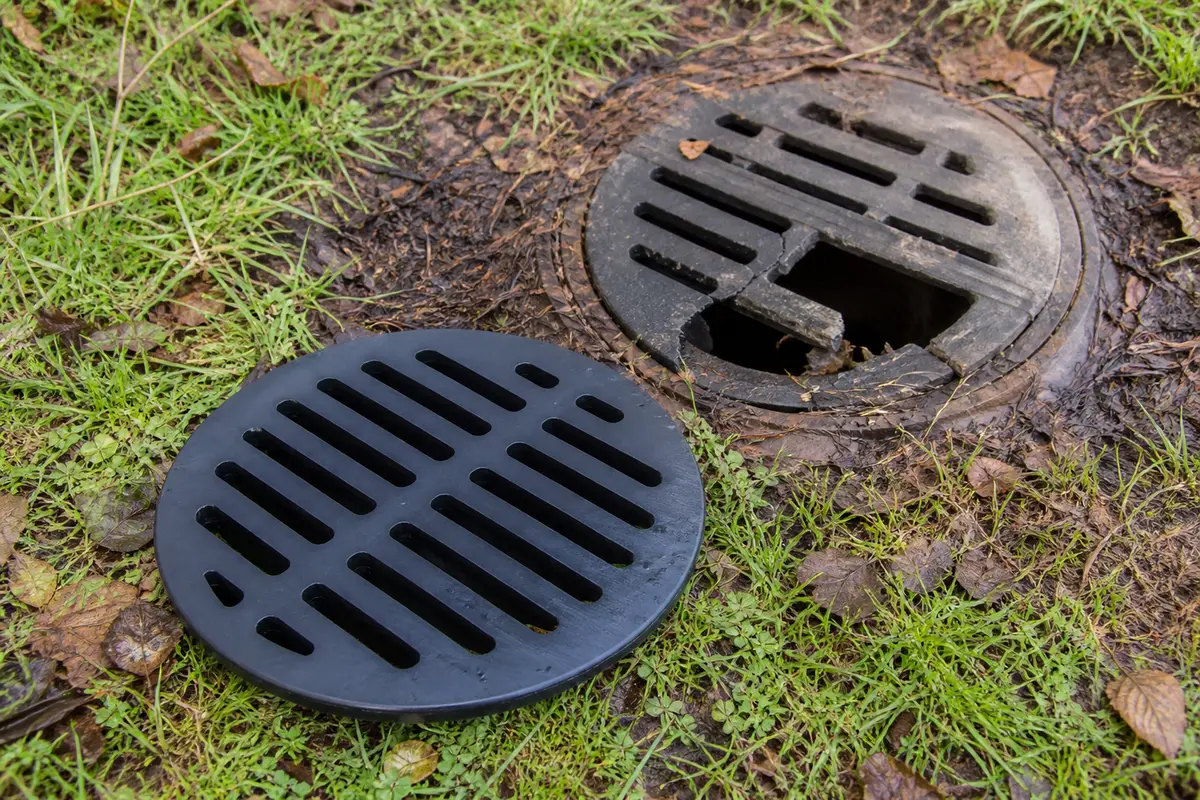
Helps when: Use one when the existing grate is cracked, missing, sunken, or shaped so it traps debris after the basin is clean.
Skip it when: Skip it when water enters the basin but cannot leave; a new grate will not clear a blocked outlet or buried line.
Compare catch basin grates on Amazon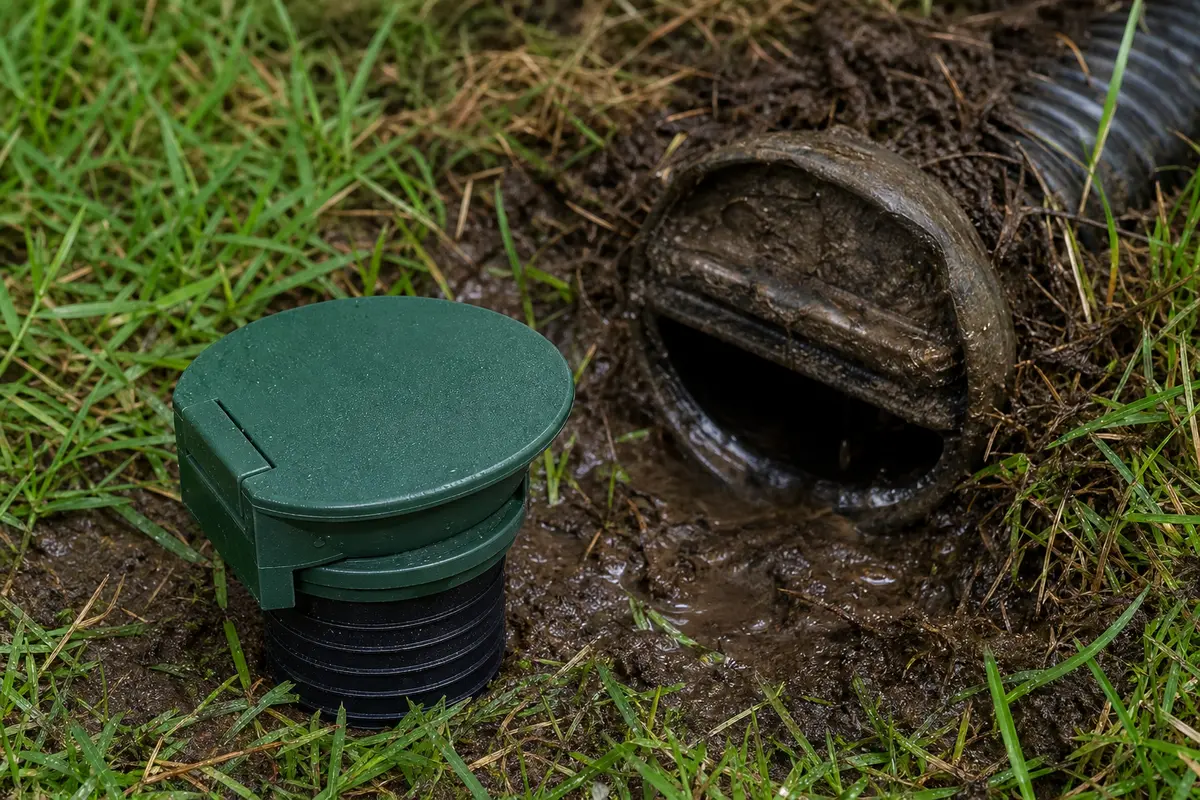
Helps when: Use one when the discharge cap is broken, jammed, missing, or buried shut and the line flows once opened.
Skip it when: Skip it if outlet flow is already strong or the restriction is somewhere in the buried run.
Compare pop-up drain emitters on Amazon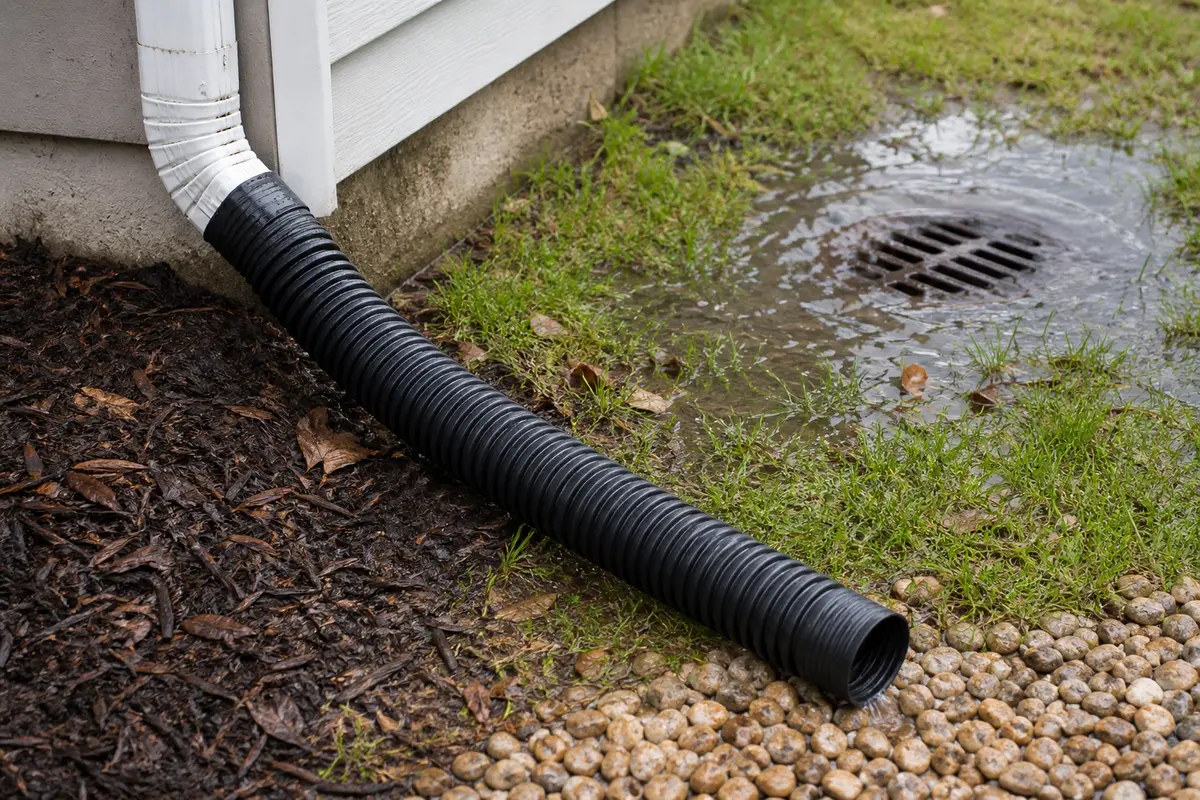
Helps when: Use one when roof runoff is overloading this drain and can be redirected before it reaches the basin.
Skip it when: Skip it when the problem is a packed basin, blocked outlet, or broken buried pipe.
Compare downspout extensions on AmazonAs an Amazon Associate I earn from qualifying purchases. Repair Riot may earn a commission at no extra cost to you.
If the grate is clear but the basin stays full, move downstream before replacing parts. Check the discharge point or pop-up emitter for grass, mud, mulch, and debris. If the outlet is open but flow stays weak, suspect a sagged buried section, crushed pipe, or root-filled line.
Yes. A drain can look open at the grate. It can still fail if the outlet is buried, the pipe has settled, roots entered the line, or runoff overwhelms one low point.
Only if the grate is clearly broken, missing, sunken, or fitting poorly enough to worsen debris entry. A new grate will not fix a blocked outlet, damaged buried line, or grading problem.
Find the discharge point and run a gentle hose flow into the basin. If little or no water reaches the outlet after the basin is clear, the restriction is between the basin and discharge point.
Sometimes, but only after you confirm the line path and outlet and only if you can avoid forcing water back toward the house. If the line may be crushed, root-filled, or tied into an unknown system, professional clearing is safer.
If the outlet flows strongly but water still sheets into one low area, watch where the runoff comes from during rain. When the basin and outlet are open and that spot still overloads, cleaning has done its job. The next decision is grading, roof-runoff routing, or drainage capacity.
Yes. Roof runoff can overwhelm a small yard drain or carry leaves and roof grit into the basin. Redirecting runoff can help only after the basin and outlet are confirmed open.
Call a drainage contractor when water threatens the house, the outlet cannot be found, or backups return right after cleaning. Also call if hose water surfaces along the route or the repair would require digging near utilities, hardscape, large roots, or structural slopes.
Repair Riot built this page around blocked grates, basin debris, outlet flow, hose-test results, runoff load, and utility-locating stop points.