Step-by-step fix
Step 1: Make sure the valve actually needs replacement and that you are allowed to replace it
- Dry the area completely with the water on so you can see whether the leak is coming from the valve body, the stem, or a nearby fitting.
- Operate the valve and open a downstream faucet to confirm whether it truly fails to shut water off, binds badly, or leaks when moved.
- Determine whether this valve is on the homeowner side of the system or part of a meter assembly or other utility-owned equipment.
- Look at the valve body, not just the first fitting you see. The body style and connection method tell you whether you are dealing with a simple homeowner replacement or a valve that needs more careful planning.
- If the leak is only from a nearby threaded joint or a loose packing nut, repair that issue first before assuming the whole valve has to be replaced.
If it works: You have confirmed the valve itself is worn out, damaged, seized, or no longer shutting off properly, and it is a valve you are actually allowed to replace.
If it doesn’t: If the leak is from a nearby joint or the valve belongs to the utility side, do not treat this as a normal homeowner valve replacement.
Stop if:- You cannot tell whether the valve is on the homeowner side or the utility side of the system.
- The piping is badly corroded, unsupported, cracked, or moves when you touch it.
- The valve is part of the meter assembly or any setup you do not have authority to disturb.
Step 2: Identify the exact replacement before you disconnect anything
- Figure out the pipe size and the connection type on both ends of the existing valve before buying a replacement.
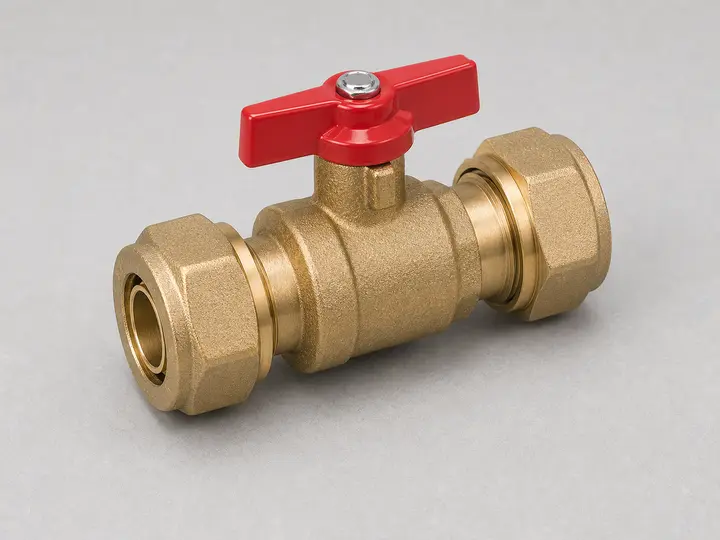
- Check whether the valve is threaded, compression, soldered, press-fit, or connected to PEX, and do not assume one style can replace another without extra fittings or rework.
- Compare body length, handle clearance, shutoff orientation, and overall layout so the new valve will fit without forcing the piping.
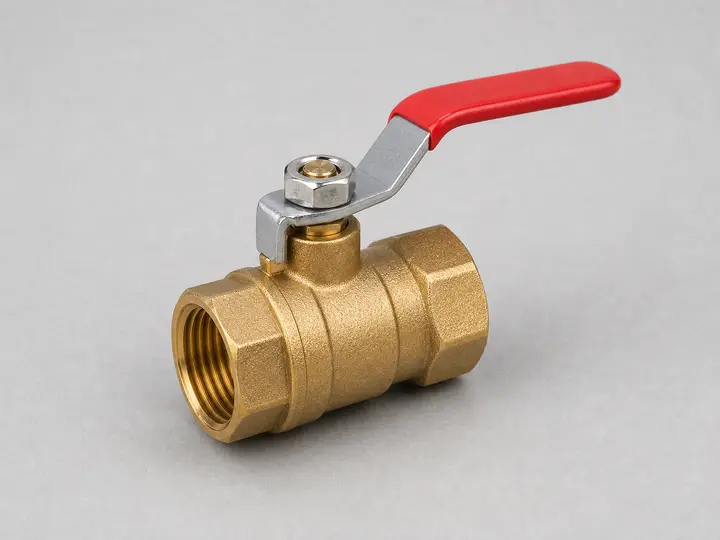
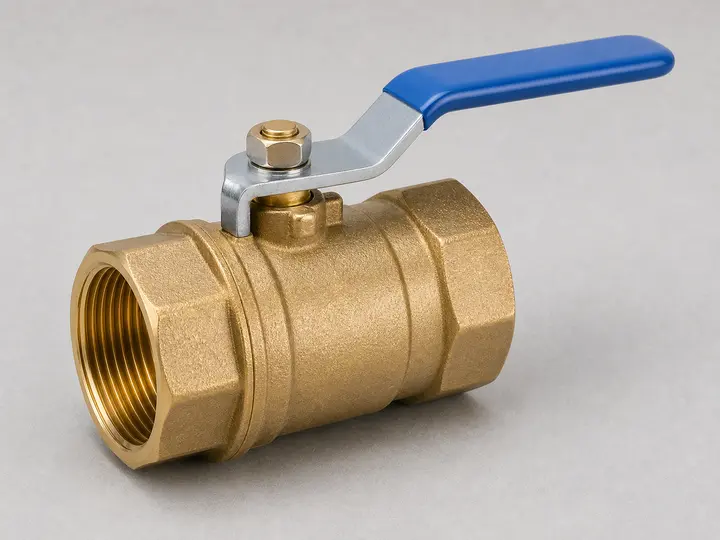
- When possible, choose a quality full-port ball valve that matches the existing connection method and materials.
If it works: You have a replacement valve that matches the pipe size, connection type, layout, and clearance of the existing setup.
If it doesn’t: If the new valve is only close enough or would require improvising under pressure, stop and get the correct parts first.
Stop if:- The replacement valve does not match the existing connection style exactly.
- Installing the new valve would require soldering, pressing, crimping, or pipe modifications you are not prepared to do safely.
- The new valve would force the pipe sideways or leave the handle impossible to operate.
Step 3: Shut water off upstream and drain the line fully enough to work cleanly
- Close the upstream water source feeding this valve, whether that is a curb stop, well equipment, or another shutoff you control.
- Open the lowest practical faucet in the home and another higher faucet to drain water and break vacuum in the line.
- Put a bucket and towels under the work area before loosening anything, because even a drained line will still hold some water.
- Wait until the flow slows to a drip so the line is no longer under pressure.
If it works: The line is depressurized and you are dealing only with residual water, not live pressure.
If it doesn’t: If water continues to flow steadily, the upstream isolation is not working well enough for a safe replacement.
Stop if:- You cannot get the line to stop running.
- You cannot safely access or control the upstream shutoff.
- The work area has electrical hazards, poor access, or surrounding finishes that cannot tolerate an accidental spray.
Step 4: Remove the old valve without twisting or damaging the house piping
- Use one tool to hold back on the fixed side and the second tool to turn the valve or nut so the pipe itself does not take the force.
- Loosen the valve slowly and let any trapped water drain into the bucket.
- Remove the old valve carefully, keeping the surrounding pipe in alignment rather than forcing it to flex.
- Clean the exposed threads or pipe ends and inspect them for cracking, thread damage, wall thinning, or severe corrosion before installing the new valve.
If it works: The old valve is out and the pipe ends are clean, sound, and ready for the new valve.
If it doesn’t: If the valve is stubborn, use steady controlled force with proper backup rather than muscling the whole pipe assembly.
Stop if:- The pipe starts rotating in the wall, floor, or meter area.
- Threads crumble, a fitting upstream breaks loose, or the pipe wall looks too thin to trust.
- Removing the valve reveals hidden water damage or structural deterioration around the penetration.
Step 5: Install the new valve squarely and only with the sealing method that fits that connection
- Threaded valves should be started by hand first so you can feel that they are engaging cleanly and not cross-threading.
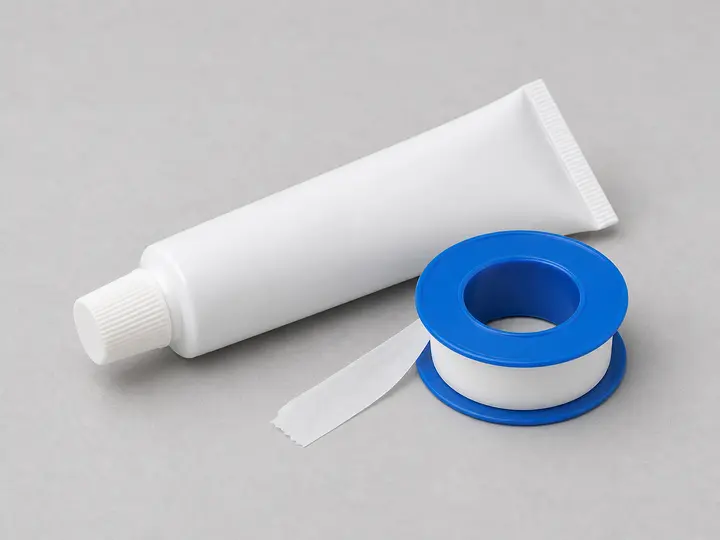
- Use the correct sealing method for that exact connection type and follow the valve manufacturer's instructions rather than treating every valve the same.
- Position the valve so the handle is accessible and the valve body is not being used to pull misaligned piping into place.
- Tighten the connection with backup support on the opposing side so the rest of the plumbing does not twist or deform.
- Leave the new valve closed before you restore water pressure.
If it works: The new valve is installed straight, supported, and ready for a controlled pressure test.
If it doesn’t: If the valve will not start cleanly by hand or will only line up when forced, stop and correct the fit before tightening further.
Stop if:- A threaded connection feels cross-threaded or cocks sideways as it tightens.
- The valve cannot align without forcing the piping.
- Any pipe, nut, or fitting begins deforming while you tighten it.
Step 6: Restore water slowly and prove the new valve works under pressure
- Open the upstream water source slowly and watch the new valve and nearby joints as pressure returns.
- Keep the new shutoff closed at first so you can confirm it holds pressure without leaking.
- Dry the valve body and all joints again, then look for seepage over the next several minutes instead of checking only once.
- Open the new valve, let air clear from the system, and then cycle it closed and open again to confirm it turns smoothly and actually stops downstream water flow.
If it works: The valve stays dry, operates smoothly, and fully shuts off the downstream water when you test it.
If it doesn’t: If a threaded joint weeps, shut the water back off, relieve pressure, and correct that connection before treating the job as finished.
Stop if:- Water leaks from the valve body itself.
- A connection keeps leaking after one careful correction attempt.
- The valve looks dry but still does not shut the water off fully when closed.
Valve options and supplies
As an Amazon Associate I earn from qualifying purchases. Repair Riot may earn a commission at no extra cost to you.
FAQ
Can I replace a main water shutoff valve myself?
Sometimes, yes, if the valve is clearly on the homeowner side, you can isolate water upstream, and the connection type matches tools and skills you already have. If the valve is on utility-owned equipment, the piping is corroded, or the connection requires methods you are not prepared to use safely, this is a job to hand off.
Is the main shutoff valve always mine to replace?
No. Some shutoff components near the meter or on the street side can be utility-owned or part of the meter assembly. You need to confirm ownership before you loosen anything.
What kind of replacement valve should I buy?
Buy a valve that matches the existing pipe size, body length, and exact connection style. In many homeowner-side repairs, a quality full-port brass ball valve is a strong choice, but only if it matches the way your current valve connects.
Can I replace an old gate valve with a ball valve?
Often yes, but only when the new ball valve matches the pipe size, connection style, and layout. The upgrade is not just about valve type. It still has to fit the existing plumbing correctly.
Why does water still come out after I shut the supply off?
A little water draining from the line is normal. A steady flow usually means the upstream shutoff is not fully closed, is not sealing properly, or you are not isolating the right part of the system.
Do I use thread tape on the new valve?
Only on threaded connections when the valve manufacturer and connection type call for it. Compression, soldered, press-fit, and other connection styles are sealed differently, so do not treat every shutoff valve the same.