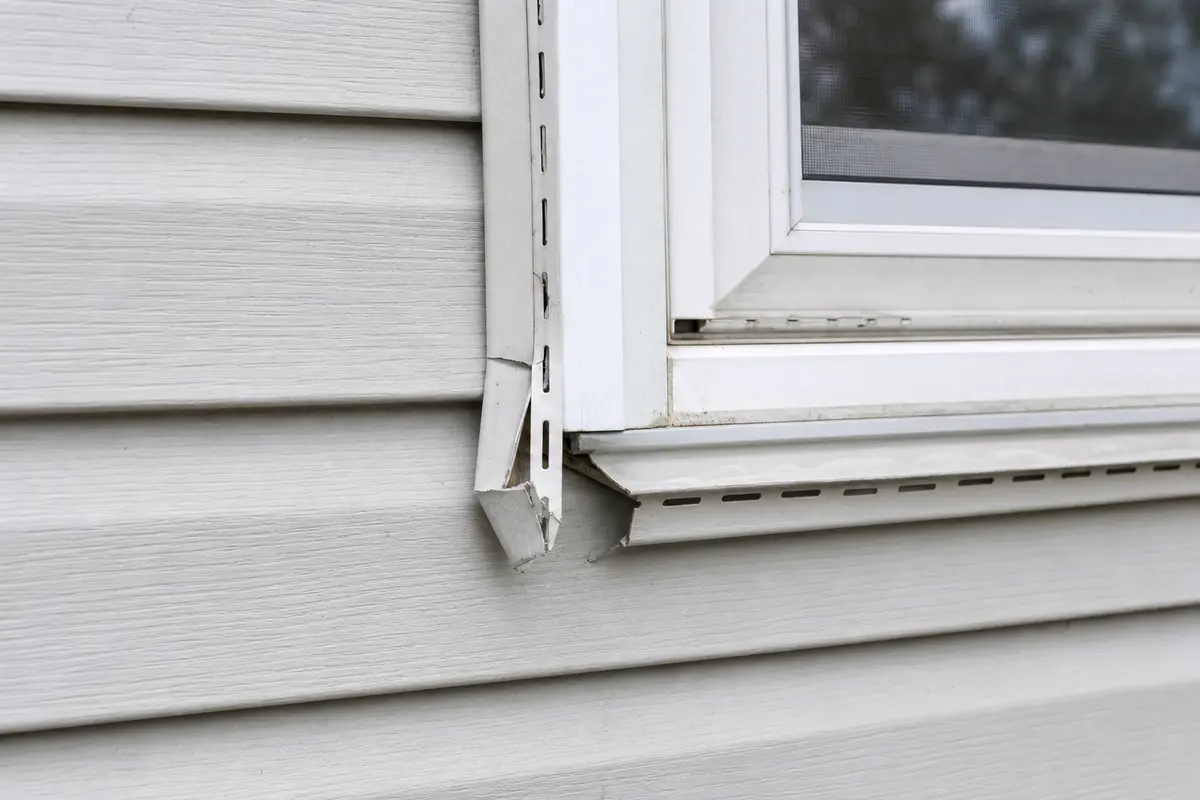
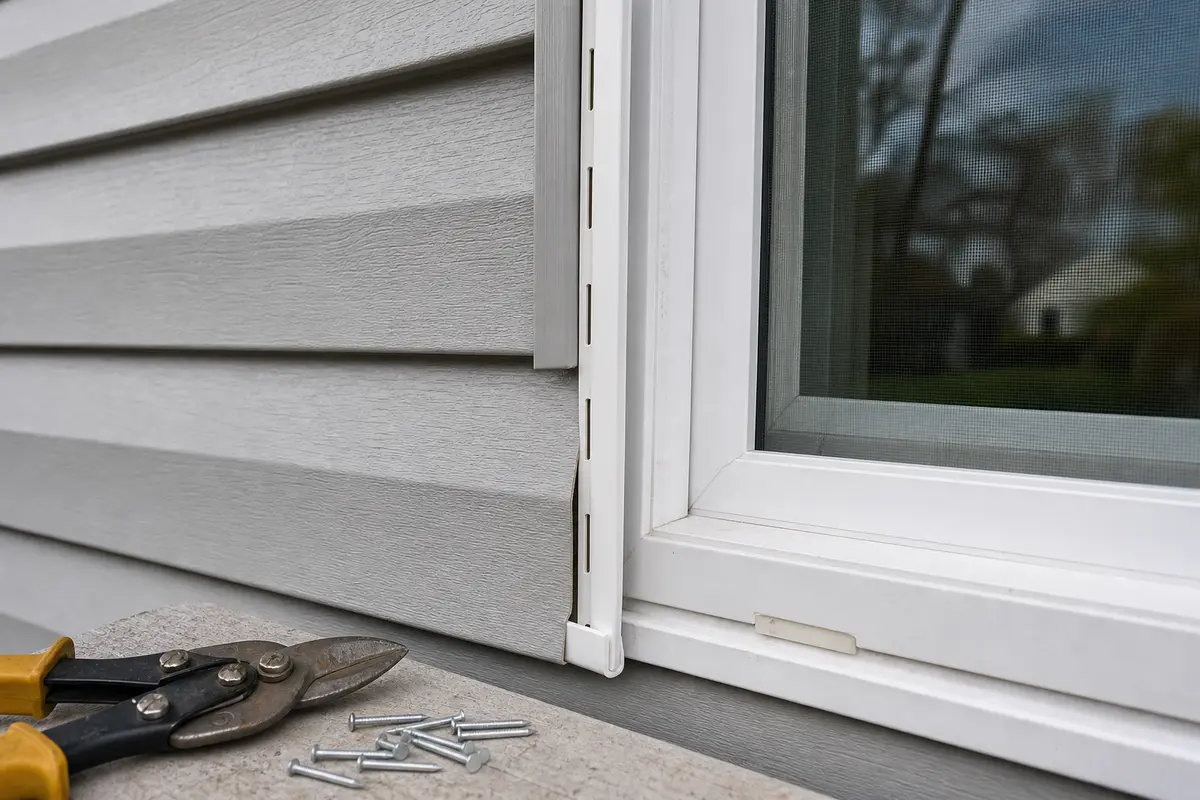
To replace damaged J-channel, unlock only enough siding to expose the nailing flange. Remove the old piece, match its profile and water-shedding overlap, cut and dry-fit the replacement, fasten it loosely enough to move, then re-seat the siding edge.
This is a trim-only repair only if the backing looks dry and solid and the nearby siding still flexes without cracking. Stop if the wall is soft or stained or the siding is brittle. Before cutting, compare the old channel depth and face width to the new piece.
Before you start: Before buying trim, compare the new J channel with the old profile. Measure the face width and channel depth, then check the material, color, and siding style. If the wall behind the trim feels soft or looks stained, moldy, or wet, stop and repair the water damage before new trim goes on.
Before replacing the J-channel, confirm what failed, what still supports it, and how the new piece needs to fit. Do not buy trim until loose siding, damaged backing, and water problems have been ruled out.
This page fits
Look for: The J-channel is visibly cracked, bent, missing, loose, or no longer holding the siding edge, and the surrounding wall still feels solid.
Next step: If the siding panel, sheathing, flashing, or backing is damaged, fix that condition before narrowing the job to this trim piece.
Confirm the profile first
Look for: You can compare the size, material, face width, channel depth, color, profile, and installation location before ordering or cutting anything.
Next step: If the old piece is missing or the fit is uncertain, look for a matching J-channel section nearby, then measure the face width and channel depth before ordering. If those numbers do not match, identify the siding system first; the new piece may not hold the siding edge.
Stop for hidden damage
Look for: The repair area is dry, solid, accessible, and safe to work on with normal hand tools.
Next step: Stop if you uncover rot, active leaks, burned wiring, missing backing, structural movement, or unsafe access.
Check the failure point and dry-fit before fastening
A J-channel replacement should restore the siding edge without trapping water or locking the trim too tight. Look for the failed corner or flange first, then dry-fit the new piece and confirm the siding can sit in the channel before nails go in.
Replace the trim when the channel is cracked, bent, or no longer holding the siding edge. Stop if the wall behind it looks wet or soft.Dry-fit the new J-channel before fastening. The siding edge should slide into the channel and the nailing flange should stay straight.
Safety first
Wear gloves because cut trim edges and siding nails are sharp.
Use a stable ladder if the repair is above reach, and do not overreach to one side.
Be careful when prying near older or brittle siding so you do not turn a trim repair into larger panel work.
Stop if you uncover soft wall material, active leaks, or damage that extends behind the trim.
Tools you may need
Tape measure — To measure the old J-channel length, face width, channel depth, and overlap before cutting the new section.
Tin snips — To cut the new J-channel cleanly without crushing the profile.
Pry bar or siding removal tool — To unlock the siding edge and expose the J-channel flange without prying against brittle panels.
Hammer — To start and set exterior fasteners while leaving the J-channel loose enough to expand.
Galvanized roofing nails — To secure the new J-channel through the nailing slots with corrosion-resistant nails that are not driven tight.
Work gloves — To protect your hands from sharp vinyl, aluminum, or flashing edges.
Step-by-step fix
Step 1: Confirm the J-channel is really the failed part
Look at the trim piece that receives the cut edge of the siding near the window, door, soffit, corner, or wall end.
Check for cracks, bends, split corners, missing pieces, pulled fasteners, or a channel opening that no longer holds the siding edge.
Press gently on the nearby siding. If the panel itself is cracked, oil-canned, shrunken, or warped, plan for siding repair too instead of replacing only the trim.
Look behind the loose trim with a flashlight where you can. The wall should look dry and solid, not dark, swollen, moldy, or crumbly.
Measure the visible face, channel depth, color, and profile of the old J-channel so the new section lines up with the existing siding system.
If it works: You have confirmed the trim is damaged, the backing looks sound, and a new J-channel section is the right repair.
If it doesn’t: When the panel is the main problem and the trim is still solid, replace or resecure the panel instead of the J-channel.
Stop if:
The wall sheathing or framing behind the trim feels soft, rotten, or water-damaged.
The trim damage appears to be part of a larger area of loose siding or structural movement.
You cannot safely reach the repair area from stable ground or a properly set ladder.
Step 2: Set up the area and free the damaged section
Put on gloves and clear space below the repair so falling trim or nails do not create a hazard.
When the siding edge is locked over the trim, use a siding removal tool to unzip only the panel edge needed to expose the J-channel flange.
Remove the fasteners holding the damaged section. Work one fastener at a time so you do not crack surrounding siding or bend trim you plan to keep.
Note which end overlaps the next trim piece. J-channel should shed water over the lower or downstream piece, not funnel water behind it.
Slide the damaged J-channel out and keep it as a pattern for length, end cuts, notches, and overlap if it is still mostly intact.
If it works: The damaged J-channel is out and the surrounding siding and trim are still usable.
If it doesn’t: If the old piece will not come free, remove one fastener at a time and loosen a little more of the siding edge rather than forcing it.
Stop if:
Removing the trim exposes hidden rot, mold, insect damage, or missing backing that needs repair first.
Nearby siding starts cracking or tearing because it has become brittle and may need broader panel work.
Step 3: Cut and dry-fit the new J-channel
Measure the opening or use the old piece as a guide, then mark the new section so the ends do not have to be forced into place.
Cut the new J-channel with tin snips so the ends are clean and the profile stays open, not flattened.
Copy any end notches, tabs, or overlap layout from the old piece so water can still shed to the outside.
Set the new piece in place before any nails go in. Check three things: the back sits flat, the face lines up with the surrounding trim, and the siding edge slides into the channel without force. If one end rocks or the panel catches, pull it back out and trim a little at a time.
If it works: The new J-channel matches the opening, keeps the correct overlap, and fits cleanly before any fasteners go in.
If it doesn’t: If the fit is tight, remove the piece and trim a little at a time until it sits flat and lines up with the surrounding trim.
Stop if:
The new profile does not match the existing siding system closely enough to hold the siding edge.
Step 4: Fasten the new J-channel without pinning it
Position the new J-channel so it sits flat against the wall and lines up with the adjacent trim.
Drive corrosion-resistant fasteners through the nailing flange into solid backing.
Center each fastener in the nailing slot where possible. Do not pin one end hard unless the original system specifically calls for it.
Do not drive the fasteners tight. Leave the head just proud enough that the trim can slide slightly with temperature changes.
Space the fasteners evenly along the flange and sight along the channel as you go so it stays straight instead of bowing between nails.
If it works: The new J-channel is secure, straight, and not crushed or pinned tight by the fasteners.
If it doesn’t: If the trim bows or twists, back out the last fastener, straighten the piece, and refasten with lighter pressure.
Stop if:
Fasteners will not hold because the material behind the trim is soft, crumbling, or missing.
Step 5: Re-seat the siding edge into the channel
Guide the siding edge back into the new J-channel a little at a time so it does not catch, buckle, or shave against the cut edge.
Reconnect any loosened siding lock carefully if you opened one to reach the trim.
Check the channel opening from end to end for burrs, bent lips, proud nail heads, or crushed spots before the panel is fully seated.
Watch the panel face as you press it in. Stop if the panel bows, oil-cans, or pulls the new trim out of line.
Check that the siding edge sits inside the channel consistently from end to end and that the panel can still move slightly.
Compare the finished reveal with nearby trim and leave no tight spots at the ends.
If it works: The siding edge is back in the channel and the repair looks aligned.
If it doesn’t: If the panel will not seat fully, stop and look along the channel before pressing harder. Check for a bent lip, a cut edge catching inside the channel, or a fastener head driven so tight it pinches the trim.
Stop if:
The siding panel is too damaged, shrunken, or misshapen to sit in the new channel and needs separate panel work.
Step 6: Test the repair in real conditions
Step back and sight along the wall to confirm the trim line is straight and the siding edge is fully supported.
Gently press on the siding near the repair to make sure it stays seated without rattling loose.
If practical, run a small amount of water above the area and watch from the outside only. Water should shed out and down, not disappear behind the trim.
Recheck the repair after a day of normal weather to make sure the siding edge has stayed in place.
If it works: The J-channel is holding, the siding edge stays seated, and the area looks stable in normal use.
If it doesn’t: Continued slipping or water behind the trim means the fit, overlap, backing, or flashing detail still needs correction.
Stop if:
Water is entering the wall assembly or staining appears inside the home after the repair.
The trim repeatedly loosens, which points to hidden damage or the wrong repair approach.
Verify the repair
The new J-channel matches the old profile closely enough to support the siding edge.
Fasteners are secure but not driven so tight that the trim cannot move slightly.
The siding edge sits fully inside the channel along the whole repair.
The trim line looks straight and the area does not loosen during normal weather exposure.
FAQ
What does J-channel do?
It receives and finishes the cut edge of siding around openings and ends. It also helps support the edge and guide water away when installed correctly.
Can I replace only one damaged section of J-channel?
Yes, if the surrounding trim is solid and the replacement follows the same overlap. Check the next section before you cut. Look for bent trim, loose fasteners, fading, leak staining, or a panel edge that no longer sits in the channel. If damage shows up past one spot, replace a longer run so the joints land cleanly.
Do I need caulk or sealant when replacing J-channel?
For a basic like-for-like siding trim replacement, no. Check the panel edge for fit, overlap, movement, and drainage before you reach for sealant. The siding edge needs to sit in the channel without being sealed in place, and water still needs a way out. Do not caulk weep paths or trap water. If the original opening has a specific flashing or sealant detail, preserve that detail instead of inventing a new one.
Why can't I nail the J-channel tight?
Vinyl siding trim needs room to move with temperature changes. If you pin it tight, it can buckle, distort, crack around the fastener, or make the siding edge bind in the channel.
What if the siding still looks loose after I replace the J-channel?
The problem may be a damaged siding panel, missing backing, shrinkage, wrong channel depth, or a larger flashing issue. Recheck the panel edge, the fastener hold, the trim profile, and the wall condition behind the repair.
Sources and reference notes
Repair Riot used current siding installation resources and related field pages to shape the fit, fastening, movement, drainage, and stop-condition guidance in this J-channel repair.