Direct answer: Replace an angle stop shutoff valve only after you identify the pipe type and connection style. Shut water off upstream, hold the stub-out with a second tool, install the matching valve, and bring pressure back slowly while checking every joint.
A clean angle stop swap works because the pipe is solid and the new valve matches. Trouble starts when a compression ferrule is crushed, CPVC is brittle, PEX needs a specific adapter, or the pipe in the wall twists while you are trying to loosen the old valve.
Before you start: Identify the pipe material and connection type before buying anything. Match the inlet, outlet, valve orientation, and supply line size, shut water off upstream, and stop if the stub out is short, loose, corroded, or wet at the wall.
Last reviewed: 2026-05-28
Pick the right angle stop repair before you loosen anything
Most trouble with angle stops starts with the wrong fitting or a damaged pipe end. Use this check before you buy parts or put a wrench on the old valve.
Valve leaks from the stem or will not shut off
This page fits when: This page fits when the valve body, stem, or internal shutoff is the problem and the pipe stub-out is solid.
Check something else when: If water is coming from the supply tube nut above the valve, tighten or replace the supply line before replacing the angle stop.
Compression valve on copper pipe
This page fits when: This is a common homeowner replacement if the copper stub-out is long, round, clean, and can accept a new ferrule.
Check something else when: If the old ferrule is crushed, the pipe is scored, or the stub-out is too short, this repair is no longer a good DIY candidate.
CPVC, PEX, threaded, push-fit, or soldered connection
This page fits when: The steps still help you understand the job, but the replacement valve must match the pipe material and connection system exactly.
Check something else when: Do not mix connection types. CPVC and PEX often need specific adapters, and soldered valves are best left alone unless you are comfortable with torch work.
Pipe moves in the wall or cabinet is wet
This page fits when: This is no longer a simple valve swap until the hidden condition is understood.
Check something else when: A loose stub-out, swollen cabinet floor, wet wall, or corrosion at the wall opening can turn a small repair into an opened-wall plumbing job.
Check the pipe before you loosen the valve
The valve body is only half the repair. The pipe material, compression nut, ferrule, and outlet direction decide what replacement will seal safely.
Hold the pipe or valve body steady while loosening the old valve. Twisting the stub-out can turn a simple shutoff swap into a wall repair.
Step-by-step fix
Step 1: Make sure valve replacement is the right repair
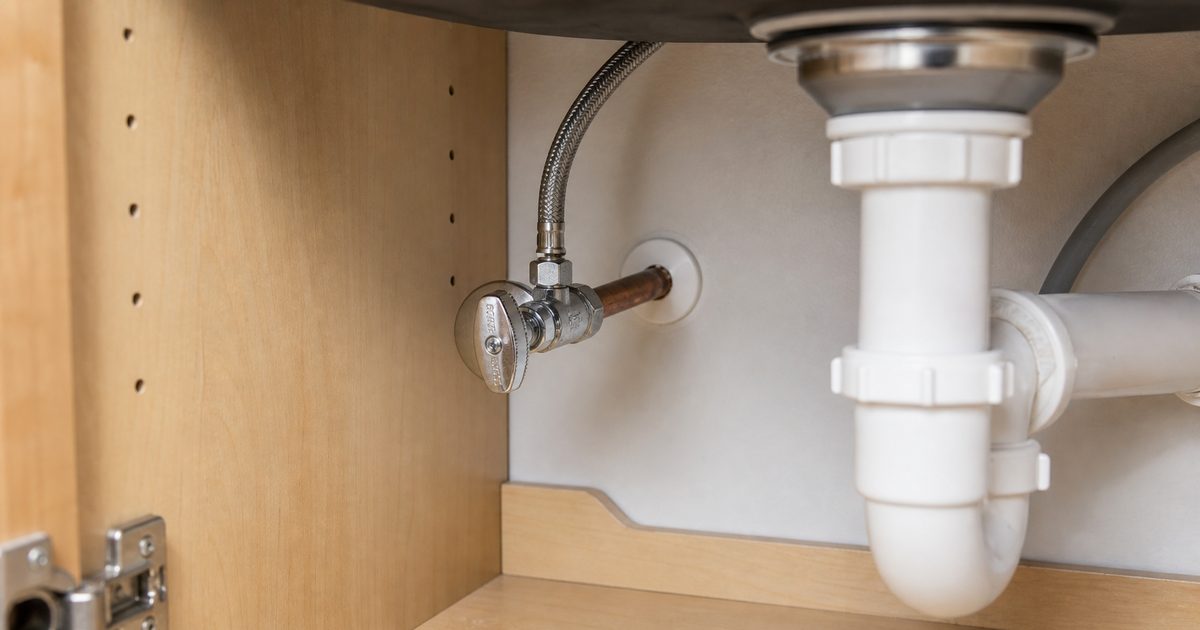
Look at the angle stop shutoff valve under the sink or behind the toilet and confirm the problem is at the valve itself, not just at the supply tube connection above it.
Turn the valve handle clockwise to see whether it stops the water flow. If the fixture still runs, the valve likely is not sealing internally.
Check for water around the stem, body, or outlet threads. A steady drip from the valve body or stem usually points to a worn valve, not a simple loose connection.
Identify how the valve connects to the pipe coming from the wall or floor. Common connection styles include compression, threaded, push-fit, and soldered.
Identify the pipe material too. Copper, CPVC, and PEX may need different valves or adapters even when the valve looks similar.
Read the outlet size on the old valve if visible, or compare it to the supply line so you buy the same size and orientation.
Take a clear photo of the valve, pipe stub-out, and supply line before shopping. That photo is often what keeps you from buying the wrong valve.
If it works: You have confirmed the valve itself is the problem, and you know the connection style and outlet size to buy.
If it doesn’t: If the leak is only at the supply tube nut, try tightening that connection slightly or replacing the supply line before replacing the valve.
Stop if:
The pipe coming from the wall is loose, badly corroded, cracked, or moves inside the wall.
You cannot identify the valve connection type with confidence.
The valve appears soldered on and you are not comfortable using heat near finished surfaces.
The wall or cabinet floor is already wet, swollen, or soft around the pipe opening.
Step 2: Shut off the water and relieve pressure
Close the home's main water shutoff valve.
Open a faucet at a lower level of the home, then open the faucet served by the angle stop to relieve pressure and drain the line.
Turn the old angle stop back open after the main is off so trapped pressure can bleed down.
Place a bucket or shallow pan under the valve and lay down rags around the work area.
Disconnect the fixture supply line from the outlet side of the angle stop shutoff valve.
If it works: Water flow has stopped, pressure is relieved, and the supply line is disconnected with the area protected for drips.
If it doesn’t: If water keeps running strongly after the main is shut off, the main shutoff may not be closing fully and this repair should wait until that is addressed.
Stop if:
The main water shutoff will not close or does not stop water flow enough to work safely.
Step 3: Remove the old angle stop shutoff valve
Hold the pipe or old valve body with one wrench or pliers so the stub-out does not twist.
For a compression valve, loosen the compression nut and slide the valve off the pipe. If the old ferrule and nut are in good shape and the new valve is designed to reuse them, follow the new valve instructions. Otherwise remove them with a compression sleeve puller or cut back to clean pipe if you have enough length.
For a threaded valve, unscrew the valve from the threaded adapter while holding back the pipe or fitting behind it.
For a push-fit valve, release it according to the fitting design and pull it off the pipe.
Wipe the exposed pipe clean and inspect the pipe end for scoring, deep corrosion, out-of-round damage, burrs, or old sealant that would keep the new valve from seating.
If it works: The old valve is off and the pipe end is clean and ready for the new valve.
If it doesn’t: If the old compression sleeve will not come off cleanly, use a sleeve puller or cut back to a fresh section of pipe if enough pipe remains.
Stop if:
The pipe is too short, badly damaged, out of round, or too corroded to seal a new valve reliably.
Removing the old valve loosens the pipe in the wall or reveals hidden leakage inside the wall opening.
Step 4: Install the new valve in the correct orientation
Dry-fit the new angle stop shutoff valve first and make sure the outlet points toward the fixture without forcing the supply line into a sharp bend.
If it is a compression connection, slide the nut and ferrule onto the pipe, push the valve fully onto the pipe, then tighten the compression nut while holding the valve body with a second wrench.
If it is a threaded connection, apply the appropriate thread sealant only where that connection type calls for it, then thread the valve on and tighten while holding back the mating fitting.
If it is a push-fit connection, mark the insertion depth if needed and push the valve on fully until it seats.
Leave the valve in the closed position before turning the water back on.
Do not use pipe dope or tape on compression ferrules or push-fit connections unless the manufacturer specifically calls for it.
If it works: The new valve is installed squarely, supported during tightening, and aimed correctly for the fixture connection.
If it doesn’t: If the valve does not sit straight or the outlet points the wrong way, fix it now. Once the water is back on, small fit problems become leaks.
Stop if:
The new valve does not match the pipe size or connection type.
You cannot tighten the valve without twisting the pipe coming from the wall.
Step 5: Reconnect the supply line and restore water slowly
Reconnect the fixture supply line to the outlet of the new angle stop shutoff valve and snug the connection without overtightening.
Make sure the fixture faucet or toilet fill valve is ready for water, and keep the new shutoff valve closed.
Turn the home's main water back on slowly.
Watch the new valve for a full minute as pressure returns to the branch line.
Open the new angle stop shutoff valve slowly and let water flow to the fixture while checking the inlet and outlet connections for drips.
If it works: Water is back on, the fixture is supplied, and there are no visible leaks at the new valve or supply connection.
If it doesn’t: If you see a small drip at a compression or supply connection, shut the water back off and tighten that connection a little more while holding the valve body steady.
Stop if:
Water sprays, the leak worsens quickly, or the pipe shifts when pressurized.
A threaded or push-fit connection will not seal after being installed correctly.
Step 6: Verify the repair holds in normal use
Run the faucet for several minutes or flush the toilet several times so the valve sees normal pressure and flow.
Turn the new angle stop shutoff valve off and confirm the fixture water stops fully, then turn it back on again.
Dry the valve and surrounding area completely, then check again after 10 to 15 minutes for fresh moisture.
Check one more time later the same day. Slow compression leaks sometimes show up after the pipe has been pressurized for a while.
Look at the wall or floor around the pipe stub-out for any delayed seepage that could point to hidden damage disturbed during the repair.
If it works: The new valve opens and closes properly, the fixture works normally, and the area stays dry after real use.
If it doesn’t: If the valve still will not shut off fully or a slow leak returns, recheck that you installed the correct valve and connection method, then replace the sealing parts or valve as needed.
Stop if:
Moisture appears from inside the wall or floor rather than from the valve connections.
The new valve body leaks from a factory seam or the stem area right after installation.
Match the pipe connection type, outlet size, and valve orientation before ordering. Compression, threaded, push fit, and soldered valves are not interchangeable.
As an Amazon Associate I earn from qualifying purchases. Repair Riot may earn a commission at no extra cost to you.
FAQ
Can I replace an angle stop shutoff valve without turning off the main water?
Not safely. You need the main water off before removing the old valve, or the branch line will keep feeding water into the room.
How do I know which replacement valve to buy?
Match three things: the pipe connection type, the outlet size for the supply line, and the valve orientation. A clear photo of the old valve and pipe stub-out helps, and taking the old valve with you after the water is safely off is even better.
Should I reuse the old compression nut and ferrule?
Sometimes, but only if the new valve is designed for that and the old parts are in good shape. If they are damaged, corroded, or do not match the new valve well, replace them.
Why does the new valve still drip after I installed it?
The most common causes are a slightly loose connection, a damaged pipe end, a crooked compression ferrule, the wrong connection type, or a supply line connection that is leaking above the valve and running down.
What if the pipe coming out of the wall is too short after I remove the old valve?
That is a real escalation point. A very short or damaged stub-out may need additional plumbing work inside the wall or a different repair approach. Do not rely on barely engaged fittings for a pressurized supply line.