Do the marks wipe down to dull paint scuffs with no groove?
Clean, feather-sand lightly, prime bare spots if any, and repaint enough of the panel or trim run to blend the sheen.
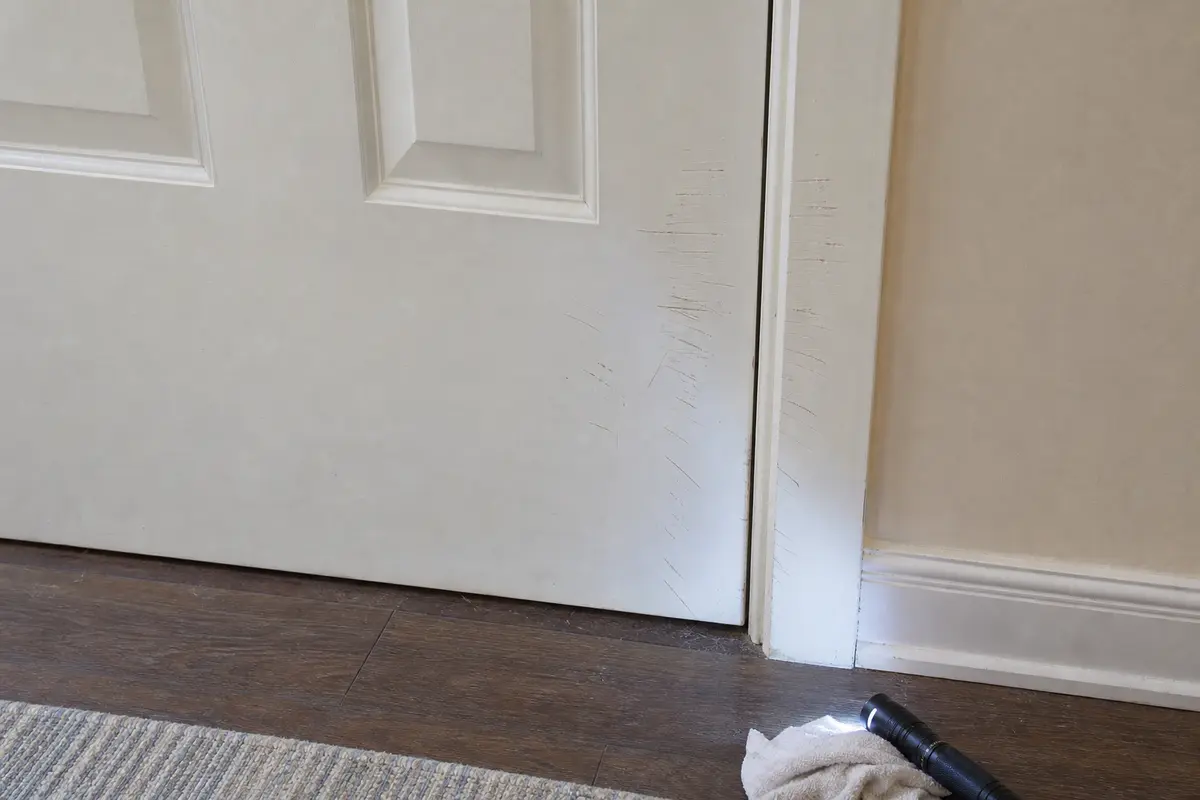
Usually, clean the scratches first, rake a flashlight across the paint, and run a fingernail over each mark. Flat scuffs need light prep and blended paint. Firm grooves need thin filler, primer, and sanding; loose casing, swelling, or flexing hollow-core skin is repair first.
Most dog scratches are shallow claw grooves in sound paint or trim. Look for a hard, dry door edge and tight casing before filler belongs there.
Sort the damage in this order: scuff, groove, loose trim, torn skin, or moisture near the lower corner.
Don’t start with: Do not bury claw marks under caulk, spackle, or heavy paint. If the groove has shape, it will show again until the surface is flat.
Clean, feather-sand lightly, prime bare spots if any, and repaint enough of the panel or trim run to blend the sheen.
Use thin coats of paintable wood filler, sand flush between coats, then spot-prime before finish paint.
Treat a hollow-core skin as a replacement case when it will not stay firm enough for a flat patch.
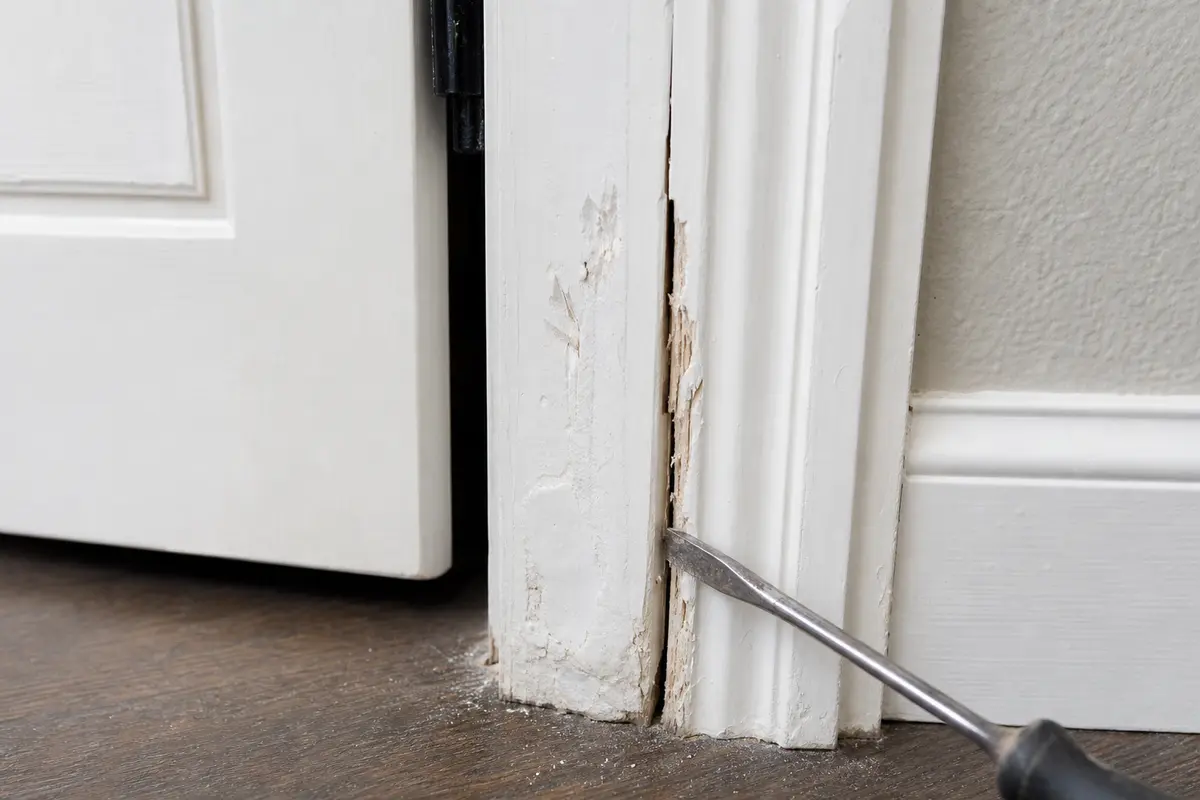
Repair or replace that trim piece first. Paint and filler cannot hold a clean edge on loose wood.
Pause the cosmetic repair and look for moisture or an old failed patch before sealing the area again.
Do not guess at slab replacement or edge repair. Preserve the door rating and hardware fit by calling a qualified carpenter or door pro.
Start wide enough to see the slab, casing, jamb, and baseboard, then move close. A firm scratched face is a finish repair; loose trim, swelling, or a torn skin changes the job.
Hold off on materials until the exact surface test points somewhere. Filler belongs on dry, hard grooves. Casing has to match the old profile and reveal. A slab has to match size, thickness, swing, bore prep, hinge layout, and door type.
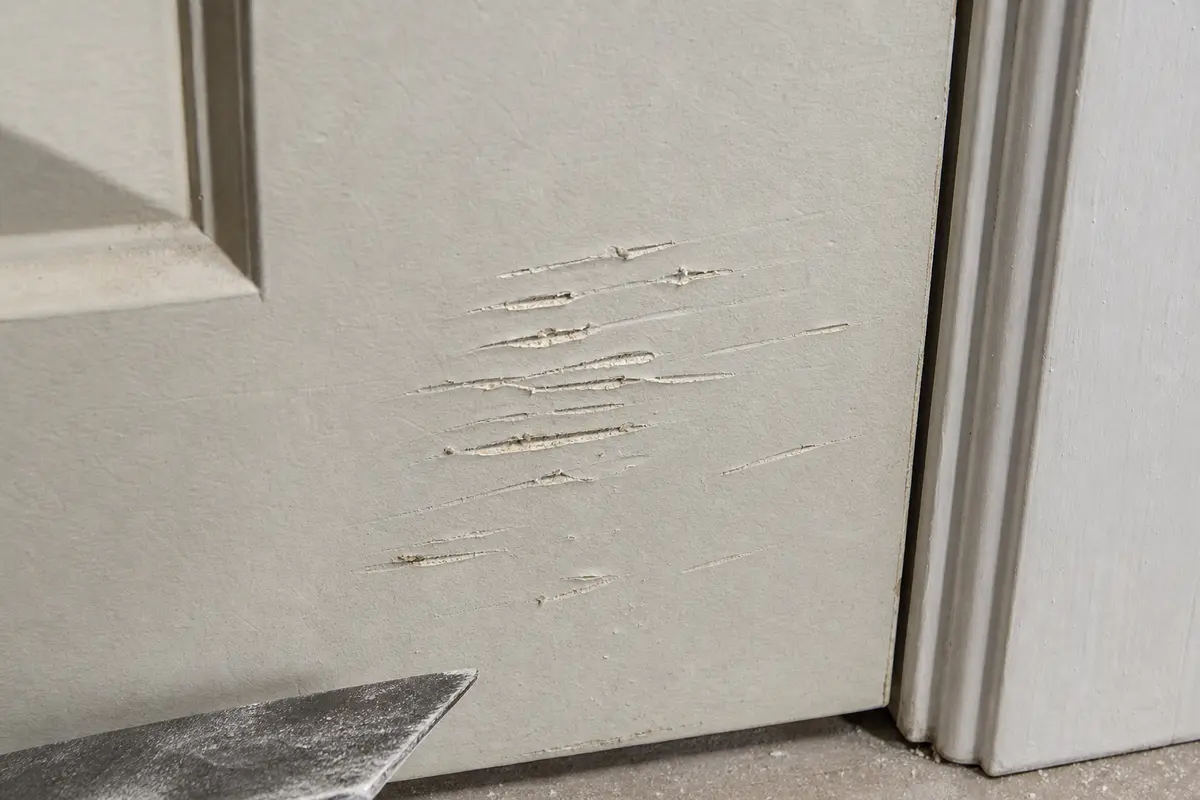
Dog scratches look worse than they are when white paint chips expose dark grooves. The useful split is simple: is the material under the paint still firm, attached, and dry?
The fast cover-up is usually what makes this repair show through later.
Use one clean inspection pass before shopping. The right repair is based on feel, movement, and where the scratches land.
| What you find | What it usually means | Next move |
|---|---|---|
| Dull scuffs, no groove, no missing paint edge | The damage is mostly in the finish. | Clean, feather-sand lightly, prime bare spots, and repaint a blended area. |
| Nail catches in narrow grooves, but the surface is hard | Shallow gouges in sound material. | Use paintable wood filler in thin coats, sand flush, spot-prime, and repaint. |
| Casing profile is chipped, split, loose, or missing a long edge | The trim piece is damaged, not just the paint. | Re-fasten or replace the casing section before primer and paint. |
| Hollow-core door skin is torn, lifted, crushed, or flexing | The skin may not support a lasting flat patch. | Price a matching slab or call a door pro if the opening or door type is special. |
| Swelling, dampness, peeling sheets, or crumbly old filler | Moisture or a failed previous repair may be under the scratches. | Find the source and remove unsound material before sealing the area again. |
Use touch and side light before you open the filler tub. The goal is to find the deepest real damage without making the repair area larger.
Compare materials only after the scratch depth and damaged piece are clear. Filler is for sound shallow grooves; replacement casing is for split or loose trim that will not hold a clean painted edge.
Paid links. As an Amazon Associate I earn from qualifying purchases. Repair Riot may earn a commission at no extra cost to you.
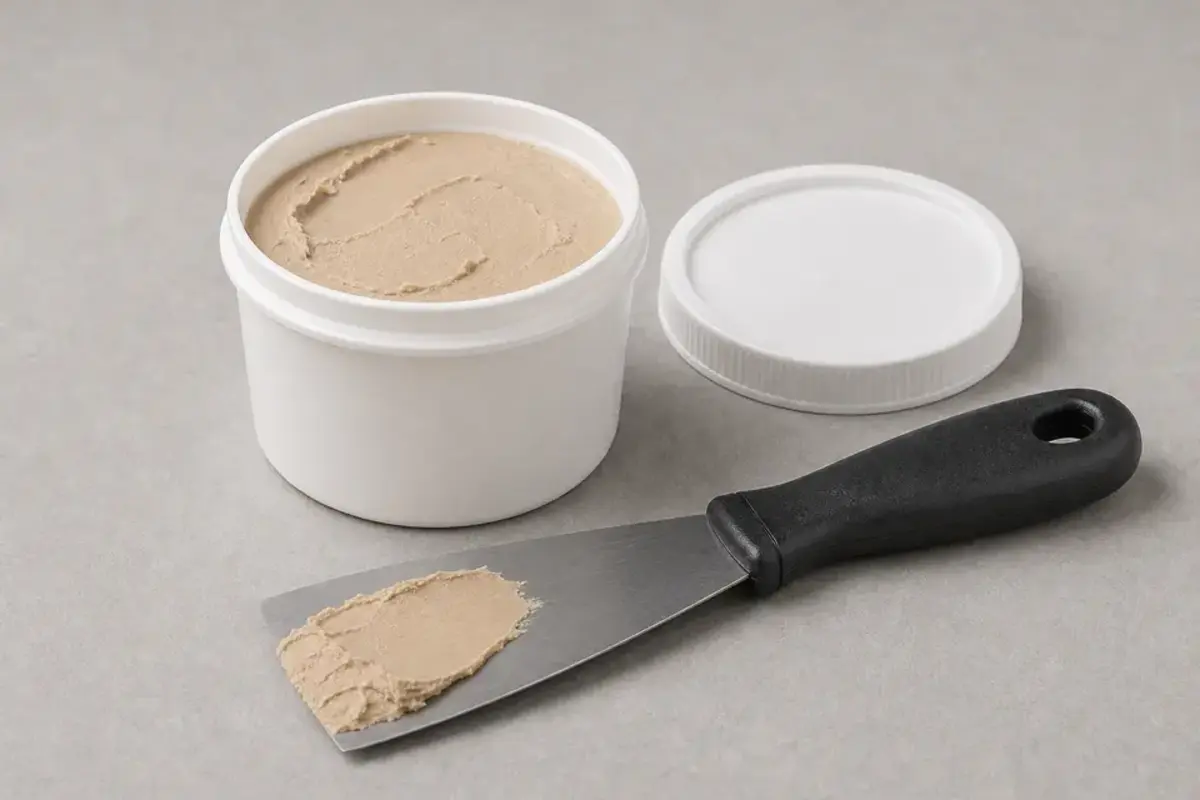
Helps when: Use it after the grooves catch a fingernail and the door face, jamb, or casing still feels hard, dry, and attached. Build the patch in thin coats before primer.
Skip it when: Skip it if the door skin flexes, the casing moves, or the area is swollen, damp, crumbly, or peeling in sheets.
Compare paintable wood filler on Amazon
Helps when: Compare trim after the casing is split, loose, missing its profile, or too chewed up to finish flat. Match width, thickness, profile, and reveal before ordering.
Skip it when: Skip casing trim when the damage is only shallow scuffing. If the door slab skin is torn or flexing, treat that as a slab repair or replacement instead.
Compare door casing trim on AmazonReplacement is cleaner when the damaged piece will not stay still or hold a crisp painted edge.
A good patch will fail quickly if the same door keeps getting hit.
Only if they look like true surface scuffs with no groove. Clean the area and feel across the marks; if a fingernail catches, paint alone leaves visible trenches and shiny ridges.
Use paintable wood filler when the trim is dry, hard, and only gouged. Use thin coats, sand flush, prime, and skip filler when the casing is split or moving.
No. Use caulk for small joints and gaps, not flat claw grooves. On a door face or trim flat, it stays flexible and shows through paint.
Replace the slab when a hollow-core skin is torn through, crushed, delaminating, or flexing around the damage. Filler needs a stable face to stay flat.
Yes, if the casing is only gouged and still tight to the wall. Replace the piece when the profile is broken off, split through, loose, or missing too much edge to shape cleanly.
Look at the patch in side light. A valley or ridge means the groove was not filled flush or the filler shrank. A dull spot points to bare filler that was not primed or paint sheen that does not match.
Check for swelling, staining, softness, or peeling paint near the floor before filling. Lower corners can have pet damage and moisture damage at the same time.
Yes. Press lightly beside the scratches and look near the lower edge; soft, swollen, peeling, damp, or crumbly material points to moisture damage or an old failed patch, not just claw marks.
Repair Riot built this page around homeowner-visible clues: scratch depth, door-skin firmness, casing movement, swelling, old paint risk, and whether the damaged piece is replaceable trim or the door slab itself.