Fresh frass returns after cleanup?
Treat the activity as current. Keep the clue visible, watch the entry point, and do not seal the holes yet.
Carpenter ants at a window frame usually point to damp or previously softened wood. Clean up the frass, watch for fresh debris, then probe the lower sill and side jamb before you patch, caulk, or buy trim.
The damage often starts in wet trim, stool ends, lower jamb edges, or sill corners. Clean the frass once, then probe those lower spots before you decide the whole window unit is bad.
Fresh frass, hollow sounds, blistered paint, and a probe that sinks at the lower corner are the useful clues.
Don’t start with: Do not seal the holes, spray blindly into the wall, or order a replacement window from the ant holes alone. Before buying anything, check whether fresh frass returns and whether the lower jamb and sill still feel dry and solid.
Treat the activity as current. Keep the clue visible, watch the entry point, and do not seal the holes yet.
Old or shallow damage is possible. Clean loose fibers and watch it before buying filler or trim.
Moisture has weakened the frame area. Find the wetting path before any finish repair.
A trim repair may be enough if the jamb and backing behind it are dry, hard, and not active with ants.
Stop DIY finish work. The repair may involve the frame, rough opening, exterior water entry, or pest treatment.
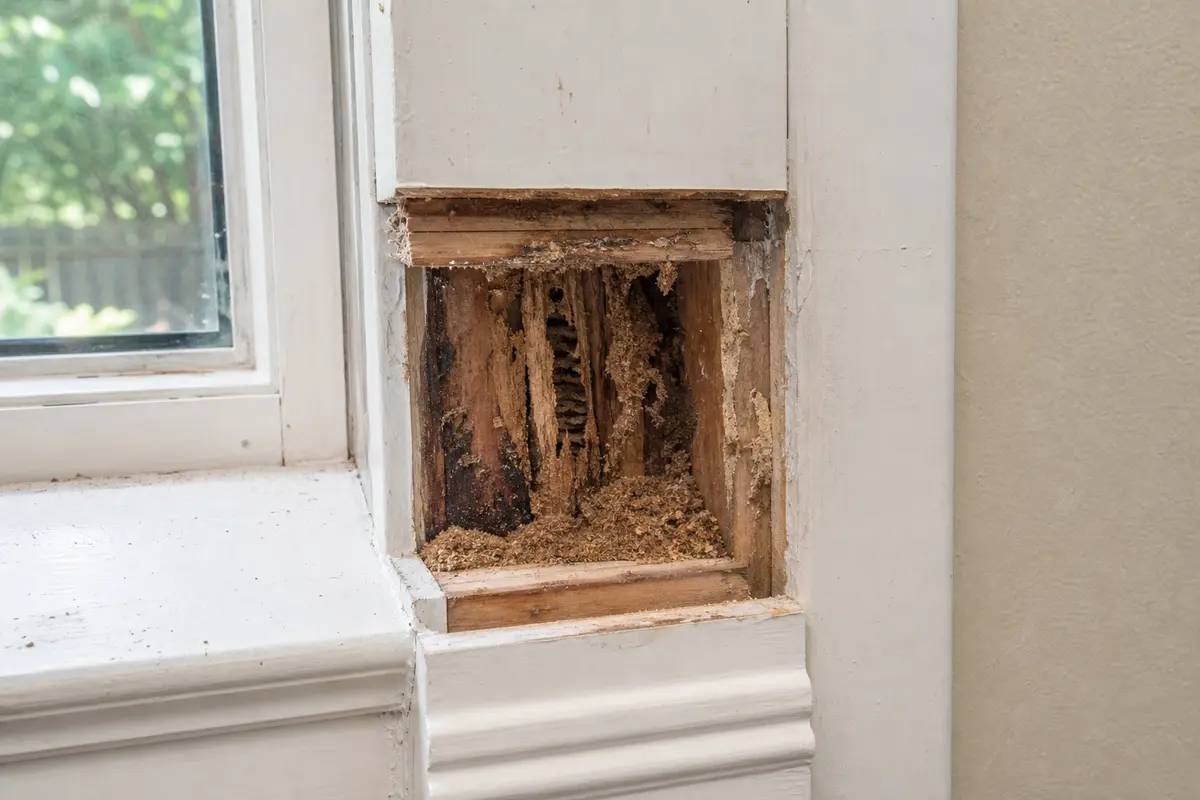
The important clues sit at the lower corners: fresh frass after cleanup, soft wood under the paint, and what one opened section shows behind the trim. Check those before filler, caulk, or a replacement-window decision.

Do not buy a replacement window, trim board, filler, weatherstripping, or pesticide from the ant holes alone. Match the buy to the exact diagnosis: fresh frass or live ants, dry versus damp wood, and trim-only damage versus a soft jamb or sill. For trim, match the existing profile, thickness, reveal, and material. Use filler only for small non-structural voids in hard wood.
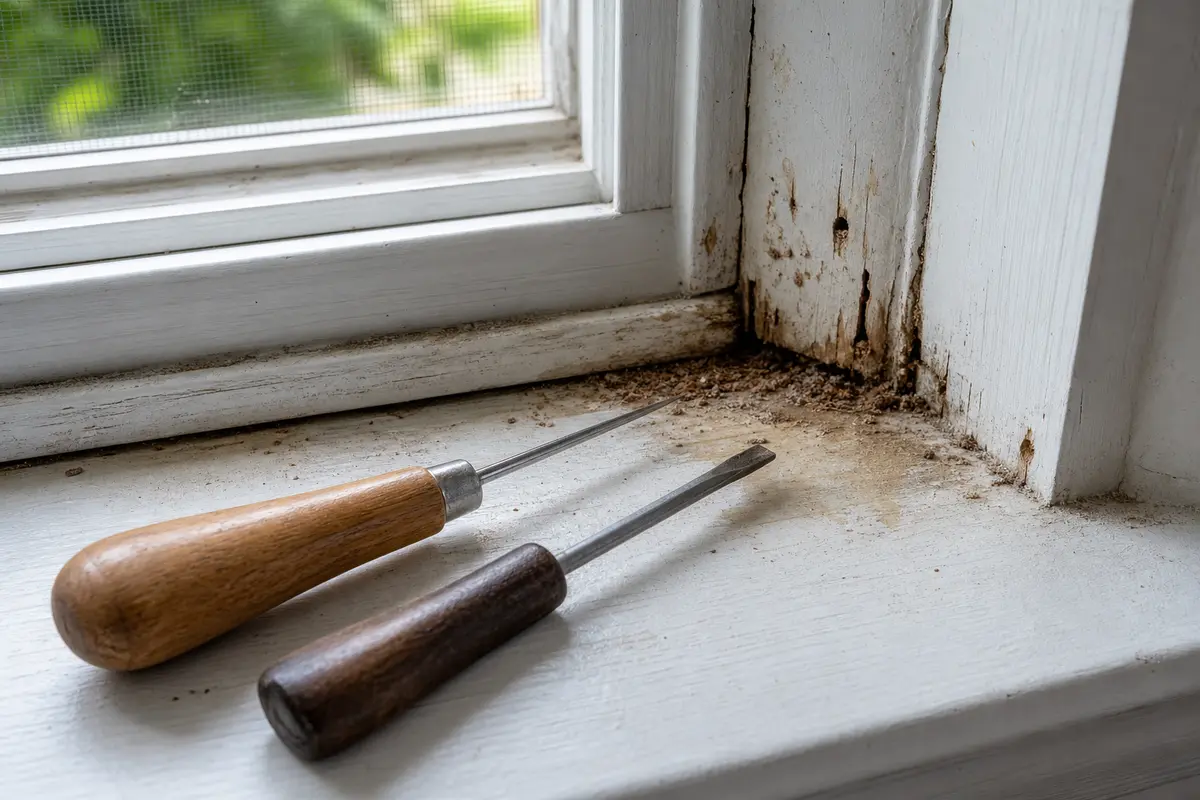
Coarse sawdust-like frass is the first useful clue. Clean it once, then see whether it comes back from the same lower corner, jamb crack, or casing joint. That tells you more than the size of the visible hole.
Paint can make weak wood look better than it is. A light probe at the lower corners separates a surface scar from a frame area that has lost strength.
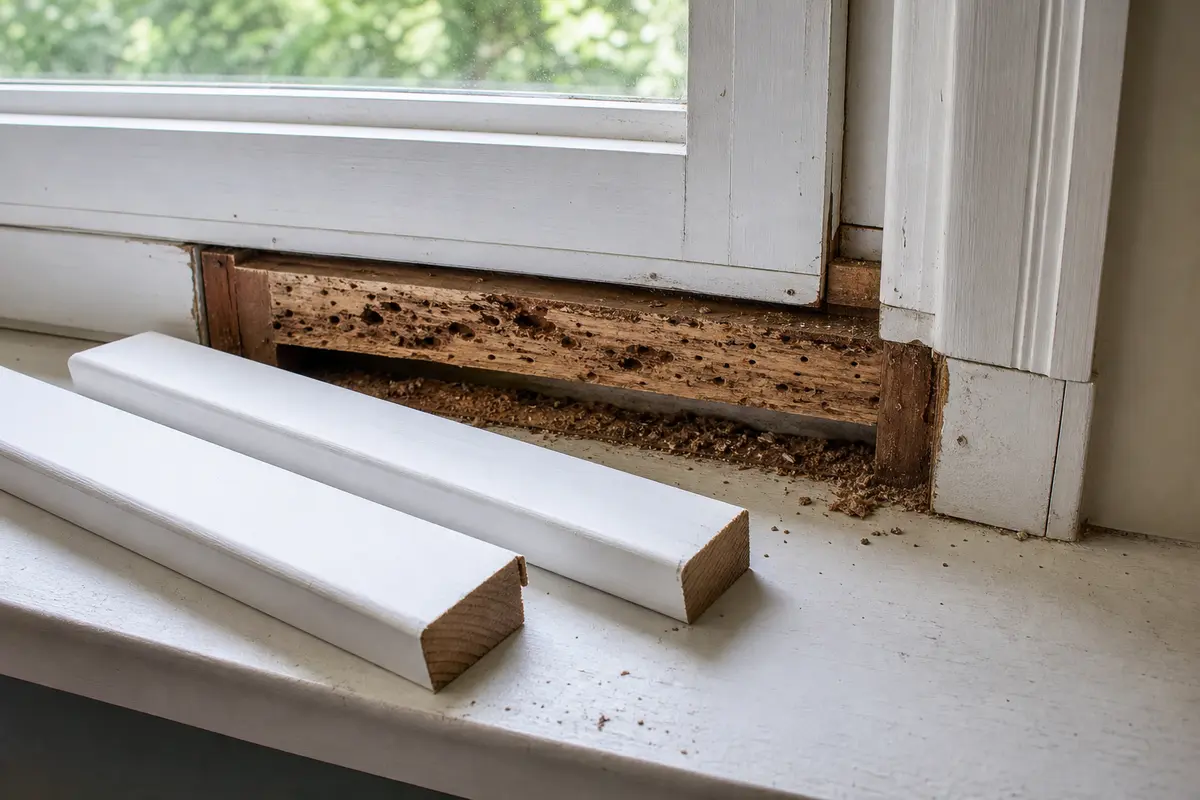
Do not strip the whole window first. If fresh frass returns or the probe finds a soft lower corner, open the softest or loosest trim section and leave the rest in place until that spot proves how deep the damage goes.
Use the inspection result to choose the repair path. The mistake is treating every hole as either a whole-window replacement or a quick dab of filler.
| What you find | What it usually means | Next move |
|---|---|---|
| No fresh frass and dry, hard wood | The damage may be old or shallow. | Clean loose material and watch before any small cosmetic repair. |
| Fresh frass or live ants return | Activity is current in or near the window opening. | Keep the area visible, trace the entry path, and plan targeted pest help if it continues. |
| Soft lower corner, blistered paint, or damp fibers | Moisture weakened the wood before or during ant activity. | Find the wetting path and dry the area before trim, filler, or paint. |
| Damage stops at removable casing or stool | A trim-only repair may be enough. | Replace the damaged trim only after the backing and jamb are dry and solid. |
| Jamb, sill, or wall-side wood is soft | The repair is deeper than finish trim. | Stop closing the opening and get the window frame, water source, and pest activity assessed. |
Carpenter ants do not prove the leak location by themselves. They point you toward wood that was easy to tunnel. The water path may be above, outside, at the sill, or from indoor condensation.
The fastest-looking repair can erase the evidence and leave wet wood behind. Keep the clues visible until the activity, moisture, and wood strength make sense together.
These tools support inspection and limited trim work. Skip any tool path that turns a window-frame check into hidden wall demolition.
Paid links. As an Amazon Associate I earn from qualifying purchases. Repair Riot may earn a commission at no extra cost to you.
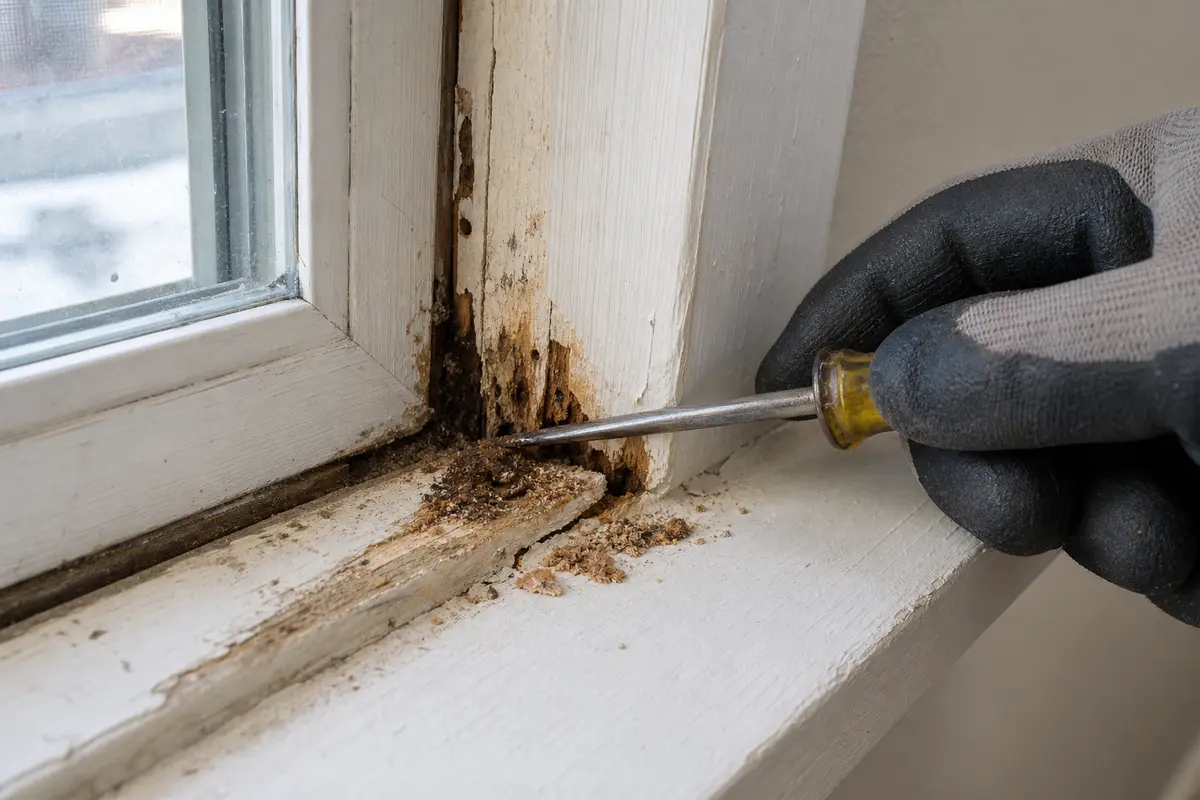
Helps when: Use an awl or small flat screwdriver when frass, blistered paint, or a hollow tap points to a suspect lower corner. Press lightly and compare with nearby hard wood; if the tip sinks in or damp fibers come out, stop planning a cosmetic fill.
Skip it when: Skip aggressive probing if the jamb already crumbles or the window moves in the opening.
Compare awls and small flat screwdrivers on Amazon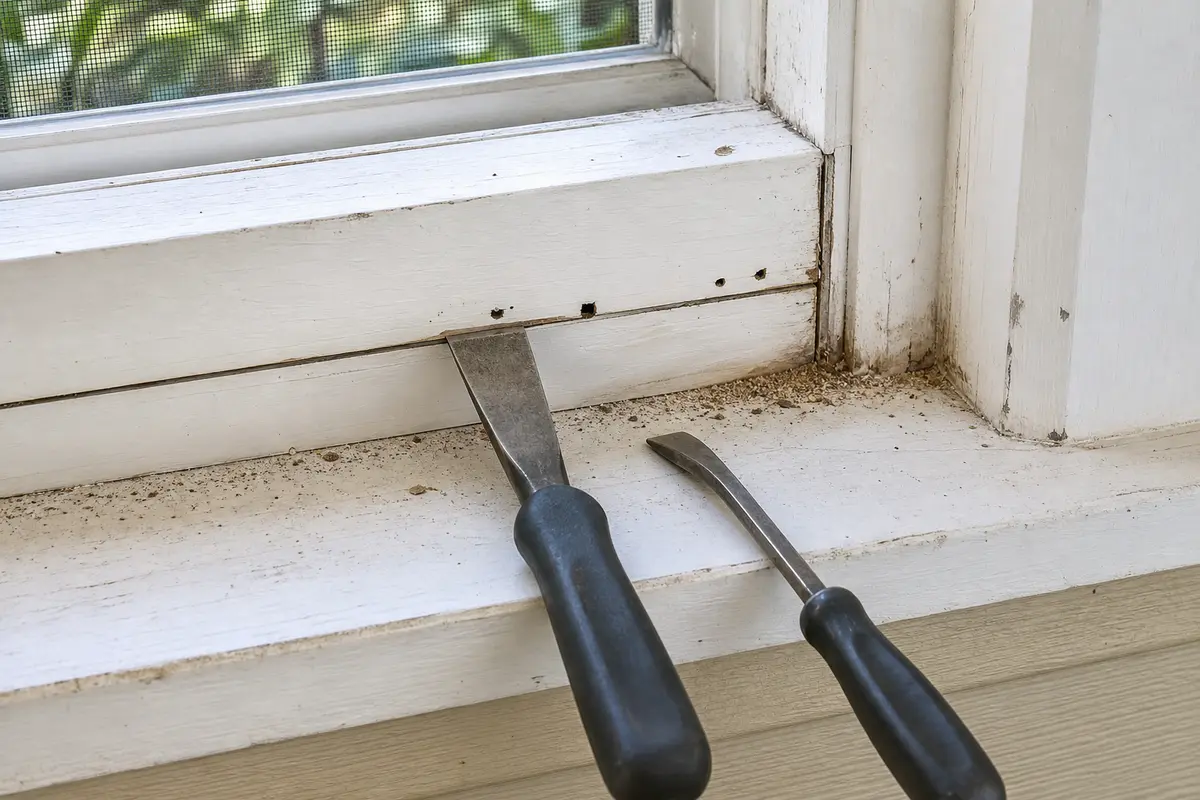
Helps when: Use a trim puller or small pry bar only after scoring paint lines and choosing one damaged section to inspect.
Skip it when: Skip prying if the wall edge or jamb is already soft; that is a stop point, not a tool problem.
Compare trim pullers and small pry bars on Amazon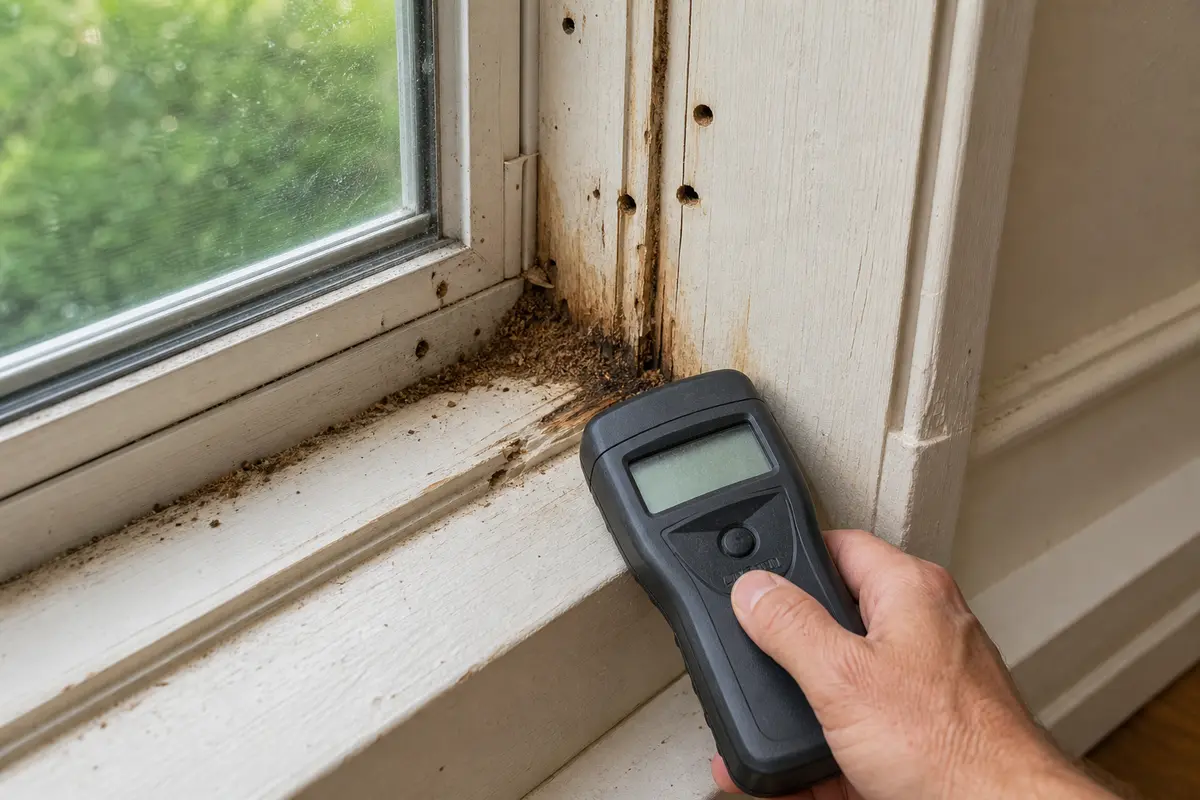
Helps when: Use a pinless moisture meter as a second check when the wood looks dry but staining or repeat frass suggests hidden dampness.
Skip it when: Skip treating a meter reading as permission to cover soft wood; the probe result and visible staining still matter.
Compare pinless moisture meters on AmazonParts come after the frame proves what failed. A trim board makes sense when the opened section shows dry backing and a solid jamb. Filler belongs only in small non-structural voids in hard wood. Weatherstripping is not an ant-damage fix unless the same inspection shows it is missing, brittle, or letting the sash leak air or water.
Paid links. As an Amazon Associate I earn from qualifying purchases. Repair Riot may earn a commission at no extra cost to you.
Helps when: Use a matched window trim board when the opened section shows damage limited to removable trim and the jamb behind it is dry and solid.
Skip it when: Skip it if the sill, jamb, or wall-side backing is soft; new trim will only hide the deeper repair.
Compare window trim boards on Amazon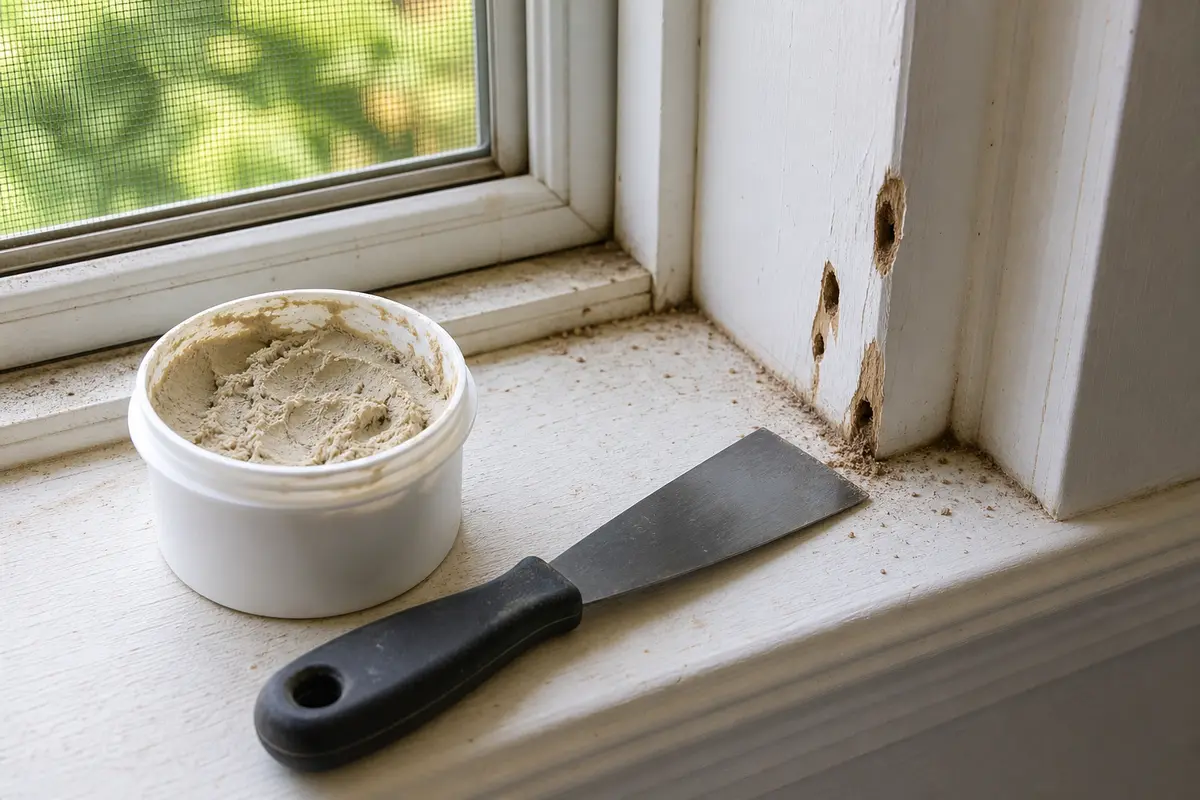
Helps when: Use exterior wood repair filler only for small cleaned voids in dry, hard, non-structural wood after ants and moisture are no longer active.
Skip it when: Skip filler for damp, hollow, crumbly, or frame-support damage.
Compare exterior wood repair fillers on AmazonNo. Many repairs stop at damaged trim, a stool end, or a small non-structural area. A replacement window moves onto the table only when the jamb, sill, frame support, or rough opening is rotten, loose, or out of square.
Look for coarse sawdust-like frass, tiny kick-out holes, hollow-sounding painted wood, and blistered paint. Lower-corner damage is especially suspicious because moisture tends to sit there.
Only when the damage is small, dry, hard, and non-structural after cleanup. If the wood is soft, hollow, damp, or still producing frass, filler hides the clue and leaves the real repair behind.
Usually because that window has had moisture at some point. Check the lower corners for failed paint, open trim joints, old staining, exterior water entry, or chronic condensation; those clues can make one window easier for ants to use than the rest.
If fresh frass keeps returning or ants are moving into the wall, call pest control early. If the jamb, sill, or wall-side wood is soft, loose, or spreading beyond trim, call a carpenter too. Many real repairs need both.
Vacuum all frass and loose debris, then check the same spot later that day and the next day. Fresh debris, live ant traffic, or new material below the same opening means activity is current or recently disturbed.
Not first. Caulk can hide the entry point and trap moisture in softened wood. Clean up, check for fresh frass, probe the lower frame, and find the moisture source before sealing finish joints.
No. Carpenter ants excavate wood to make galleries; they do not eat it the way termites do. The frass is wood fibers and debris they pushed out while tunneling.
Treat the soft wood as a moisture or rot problem even if the ants have moved on. Dry, hard old damage may be watched or repaired lightly, but soft jamb or sill wood needs the wetting source fixed before close-up.
No. Weatherstripping may help a drafty sash or a failed seal path, but it does not restore chewed or rotten wood. Check it only after the wood repair is understood, and buy it only if the same inspection shows worn or missing weatherstripping and the sash was already leaking air or water.
This page keeps the repair path moisture-first because carpenter ants excavate galleries in wood and are commonly tied to damp or decayed areas. Clean the frass, probe the lower sill and jamb, and let the trim backing and exterior water path decide how far the repair should go.