Does the board flex, crush, or crack?
Block off the area. Treat the board as failed until the joist below has been probed and found solid.
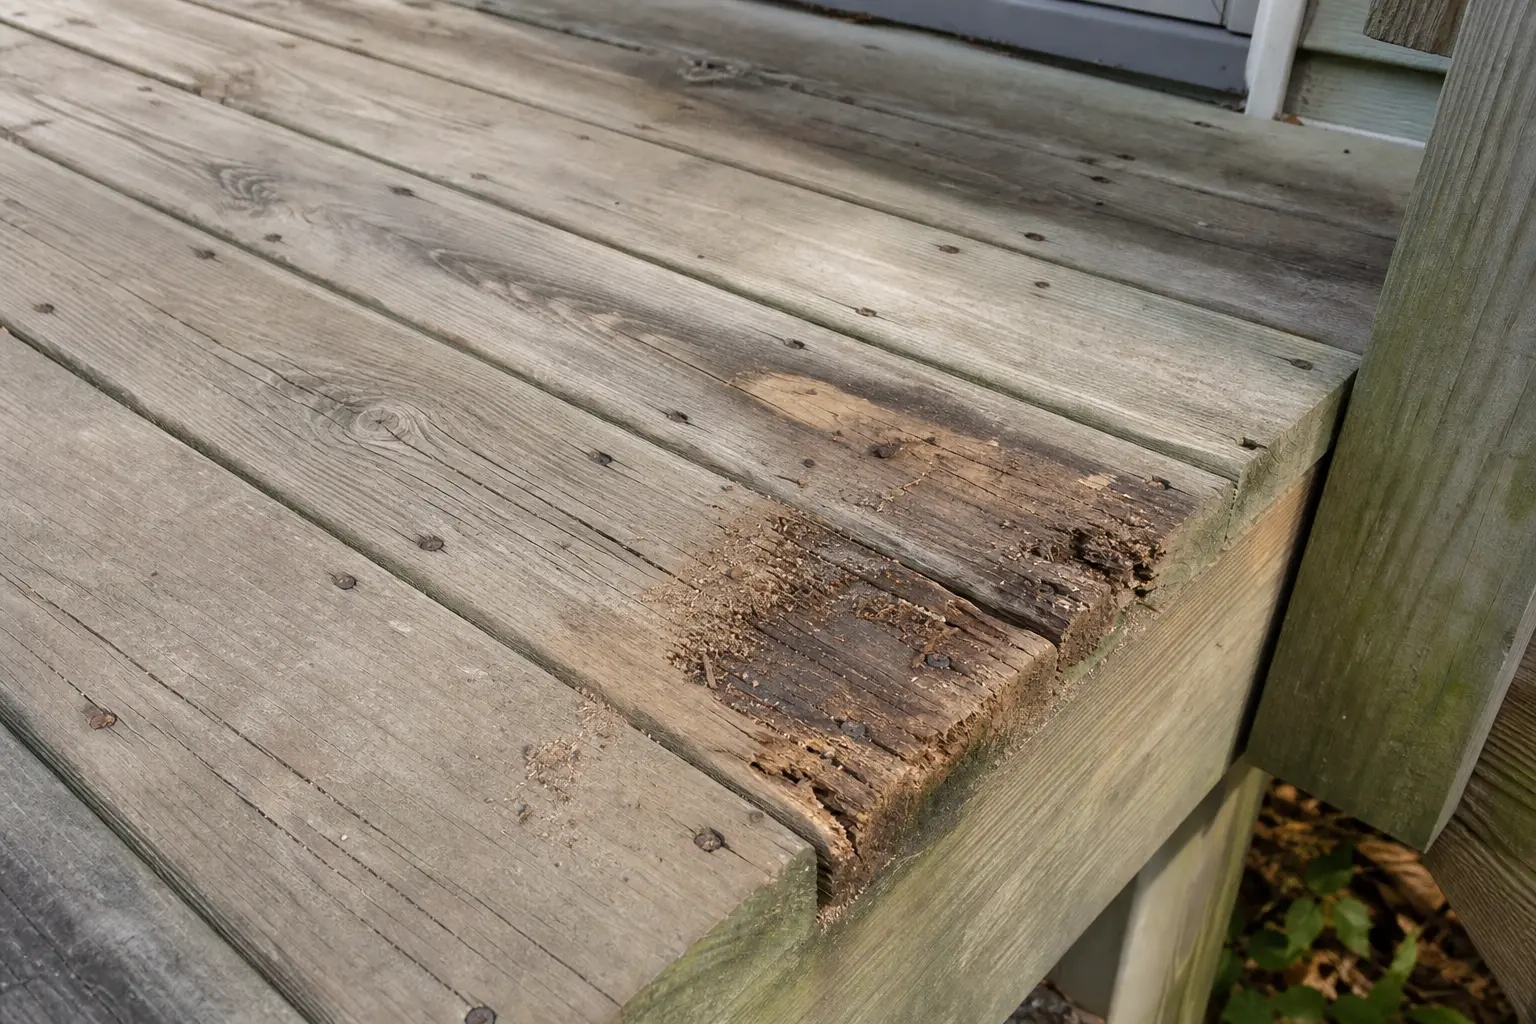
Carpenter ants on a deck board usually mean wet, softened wood. Block off any springy area, brush away coarse frass, probe from a stable spot, and inspect the joist below before you spray, fill, or buy lumber.
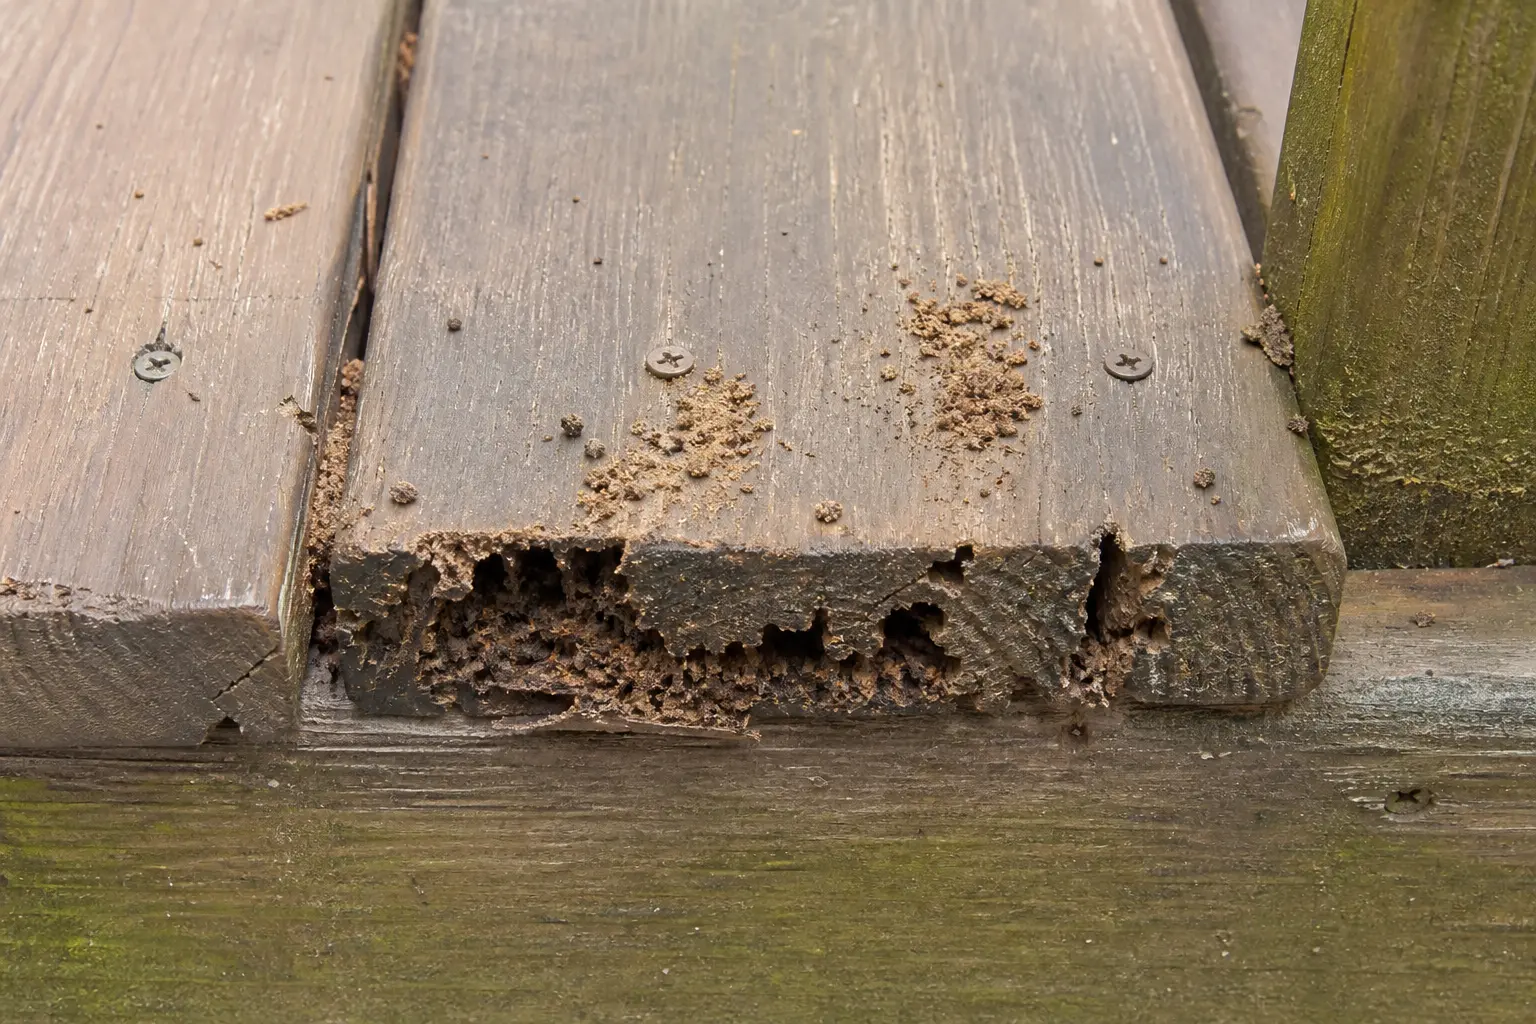
A wet board end or fastener line has softened enough for ant galleries. A good clue is frass returning at the same screw line or board end after cleanup.
Look for coarse frass, hollow board ends, dark stains, and fastener lines that stayed wet.
Don’t start with: Do not spray every crack or replace the board just because ants are visible. Brush away the frass, inspect the stained line, and test whether the joist below is still hard.
Block off the area. Treat the board as failed until the joist below has been probed and found solid.
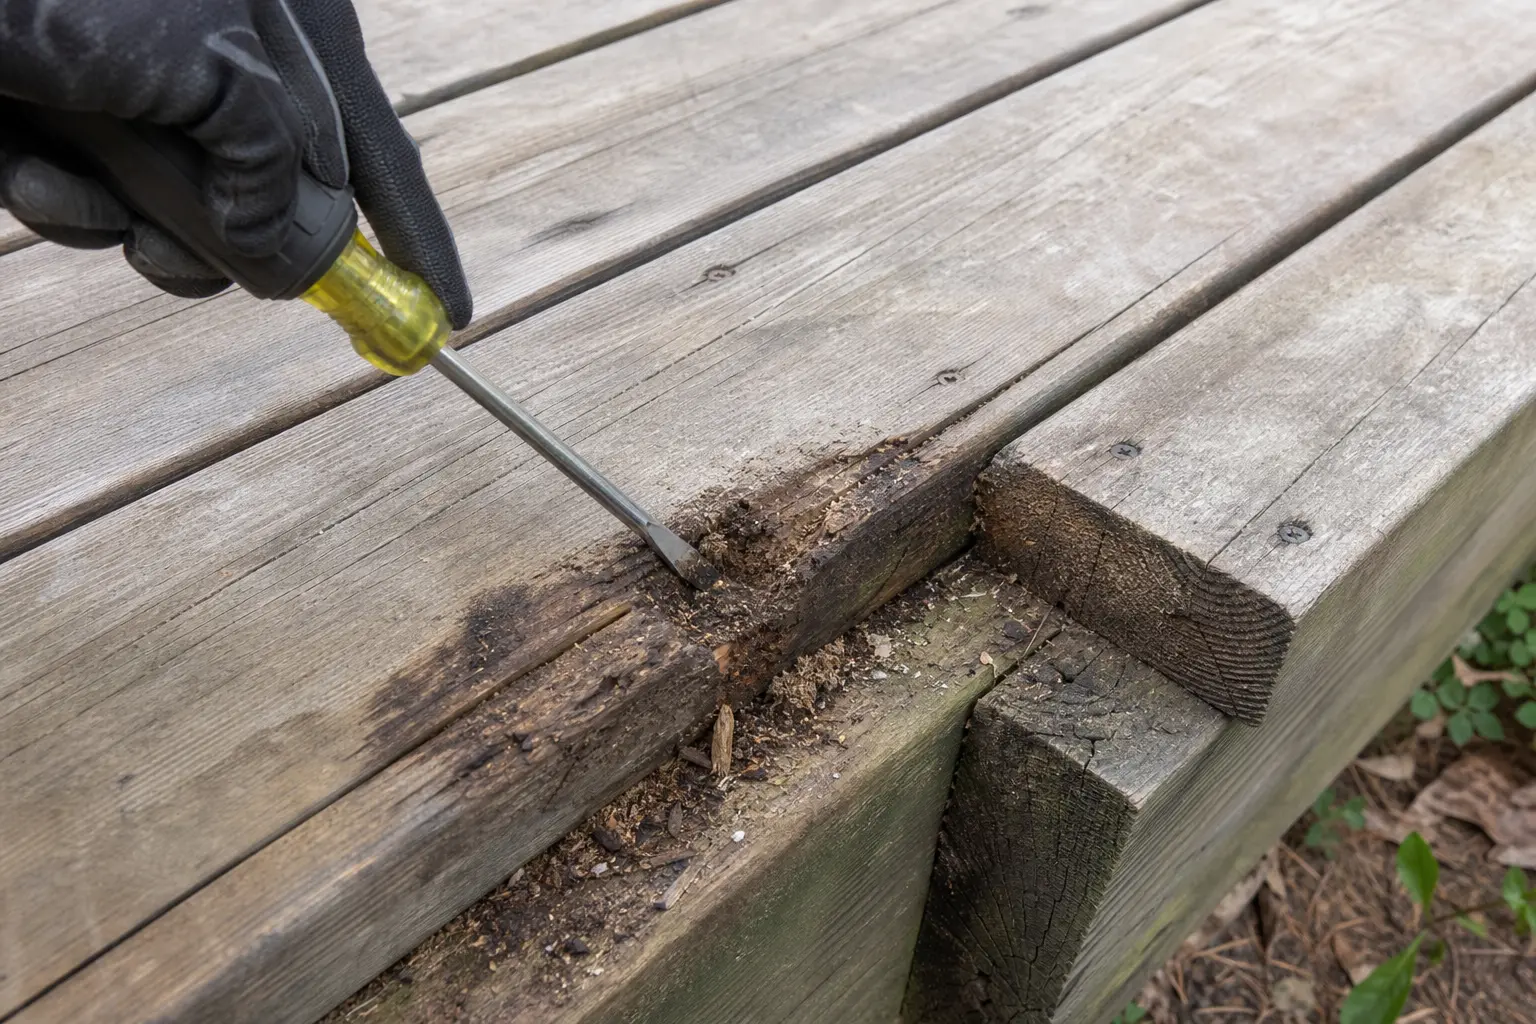
Brush the debris away once, mark the spot, and probe that exact line before buying lumber or pesticide.
Weathering may be cosmetic. Look for fresh frass, dark wet staining, hollow sound, and a soft probe result before replacing the board.
Stop using that deck area. A soft joist changes the job from deck-board replacement to framing repair.
Look for a damp zone, clogged gaps, wet leaf buildup, sprinkler spray, or runoff instead of replacing boards one at a time.
Follow the activity to the nest area if it is safe. For hidden or widespread activity, call a pest management professional.
Frass at a board end or screw line is the clue, not the final answer. Brush it away once, mark the spot, then inspect the board and the joist below. That tells you board swap or structural repair.
Before you buy parts, measure the exact board thickness, width, and span, then expose enough of the damaged area to know whether the joist is solid. Deck screws, replacement boards, and hangers belong in the cart only after that check.
Carpenter ants usually take advantage of wood that already stayed damp. The board may look like an insect problem from above, but the repair decision comes from how much wood still has strength.
A deck board can look only partly damaged and still break under a foot. Keep the load off the suspect spot while you find out how deep the damage goes.
Do not treat every rough board the same. The result should send you toward cleanup, board replacement, framing repair, or pest help.
| What you find | What it means | Next step |
|---|---|---|
| Coarse frass at one crack, board end, or screw line | Carpenter ant galleries may be in a damp pocket | Brush it away once, mark the spot, and probe that line again after a day or two |
| Gray surface, shallow checking, and hard wood | Weathering is stronger than insect damage | Clear debris, improve drying, and watch for fresh frass |
| Clean round hole with little shredding | Carpenter bee damage may fit better than carpenter ants | Compare the hole pattern before using this deck-board repair path |
| Soft board but hard joist below | The repair can often stay at the board | Replace the full damaged board or refasten only if the wood still holds screws |
| Soft joist top, rim area, stair support, or ledger side | The damage has reached structure | Block off the deck area and call a deck repair pro or carpenter |
Work from easy observation to careful opening. The goal is not to save the old board at all costs; it is to leave a walking surface that is dry, firm, and supported.
The bad repair is the one that hides soft wood and leaves the wet condition alone.
These tools are for homeowner-level inspection and board removal after the area is safe. They are not a substitute for shoring, framing repair, or pest treatment inside a hidden nest.
Paid links. As an Amazon Associate I earn from qualifying purchases. Repair Riot may earn a commission at no extra cost to you.
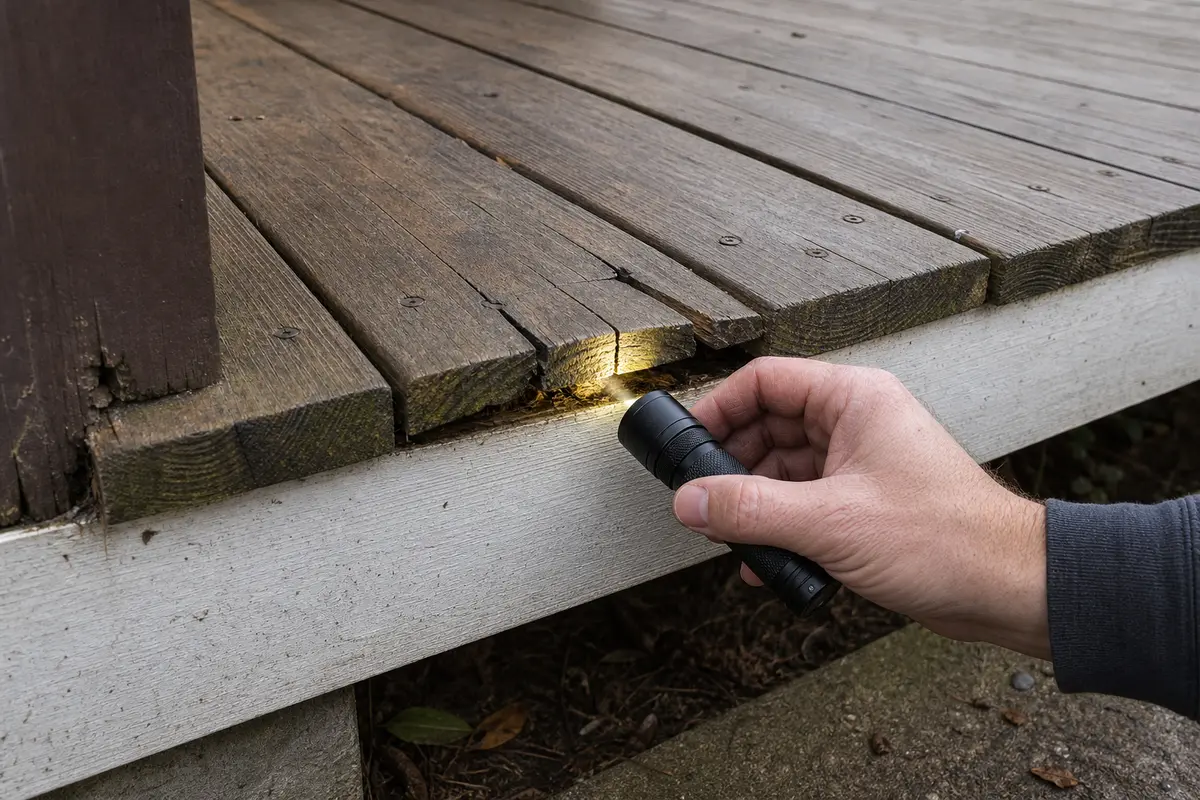
Helps when: Use an inspection flashlight to see board ends, joist tops, dark stains, and fresh frass in shaded deck areas.
Skip it when: Skip approaching from below if the deck section is loose, springy, or unsafe; block it off and get help instead.
Compare inspection flashlights on Amazon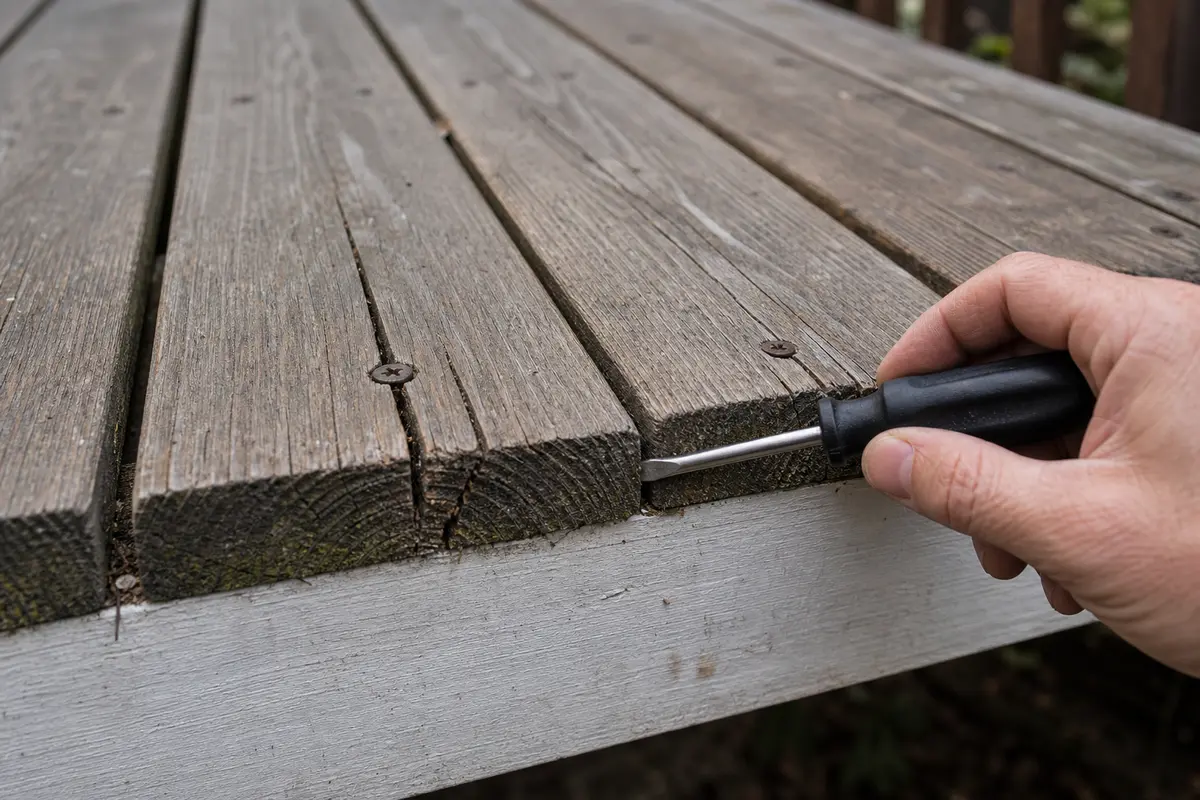
Helps when: Use an awl or flat screwdriver to probe frass, hollow sound, or dark staining, then compare the suspect spot with firm wood nearby.
Skip it when: Skip probing if you would have to stand on the damaged area or pry against unsupported framing.
Compare awls and flat screwdrivers on Amazon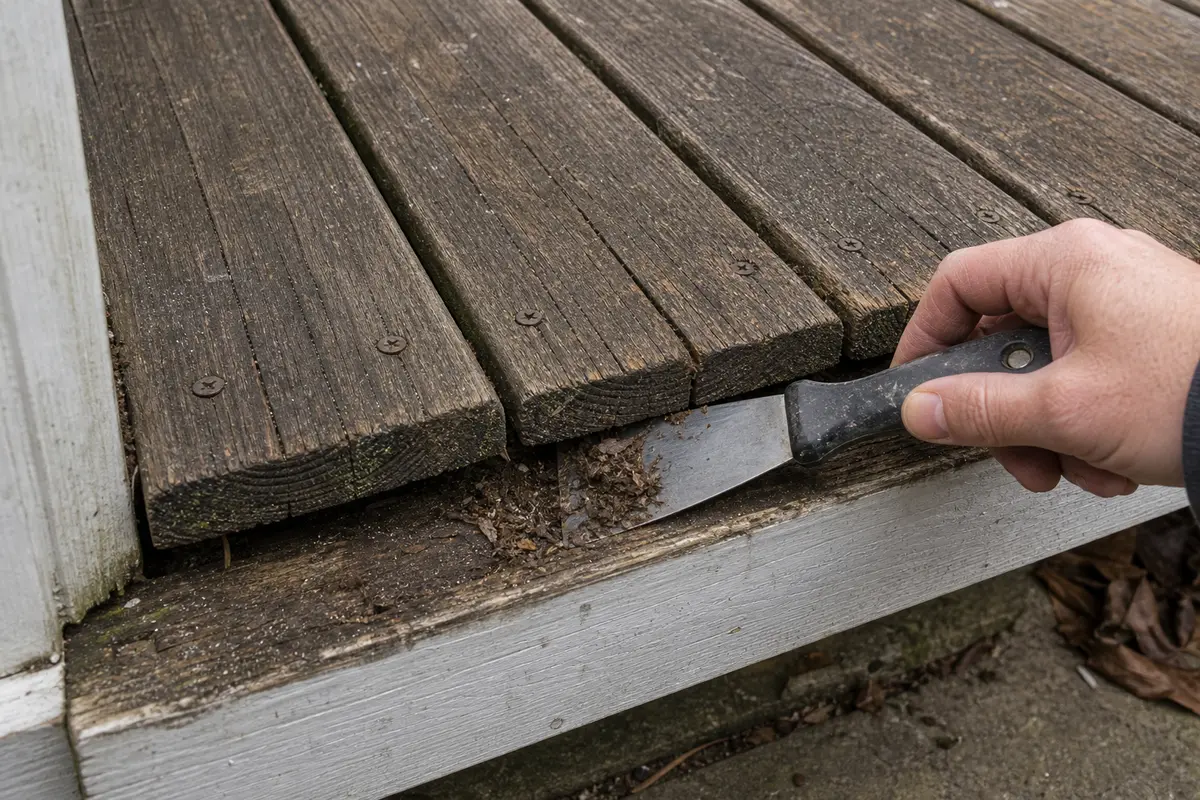
Helps when: Use a thin pry tool after you have found a failed board and need to lift it without tearing up solid neighboring boards.
Skip it when: Skip it if the board is part of stairs, an edge, or any area where removal could create a fall-through opening.
Compare thin pry tools on Amazon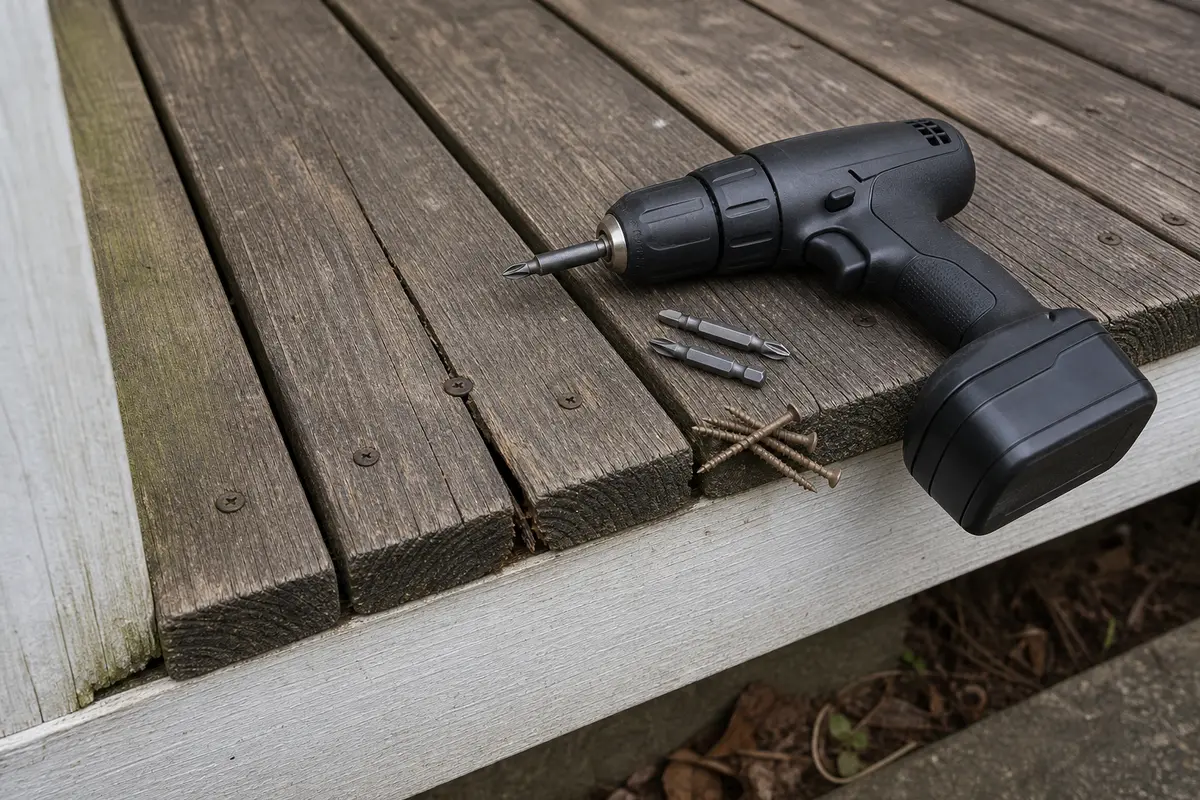
Helps when: Use a drill or driver when the board and joist are sound enough for safe fastener removal or refastening with exterior deck screws.
Skip it when: Skip it if screws spin without biting, the wood crushes around them, or the joist below is soft.
Compare drill drivers on AmazonCompare parts only after the probe and framing check point there. Deck parts are not universal: size, coating, board thickness, span, and connection style all matter.
Paid links. As an Amazon Associate I earn from qualifying purchases. Repair Riot may earn a commission at no extra cost to you.
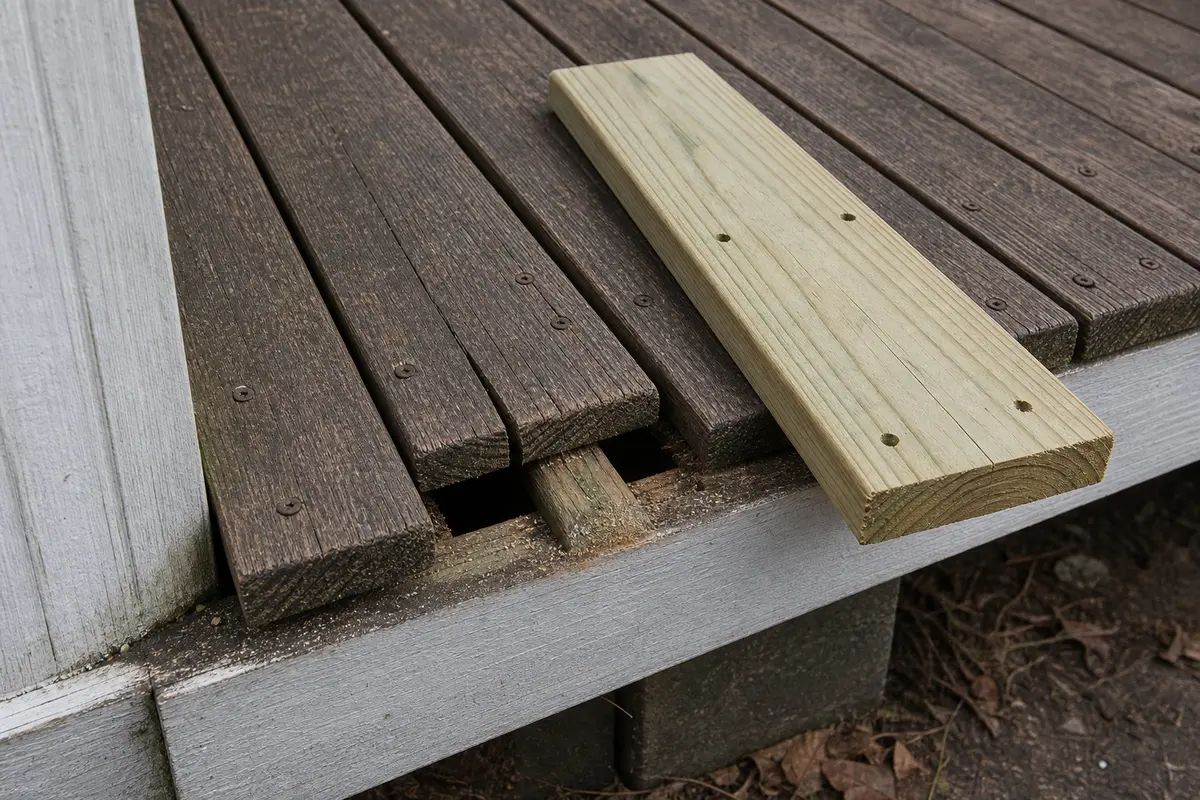
Helps when: Use a matching deck board when the walking board is soft or hollow but the joist below is hard and the repair stays at the surface.
Skip it when: Skip it if the joist, rim, stair support, or ledger area is soft; the board is not the whole repair.
Compare matching deck boards on Amazon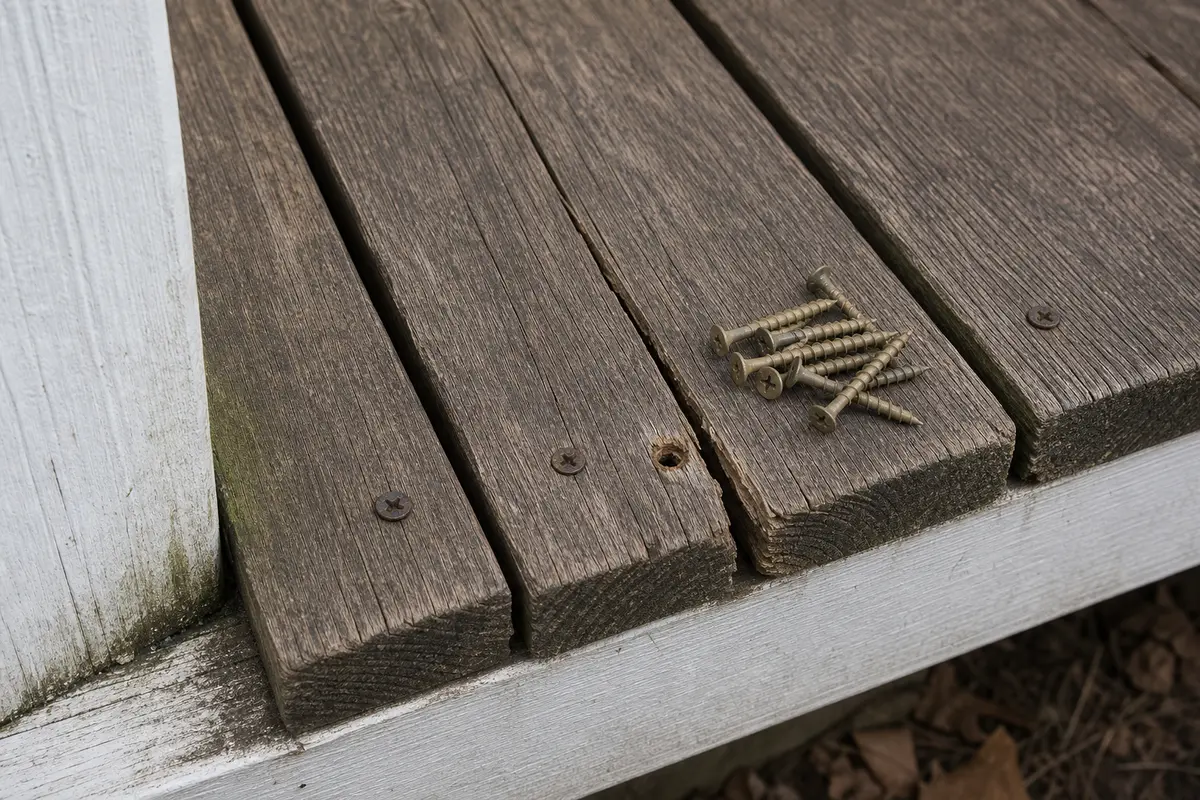
Helps when: Use exterior deck screws when the existing board or replacement board is solid and the fasteners need fresh bite in sound framing.
Skip it when: Skip them if the screw holes are punky, enlarged, wet, or no longer hold firmly.
Compare exterior deck screws on Amazon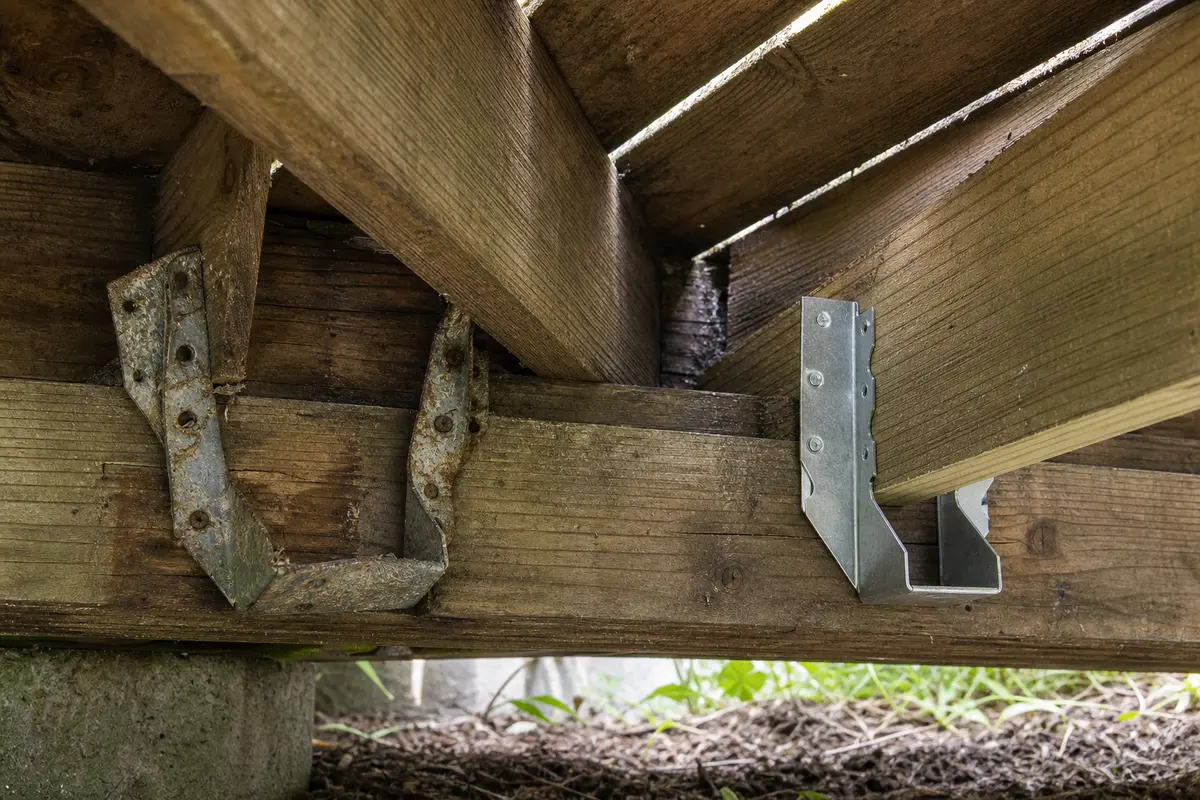
Helps when: Use a galvanized joist hanger only when an opened repair or deck pro confirms a localized failed framing connection.
Skip it when: Skip hardware shopping if the connection is not exposed or the joist itself is soft enough that metal hardware cannot restore strength.
Compare galvanized joist hangers on AmazonUsually both, but the wet wood comes first. Carpenter ants prefer softened or decaying wood, then hollow it out further. On a deck, look for coarse frass, dark wet staining, or a hollow board end. Then inspect the joist and moisture source before treating it as only a pest problem.
Not if the board is soft, hollow, or flexing. Spraying visible ants does not put wood fibers back. Check the board with a probe; if it has lost strength, replace or repair the damaged board.
Carpenter ants leave coarse frass and irregular galleries inside damp wood. Carpenter bees usually leave cleaner round entry holes on exposed faces or undersides. If the holes are neat and round, check the pattern again and compare the pest clue before you choose this deck-board repair path.
Yes, if the damage is limited to the board and the joist below is solid. Once the framing is soft, loose, or damaged at connections, it moves out of simple DIY territory.
Usually no. On a walking surface, a full deck board replacement is the better repair when there is real softness or tunneling. Short patches tend to look rough, trap water, and leave weak spots.
That usually points to a wet area or hidden framing trouble. Check drainage, shade, debris buildup, and the joists below before replacing boards one by one.
Look for coarse frass at a crack, board end, or screw line; irregular openings in damp or softened wood; hollow sound at a board end; dark wet staining; and weakness near fasteners. Then press a screwdriver into that spot and compare it with hard gray weathered wood nearby.
Brush away the debris once, then recheck the same spot. Fresh frass, repeat ant traffic, or activity that returns after cleanup means the nest or foraging route may still be active.
Use filler only for tiny cosmetic defects in wood that is still hard. Do not use it to hide a soft, hollow, or tunneled board on a walking surface.
Call a pest management professional when activity is widespread, the nest is hidden, ants keep returning after wet wood is removed, or pesticide treatment would require drilling or treating voids you cannot clearly identify.
Measure board thickness, width, length, spacing, and how it bears on the joists. Also match the material and finish as closely as practical so the new board sits flush and drains like the others.
Repair Riot built this page around testable clues: coarse frass, soft probe results, hollow board ends, joist involvement, and moisture that keeps coming back. The references below support the carpenter-ant facts and treatment boundaries; deck structural calls stay conservative.