Does the drain valve area get wet first?
Focus on the drain valve outlet, handle stem, and tank-thread connection. Do not force an old plastic valve.
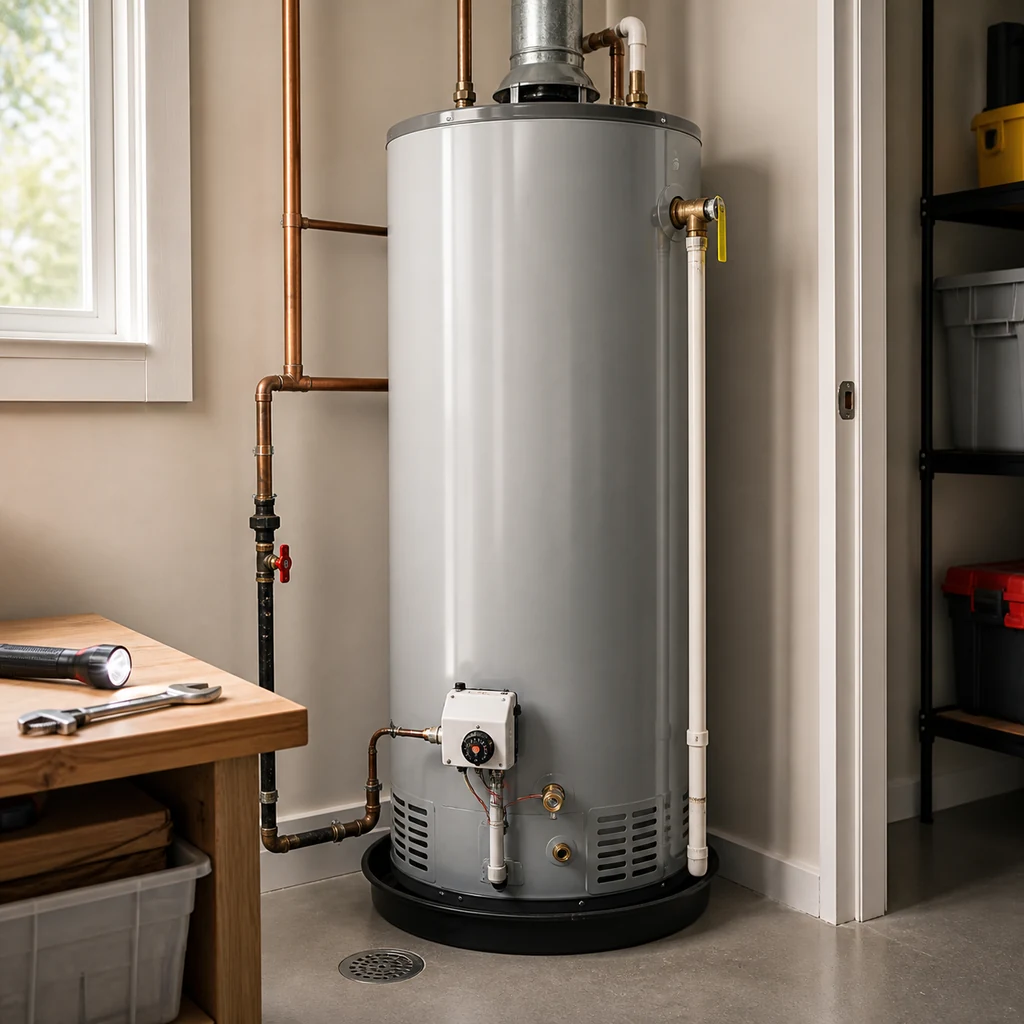
If your American Standard water heater is leaking from the bottom, dry the jacket and floor before you price a new tank. Check the drain valve, relief-valve discharge tube, top fittings, and condensation path first.
When the puddle shows up after a heating cycle, start by drying the drain valve, T&P discharge tube, and top fittings, then watch which spot wets first. A steady wet seam, rusty streaks, or water from the insulation points toward tank replacement.
Dry first. Watch high to low. The first new moisture tells you whether this is an external leak, condensation, or a replacement job.
Don’t start with: Do not cap the relief pipe, force an old drain valve, or order parts from the puddle alone. Dry the heater first and prove the first wet spot.
Focus on the drain valve outlet, handle stem, and tank-thread connection. Do not force an old plastic valve.
Treat it as a relief-valve or pressure-temperature clue. Do not plug the pipe or assume the valve alone is bad.
Check hot and cold connections, nipples, shutoff valves, and nearby piping. The base may only be the collection point.
Condensation moves up the list, especially in humid rooms or after heavy hot-water use.
That is not a valve repair. Shut the heater down safely and plan for replacement or a licensed plumber.
Use the photos as diagnostic patterns, not proof of your exact model. Start with the whole heater, then separate fitting runoff, drain-valve seepage, relief discharge, and condensation before you decide what to buy.
Dry the heater, trace the first wet spot, and match any part to the exact model tag. A drain valve, relief valve, fitting leak, condensation problem, and failed tank all leave water at the bottom. The purchase only makes sense after the leak path points to that part.
A bottom puddle is the last clue, not the first one. Make the heater dry enough that new water has to show itself.
Use the first fresh moisture to sort the repair path. Do not let the biggest puddle make the decision for you.
Most expensive mistakes happen before the leak source is proven. Keep the first pass external and calm.
The drain valve is the most useful first check because it sits low and is easy to isolate as a true bottom-area leak.
Two lookalikes create many false bottom leaks: relief-valve discharge running down the jacket, and clear condensation dripping from cold metal.
A failed tank is not a patch job. The useful homeowner move is recognizing it quickly and shutting the heater down without making the leak worse.
Use tools to trace water and contain a small drip. If the job turns into gas work, live electrical work, or a tank leak, stop at diagnosis.
Paid links. As an Amazon Associate I earn from qualifying purchases. Repair Riot may earn a commission at no extra cost to you.

Helps when: You need to follow a wet trail from the base up to the drain valve, relief pipe, top fittings, or tank seam.
Skip it when: Water is near live electrical parts or the burner compartment and the heater needs to be shut down first.
Compare inspection flashlights on Amazon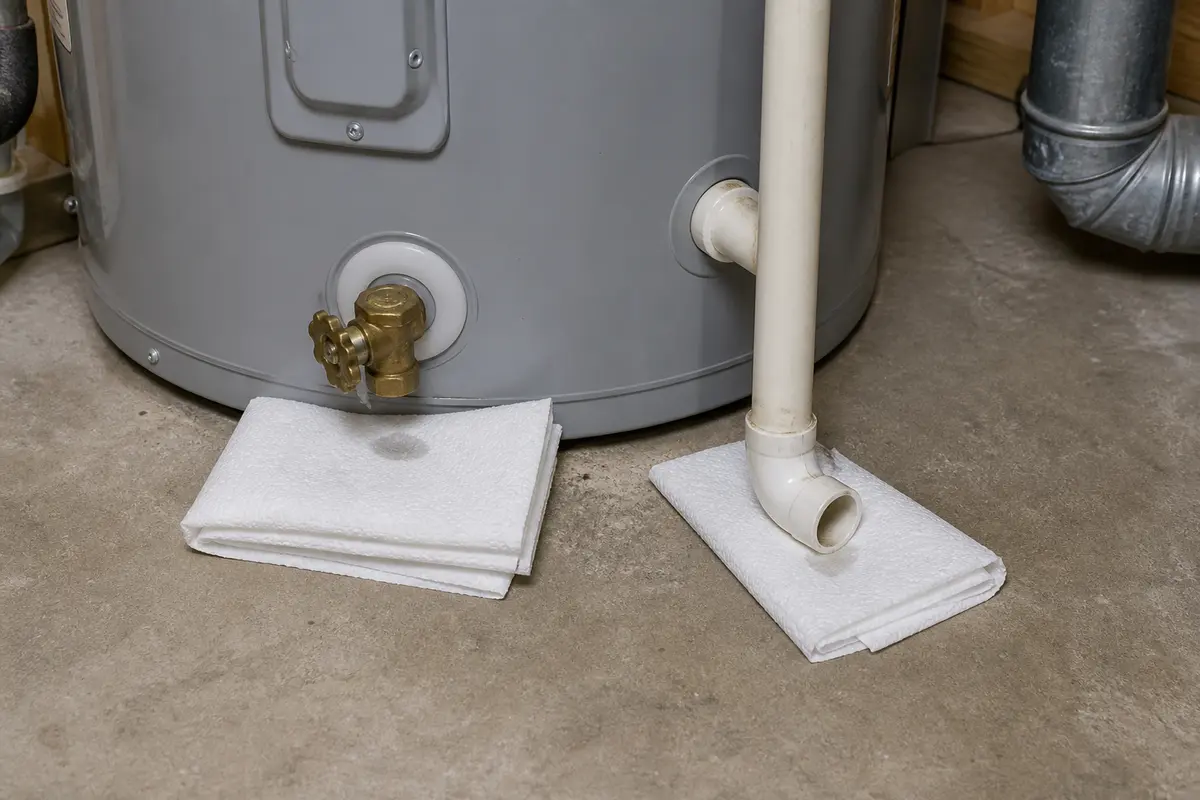
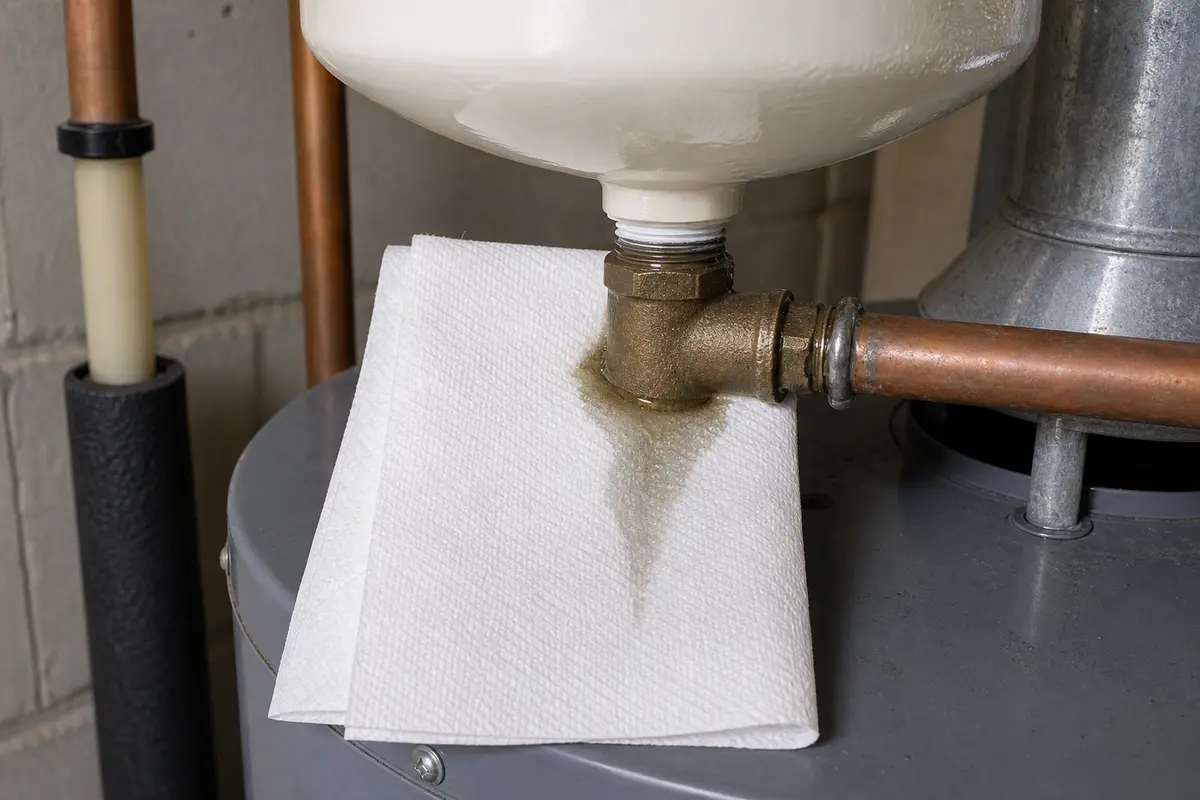
Helps when: You need a dry witness at the drain valve, relief discharge, and upper fittings so the first wet point is obvious.
Skip it when: Water is spraying, very hot, or coming from the tank body instead of a small external seep.
Compare shop towels on Amazon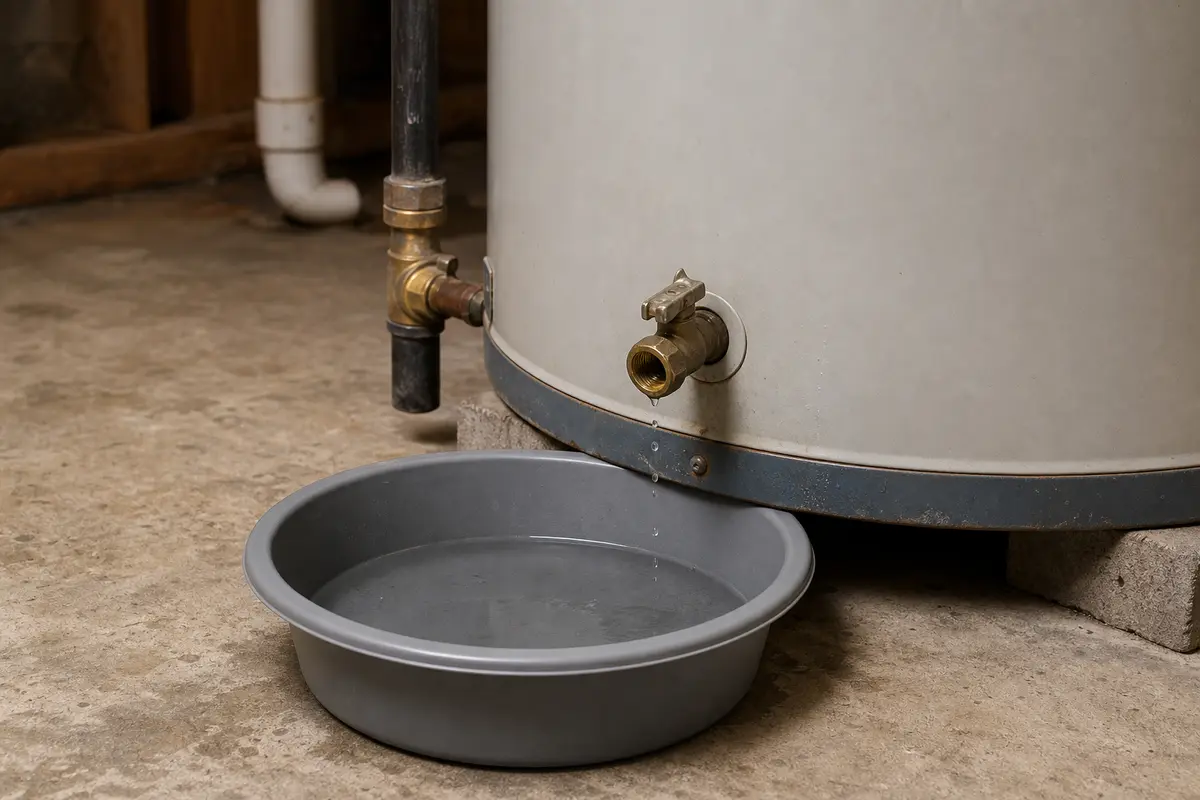
Helps when: You have confirmed a small external drip and need to catch water while you shut the heater down or arrange service.
Skip it when: The relief valve is dumping hot water or the leak is too large to contain safely.
Compare shallow pans on Amazon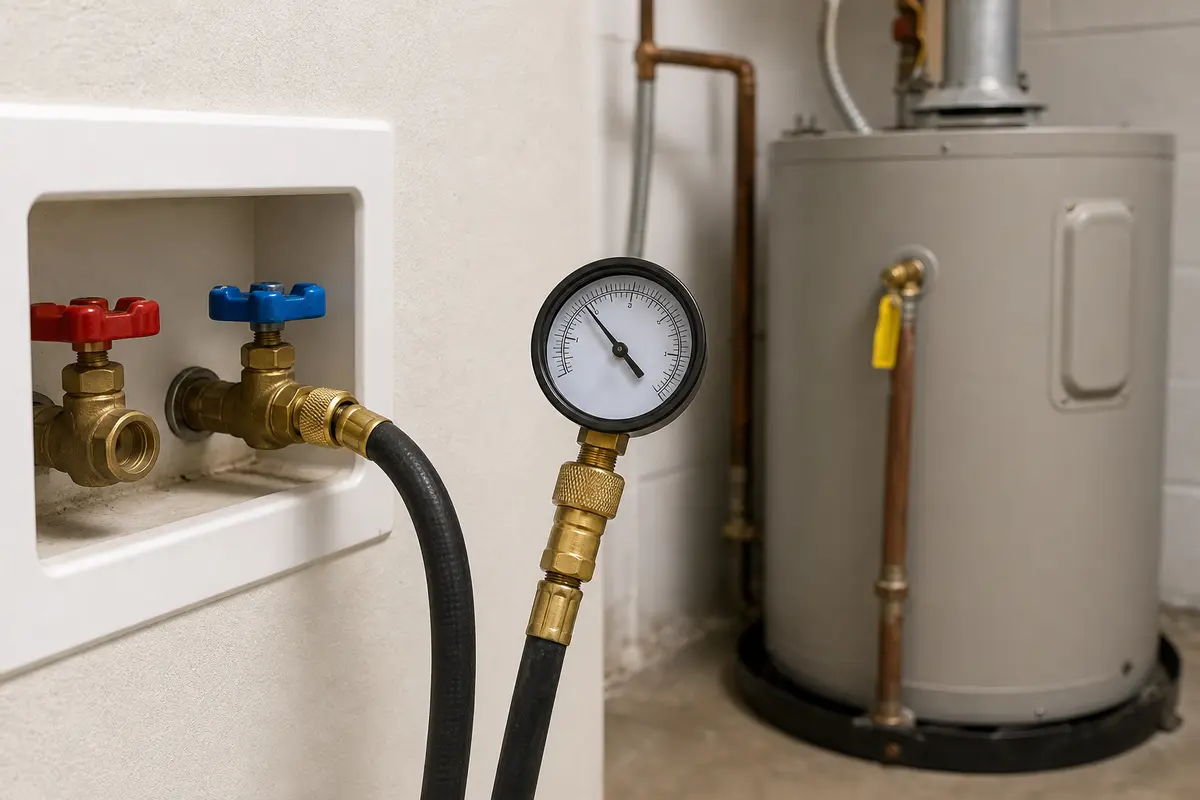
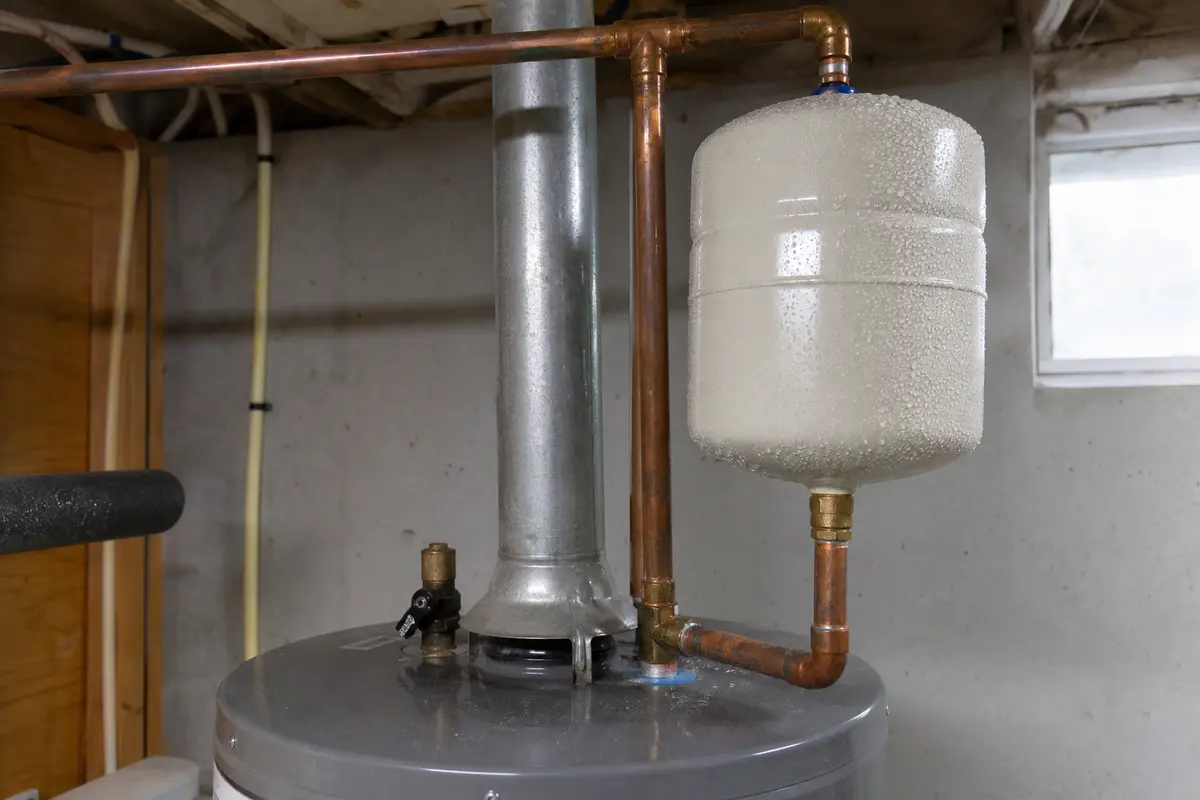
Helps when: The relief discharge appears mainly after heating, so house pressure or thermal expansion needs a real reading.
Skip it when: The tank shell or seam is leaking, or you cannot access a safe hose bib or laundry connection.
Compare water pressure gauges on AmazonPut parts in the cart only after a dry-towel check points to the part. Match the model tag, connection size, pressure and temperature rating, and old part shape before ordering.
Paid links. As an Amazon Associate I earn from qualifying purchases. Repair Riot may earn a commission at no extra cost to you.
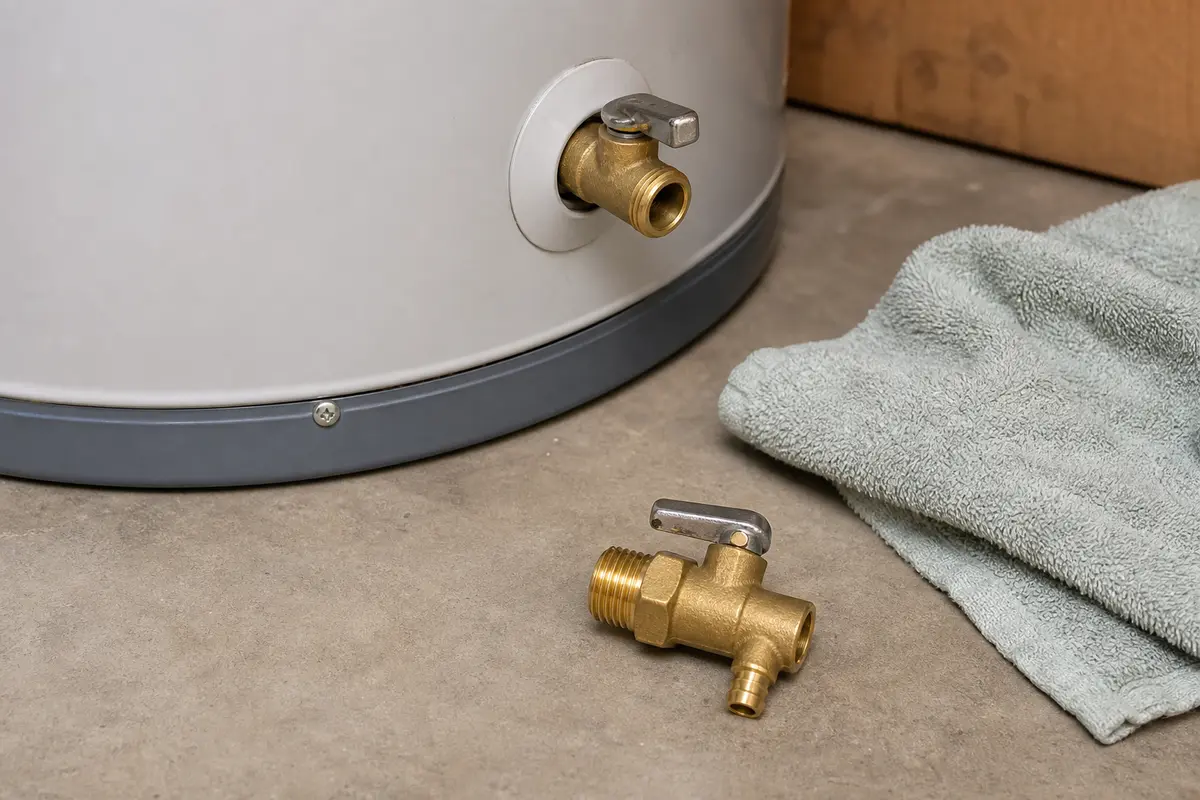
Helps when: Replace it only when water starts at the drain valve while the surrounding tank shell stays dry.
Skip it when: The first wet point is the relief discharge, an upper fitting, condensation, or the tank body itself.
Compare drain valves on Amazon.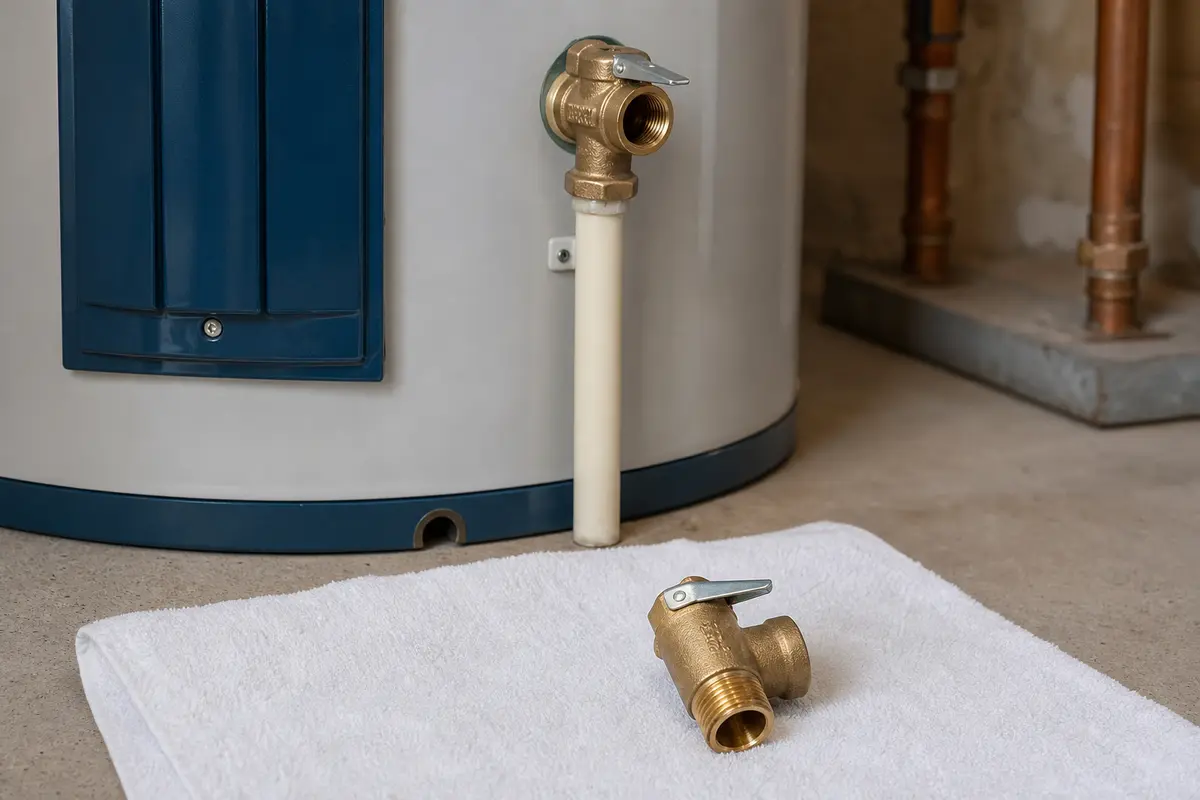
Helps when: Consider one only when the valve or discharge pipe is first wet after normal temperature and pressure checks.
Skip it when: The heater is overheating, pressure is high, or the tank shell is leaking.
Compare T&P relief valves on Amazon.No. Dry the outside of the heater first, then check the drain valve, T&P discharge pipe, top fittings, and cold surfaces for condensation. A bad tank is more likely when water comes from the shell, lower seam, insulation, or burner/access-panel area while the outside fittings stay dry.
Dry the heater and floor first. Put paper towel at the drain valve, relief discharge pipe, and any wet-looking upper fitting. The first towel that gets wet tells you more than the puddle on the floor.
Yes. A worn or slightly open drain valve can leave a small puddle at the front bottom edge. Close it gently if it is open, but do not force an old plastic valve. Replace it only after the valve is confirmed as the source and the heater can be isolated safely.
Do not cap or plug it. Dry the pipe, run a normal heating cycle, and see whether it wets again. A wet discharge pipe can mean the valve opened because of temperature, pressure, debris, or valve wear. If the discharge is steady, very hot, or tied to overheating symptoms, shut the heater down and call a licensed plumber.
Yes. Clear beads on cold piping or nearby metal can drip to the floor and look like a leak. Condensation usually forms over a broad area and changes with humidity. A single point that keeps wetting after drying is a leak path.
Only for a short planning window if a dry-towel check confirms a tiny external seep and the water is not near electrical parts, burner parts, or flooring damage. Shut it down if the source is uncertain, the leak is growing, or water is coming from the tank body.
Replace the drain valve only when water starts at that valve and the tank metal around it stays dry after you wipe everything down. Replace the water heater when fresh water comes from the tank shell, seam, insulation, or underside with no external valve or fitting source.
That timing points toward relief-valve discharge, pressure rise, a fitting that opens as the heater warms, or condensation after cold water enters the tank. Dry the pipe and top fittings, then watch them during recovery before buying parts.
Rust-colored water coming from the shell, seam, or insulation is a strong tank-failure clue. Rust on a nearby pan or floor is less useful. Find where fresh water starts before deciding.
Some experienced homeowners can replace a confirmed bad valve after power or gas is off, water is isolated, pressure is relieved, and the replacement matches the required rating and probe length. Stop if discharge is caused by overheating or pressure, or if gas or electrical work is involved.
Repair Riot built this page around visible leak paths: drain valve, relief discharge, upper fitting runoff, condensation, and tank-body failure. These references support the model-specific documentation path and the safety stop points.