Set the toilet chain with a small slack gap when the flapper is closed, then test one flush to confirm the lever slot lifts the flapper fully without breaking the seal.
Flush once with the lid off and watch the chain. Too much slack can tuck links under the flapper seal and leak into the bowl. Too little slack can lift the flapper before you touch the handle. Check rusty, kinked, or missing links before trusting an adjustment.
Before you start: Before buying anything, watch one flush with the tank lid off. Stop if the tank is cracked, the shutoff leaks, the flapper is torn, or the handle arm is broken.
A chain adjustment only helps when the chain is the reason the flapper is not opening or sealing. Separate chain length from flapper wear and handle damage before ordering anything.
This page fits
Look for: The chain is too loose, too tight, tangled on the lever arm, or dropping under the flapper while the flapper and handle still look usable.
Next step: If the flapper is curled, cracked, slimy, or leaving water trickling into the bowl, adjust the chain only after deciding whether the flapper needs replacement.
Confirm the fit first
Look for: A replacement chain or flapper kit can connect to your handle arm holes and the flapper pull tab without forcing the chain sideways.
Next step: If your toilet uses a canister-style flush valve, tower seal, or dual-flush button, use the model-specific setup instead of a basic flapper-chain adjustment.
Stop for hidden damage
Look for: The tank is intact, the shutoff is not leaking, the handle arm is not broken, and the flapper seat is solid enough for a normal test flush.
Next step: Stop if porcelain is cracked, a shutoff valve leaks when touched, tank hardware crumbles, or the toilet keeps running with the chain fully disconnected.
What the chain should look like
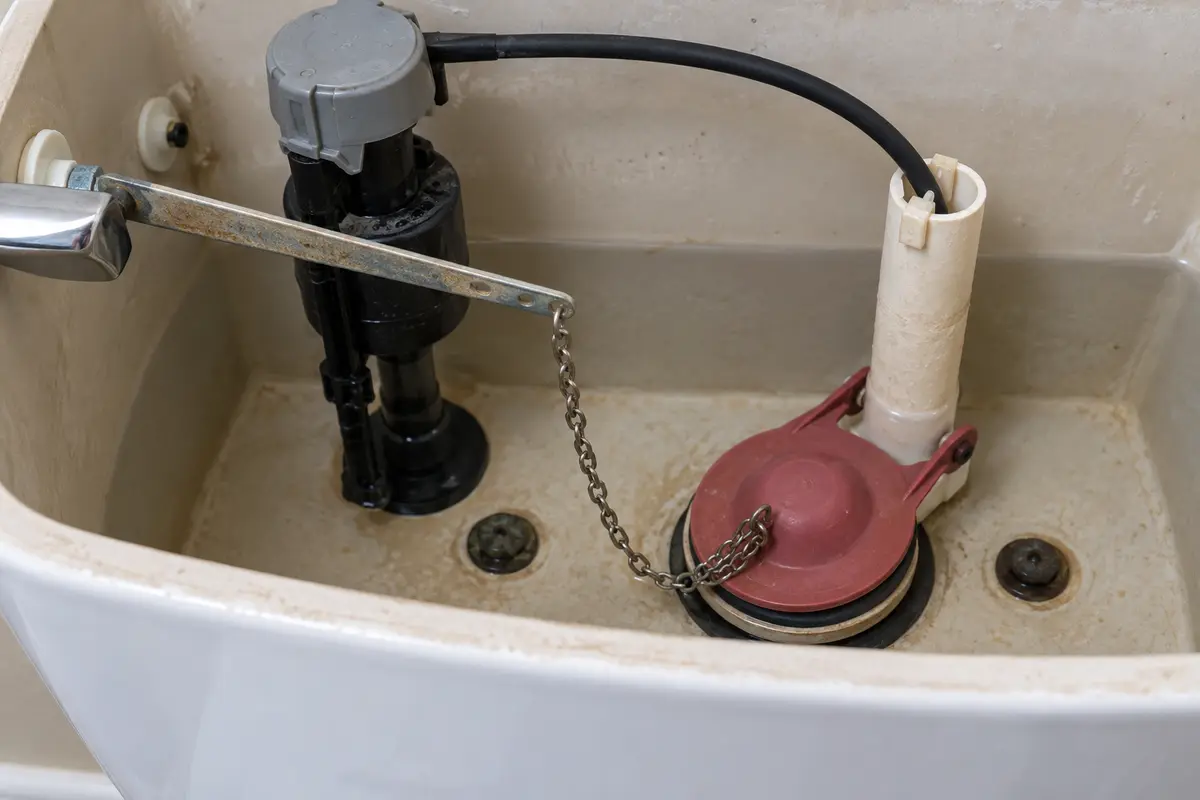
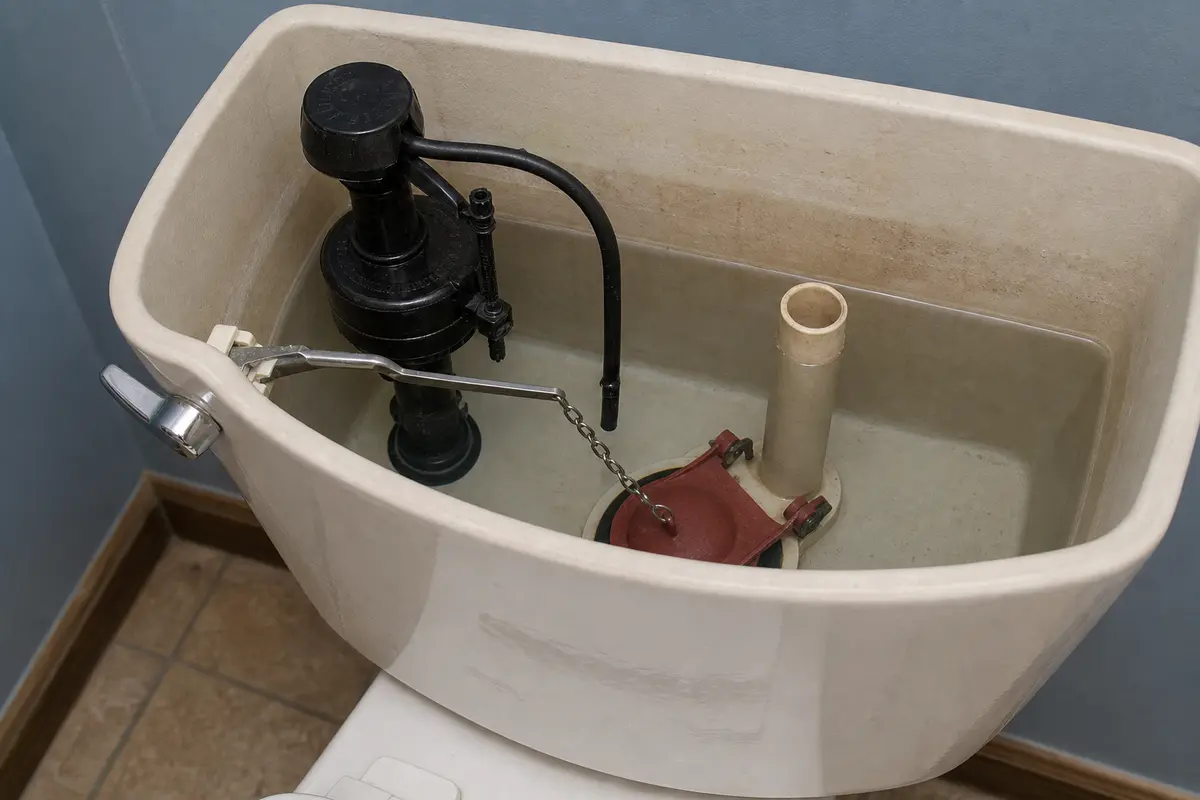
Use the failure photo to spot the wrong chain path, then use the dry-fit photo to compare the amount of slack before you test the handle.
Too much slack can fall under the flapper or delay the lift. If the flapper edge is damaged, fix that before chasing chain length.Aim for slight slack with the flapper closed. The chain should lift straight without tugging the flapper sideways.
Safety first
Handle the tank lid carefully. Porcelain lids crack easily and can cause sharp edges.
Do not force a stuck shutoff valve or a corroded chain clip. Light hand pressure or pliers is enough.
Keep fingers clear of sharp rusted chain links or broken porcelain edges inside an older tank.
Tools you may need
Rubber gloves — Keeps your hands clean while working inside the tank.
Small towel or sponge — Catches drips from the tank lid and wipes up water around the toilet.
Needle nose pliers — Helps move the chain clip and bend a stubborn hook without forcing it.
Flashlight — Makes it easier to see the chain, flapper, and flush lever inside the tank.
Step-by-step fix
Step 1: Confirm the chain is the problem
Lift the tank lid with both hands and set it flat on a towel so it cannot slide.
Flush once with the lid off and watch the chain from the handle arm down to the flapper.
Look for the chain going tight before the handle moves, sagging low enough to touch the flapper edge, snagging on the handle arm, or slipping under the flapper as it closes.
After the tank refills, press the handle lightly without flushing; the chain should have a little slack and the flapper should stay seated.
Check that the handle returns on its own and that the flapper is not warped, cracked, stiff, or covered with heavy buildup.
If it works: You can see the chain length or chain path causing a weak flush, a stuck handle, or a running toilet.
If it doesn’t: If the chain looks fine, check the flapper seal, water level, and fill valve instead. The chain may not be the root cause.
Stop if:
The flush lever is broken or loose at the tank wall.
The flapper is damaged enough that it cannot seal even with the chain disconnected.
You see cracks in the tank or active leaking outside the toilet.
Step 2: Set up the tank so you can work cleanly
Check the shutoff valve first. Turn it clockwise only if you want a quieter tank while you work; leave it alone if it is stiff or crusted with mineral buildup.
Flush once to lower the tank water, then press and hold the handle for a few seconds so the flapper stays open while the tank drains.
Look for water or a leak at the supply connection, tank bolts, and shutoff before you put your hands in the tank.
Wipe water from the tank rim and the top of the flush lever arm so your hand and pliers do not slip.
Use the flashlight to compare the lever holes, the chain clip, the flapper connection, the slack gap, and any extra chain hanging loose.
Test the handle once with the tank partly drained and listen for the flapper dropping flat on the flush valve seat.
If it works: The tank is open, stable, and easy to see, with the chain clip and flapper connection within reach.
If it doesn’t: If the shutoff will not close but the toilet is not overflowing, leave the valve alone and adjust the chain with the tank full. Keep the porcelain lid flat on the towel, move the clip one hole at a time, and stop if water starts leaking at the supply or tank.
Stop if:
The shutoff valve will not turn with light hand pressure.
Water is leaking from the supply line, tank bolts, or outside of the tank.
The tank lid or tank rim is cracked or chipped enough to leave sharp porcelain edges.
Step 3: Reconnect the chain at a better length
Check that the chain lifts a hinged rubber flapper before you unhook anything. If the tank uses a canister-style flush valve, tower seal, or dual-flush button, stop here and use its model-specific setup.
For a conventional flapper, unhook the chain clip from the flush lever arm while holding the chain so it does not fall into the tank hardware. Let the flapper sit flat on the flush valve seat before choosing a new chain hole.
On a conventional flapper, reconnect the clip in a lever slot that lets the chain hang nearly straight while the flapper sits flat on the flush valve seat. Leave about one or two loose links at rest. Check the rubber edge; if the loop touches it, the chain is long enough to get caught.
Press the handle slightly and check that the first movement starts lifting the flapper instead of only taking up a long loop of slack.
Move the clip one hole at a time. Shorten the chain if the handle travels too far before the flapper lifts; lengthen it if the flapper is pulled even a little while closed.
Compare the chain path to the overflow tube and refill tube so the links do not rub either one during a flush.
Test the handle after each slot change, then secure or remove excess chain above the clip so it cannot drop under the flapper.
If it works: The flapper sits flat with slight chain slack, and the handle begins lifting it without a long dead pull.
If it doesn’t: If the best hole still leaves the chain far too loose or too tight, the chain may be the wrong length for the lever and flapper setup.
Stop if:
The chain is rusted through, kinked solid, or missing enough links that it cannot hold a steady setting.
The flapper pull tab tears, cracks, or will not hold the chain hook.
The flush lever arm is bent so far that the chain cannot hang close to straight.
Step 4: Fine-tune the handle and flapper movement
Move the handle slowly by hand and watch the chain lift the flapper straight up instead of dragging it sideways.
Flush once and check that the flapper opens far enough for a full flush before floating back down.
Let the handle go. The handle should return by itself, the chain should relax, and the flapper should land squarely on the flush valve seat.
If the toilet needs the handle held down, shorten the chain one hole and test again.
If the toilet runs after the flapper closes, listen at the bowl, lengthen the chain one hole, and make sure no extra links are caught under the rubber edge.
Compare the chain path with the refill tube, overflow tube, tank wall, and lever slot during the whole handle swing.
Recheck the slack gap after the tank fills because the water can float the flapper differently than it did in a drained tank.
If it doesn’t: If the handle sticks or the flapper twists even with the chain adjusted, inspect the flush lever and flapper alignment for wear or damage.
Stop if:
The handle binds against the tank opening or will not return without help.
The flapper is swollen, curled, or too stiff to drop flat after the chain is freed.
The overflow tube or flush valve seat is cracked, loose, or damaged.
Step 5: Turn the water back on and test several flushes
Turn the water supply back on if you shut it off.
Let the tank fill completely.
Flush the toilet at least three times, including one normal flush and one longer handle press, and watch the chain each time.
Listen after each refill to make sure the water stops and the toilet does not keep running.
If it works: The toilet flushes normally, the flapper closes fully, and the fill cycle stops without ghost running.
If it doesn’t: If the toilet still runs or gives a weak flush, make one small chain adjustment and test again. If that does not fix it, the flapper or another tank part is likely the real issue.
Stop if:
Water starts leaking from the tank, supply connection, or around the base during testing.
The toilet will not stop running even when the chain is fully free and not touching the flapper.
Verify the repair
The chain has slight slack when the flapper is closed.
The chain does not slip under the flapper or wrap around the flush lever.
The toilet flushes fully without needing to hold the handle down.
The tank refills and then stops running completely.
FAQ
How much slack should a toilet chain have?
Just a little. The chain should not be tight when the flapper is closed, but it also should not hang so low that it can get trapped under the flapper.
Can a toilet chain be too tight?
Yes. A tight chain can hold the flapper slightly open, which causes constant or intermittent running, or it can keep the flapper from seating properly after a flush.
Can a toilet chain be too loose?
Yes. Too much slack can keep the flapper from lifting enough for a full flush, or the extra chain can fall under the flapper and prevent a seal.
Do I need to turn off the water to adjust the chain?
Not always. Many people adjust it with the water on. Turning the water off and flushing once just makes the tank easier to work in and reduces splashing.
Should I replace the chain or the flapper if adjustment does not help?
If the chain is rusty, kinked, or broken, replace it. If the flapper is warped, stiff, cracked, or no longer seals well, replace the flapper too. A worn flapper is often the real cause of running.
Sources and reference notes
Repair Riot used related toilet-tank diagnostics to keep this page focused on chain movement first, then flapper seal, handle travel, and stop conditions when the symptom points beyond adjustment.
The Current: Winter 2022 — Flip Your Flapper for Fix a Leak Week - Within a conventional flapper-replacement procedure, supports turning off the toilet water, removing the tank lid, flushing to empty the tank, reconnecting the chain with enough slack to preserve the seal while allowing the flapper to rise, restoring water, and test-flushing.
Toilet Occasionally Leaking or Running - For one- and two-piece toilets, supports roughly one to two links of chain slack, removing excess chain that could catch on the trip-lever arm, and checking for lever binding, overflow, or a worn flapper or canister seal when intermittent running continues.